Creating Warranty Requests

Warranty requests are created after reviewing and triaging incoming requests. Based on the outcome, emails may be linked to an existing request or used to create a new one.
This section explains how to link emails to existing requests and how to create new warranty requests in BuildBase.
From the Email Journal
Requests received by email can be managed directly after review and triage.
Link to an Existing Warranty Request
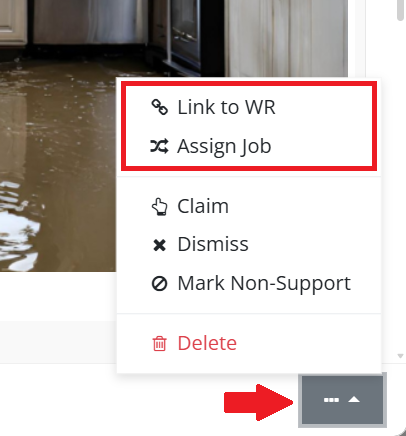
If the email relates to an existing issue, it can be linked to that request.
- From the email preview, select Link to Existing Warranty Request using the Action menu.
- Search by warranty request number or subject.
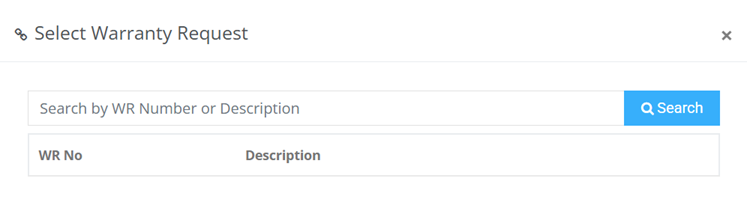
- Select the appropriate warranty request from the search results list.

- After selection you will get a message in the top right hand corner of the browser indicating that the link is successful. Once linked, the email becomes part of the request history and can be used for reference and communication tracking.
Create a New Warranty Request
If the email describes a new issue, a new warranty request is created by assigning the email to a Warranty Job.
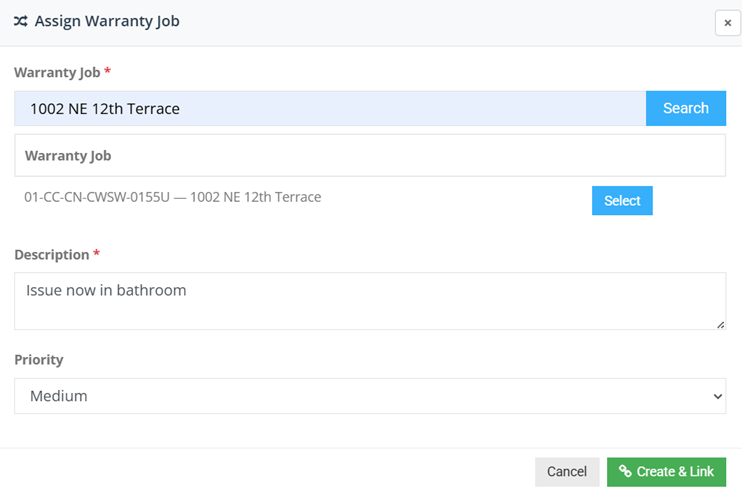
- From the email preview, select Assign Job using the Action menu.

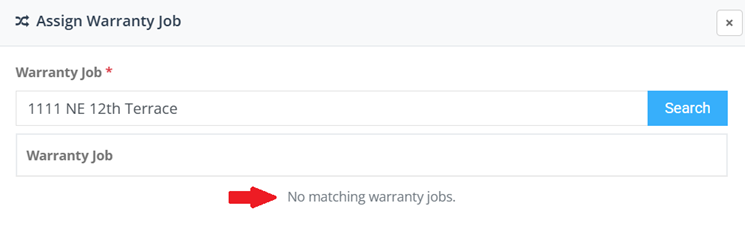
- Search for an existing Warranty Job.
 A Warranty Job groups all warranty requests for a specific property or unit.
 - Select the appropriate Warranty Job.
- If no matching Warranty Job exists, it must be created before the request can be completed. See Finding and Managing Warranty Jobs for instructions on creating a new job.
- Confirm job details.
- Update the issue description if needed and set priority.
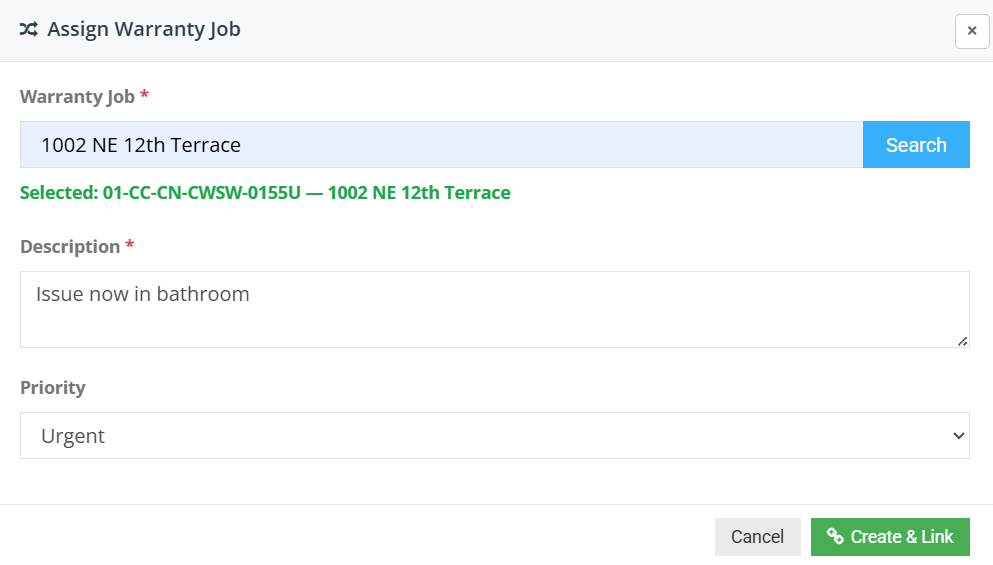
- Select Create & Link to finalize the request. A new Warranty Request is created under the selected Warranty Job and assigned a new Warranty Request Number.
From Other Channels
Requests received outside of email, such as phone calls or in-person reports, must be entered manually.
Create a Warranty Request
- Select the Create Warranty Request from the appropriate user dashboard.

- Search for an existing Warranty Job.

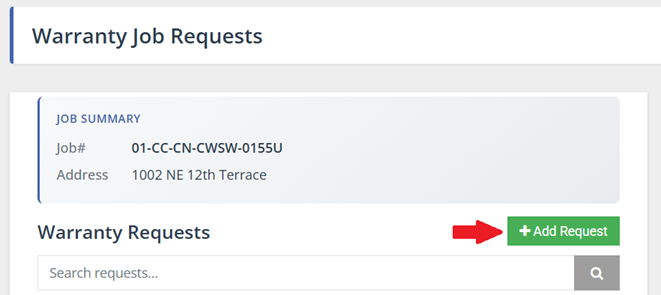
- Locate the appropriate Warranty Job in the results, then select Review Requests from the Actions column.

- If no matching Warranty Job exists, it must be created before the request can be completed. See Finding and Managing Warranty Jobs for instructions on creating a new job.
- In the Warranty Requests section of the Warranty Job page, select Add Request.
- Enter the required request details, including; priority, requested by , request date, and description.
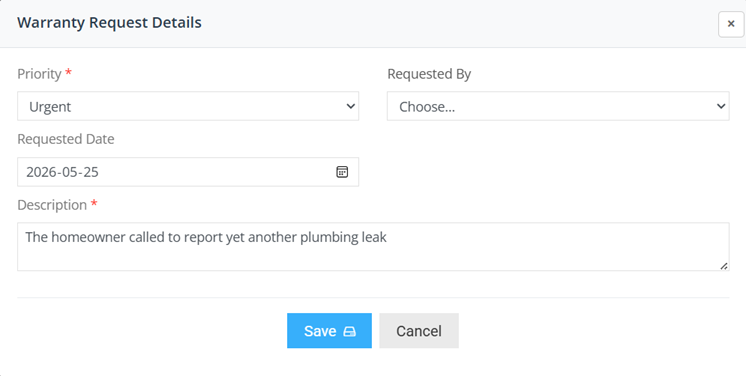
- Select Save to create the request. A Warranty Request Number is automatically assigned when the request is saved.
Field Considerations
When creating a warranty request, ensure that:
- The correct Warranty Job is selected
- The requester information is complete and accurate
- The issue is clearly described
- Relevant context or supporting information is included
- Status and priority are set appropriately
- Responsibility and next steps are clearly assigned