Attributes

Creation of items in Dynamics is simple and while each item must have an item category code, attributes allow us to further categorize our items which will provide even more functionality when it comes to searching for a specific group of items.
We have the ability to assign items to item categories such as:
- Baseplan
- Labor
- Part
However, most of us would like to categorize the items we use to build a home into groups and subgroups. A good example of this would be countertop items. Attributes will allow us to categorize countertop items into groups and subgroups:
Attribute – Countertops
Attribute Values – Granite, Quartz, Silestone
Use of attributes will unlock a new level of power when it comes to working with items.
How to create Attributes
As with any feature, it is best to map out what is needed prior to start. With attributes, we must first fully understand the items we have, or will be creating so that we can successfully create attributes to support the organization we desire. We recommend that you first review your item library and then come up with a list of attributes that you think will best support your items.
Example:
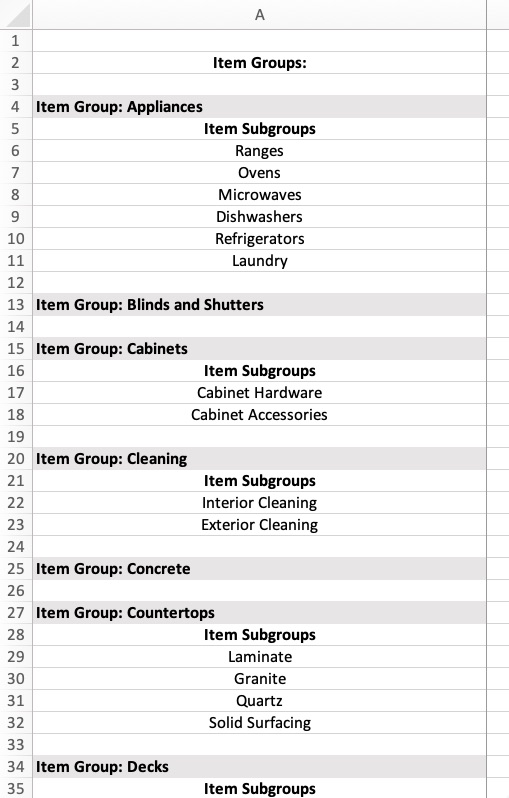
Here we have made a list of “item groups” and “item subgroups” based upon the types of items we use. Keep in mind that we can always add more but it is best if we can design our needs up front and avoid rework.
Once you have a list of all the attributes desired, you are now ready to create them in Dynamics. To get started, first go to the Attributes Menu:
Since there are currently no attributes created, this is what you will see:
Click on the attribute field and you will then see a prompt to add “NEW”:
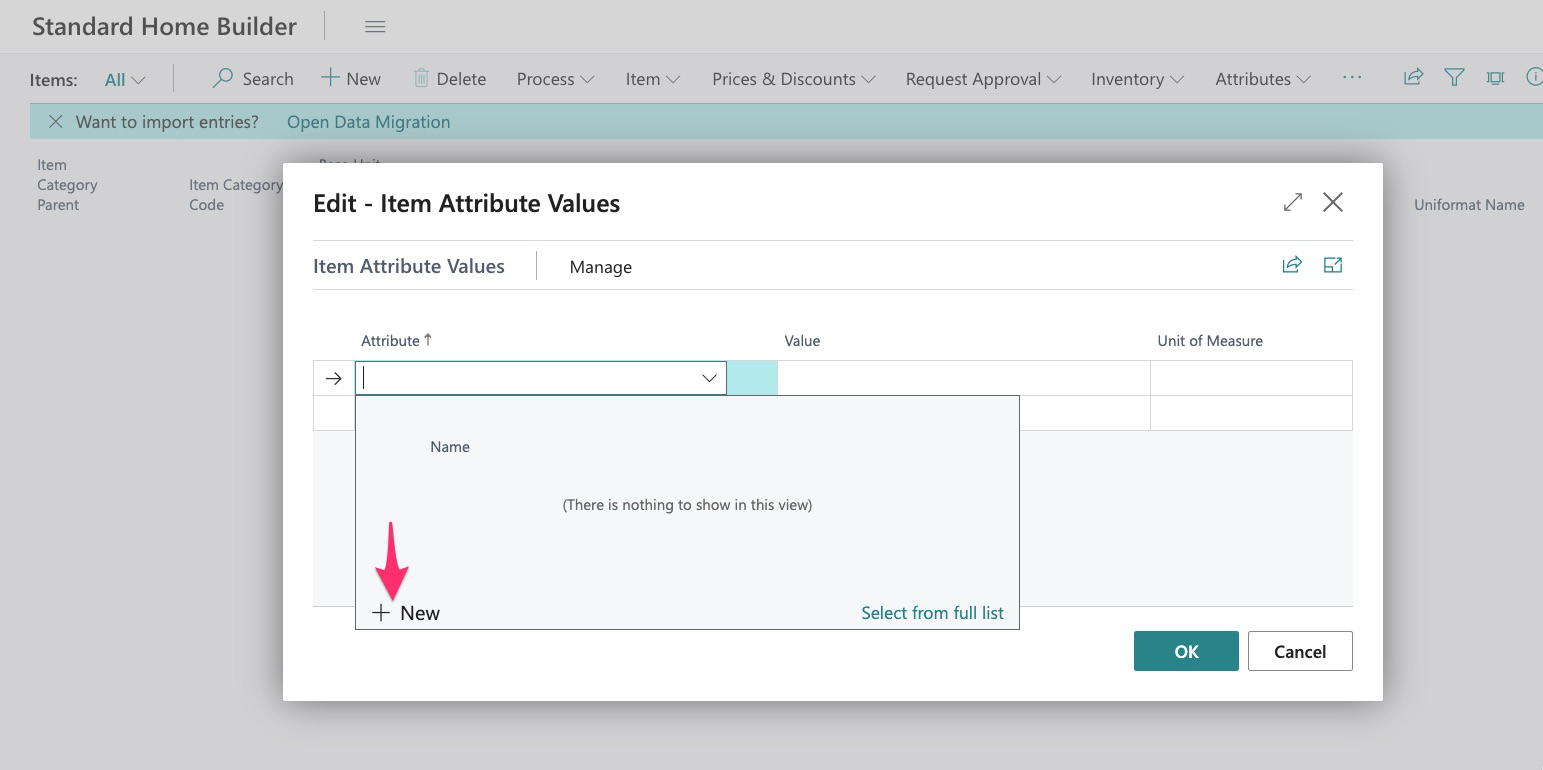
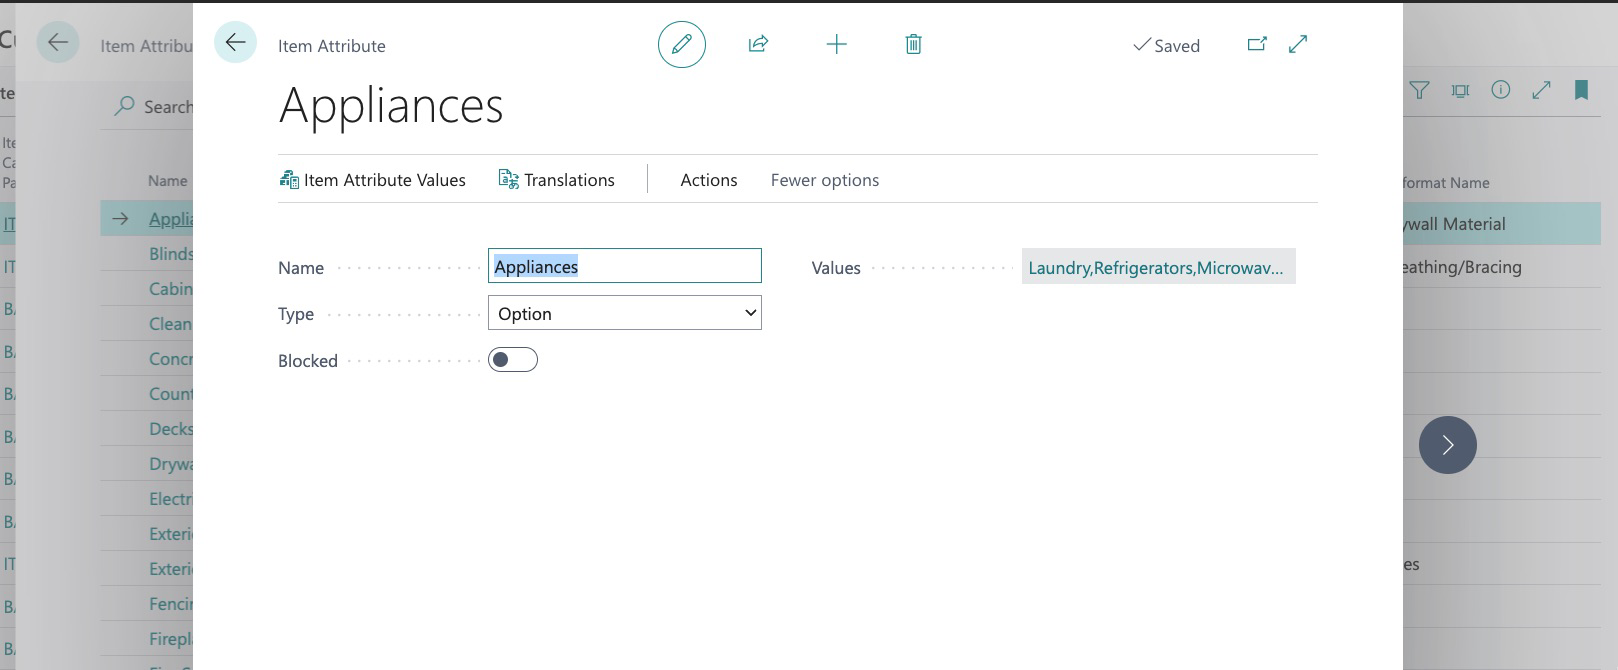
Here we start by giving the attribute a name (Item Group):
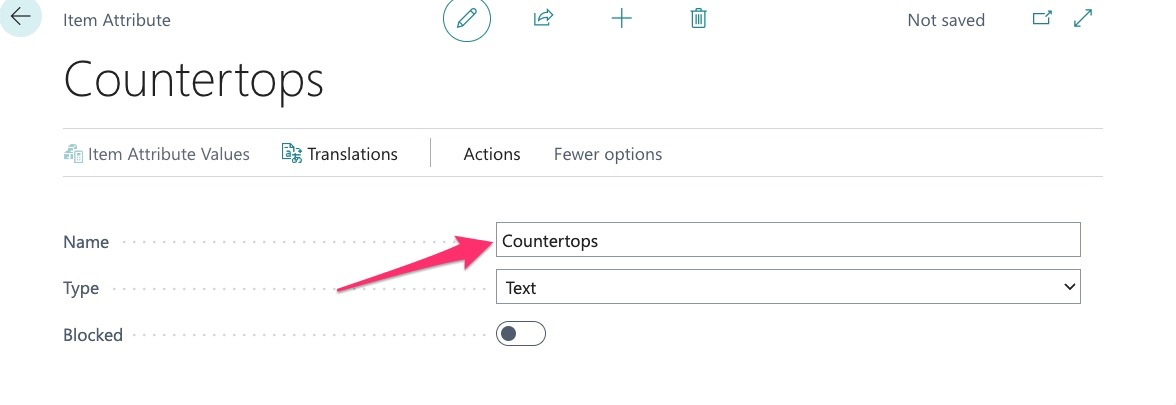
Select the “type”, we ALWAYS use “option” :
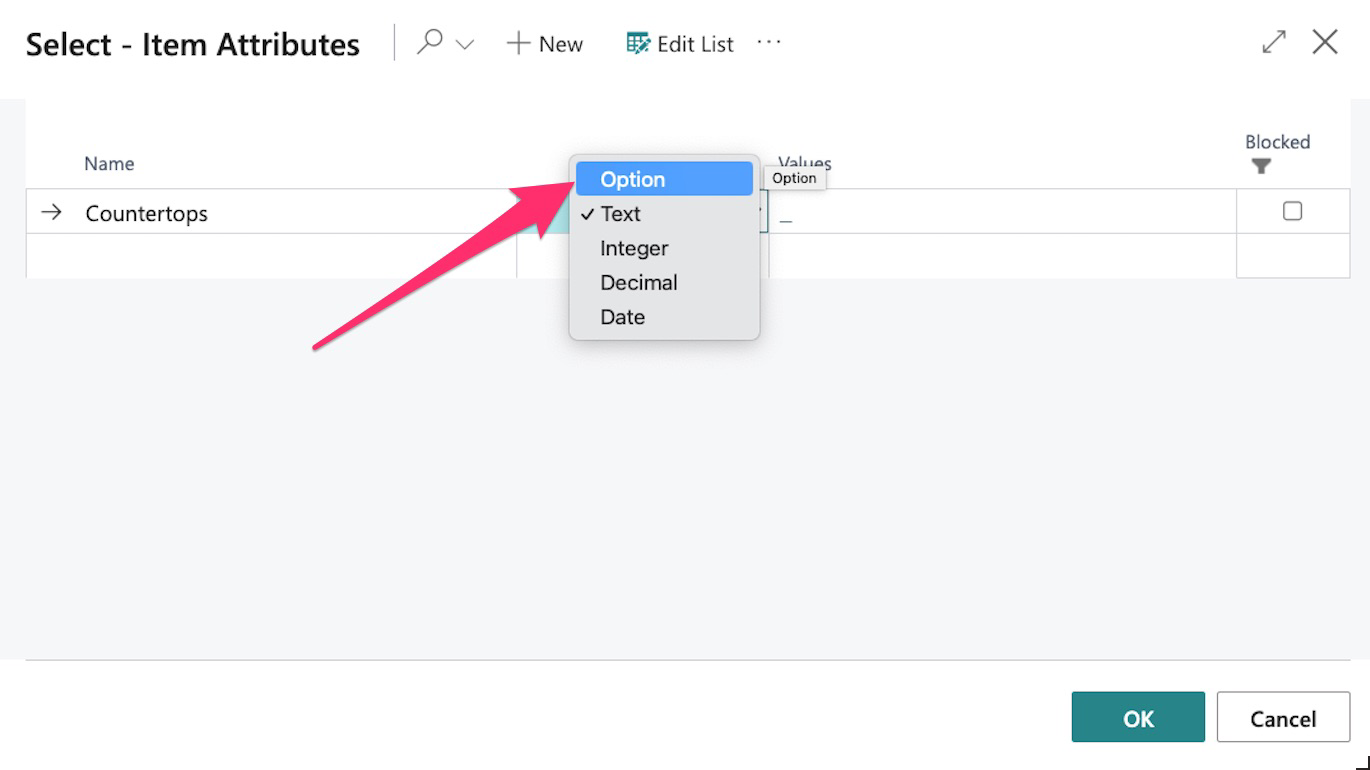
Once “option” is selected, click on the value box:
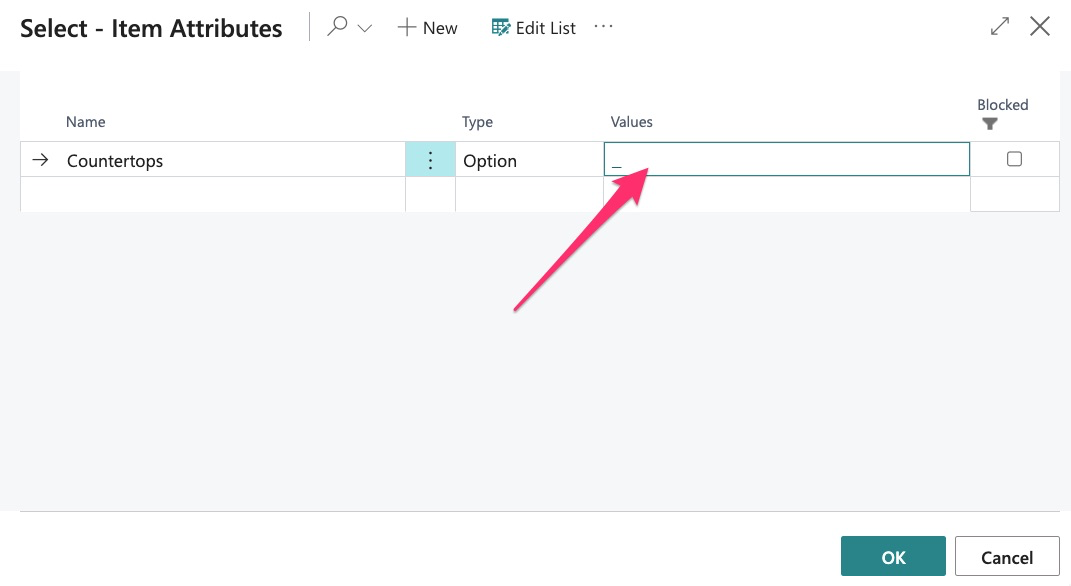
Then click “New” and add your first value:
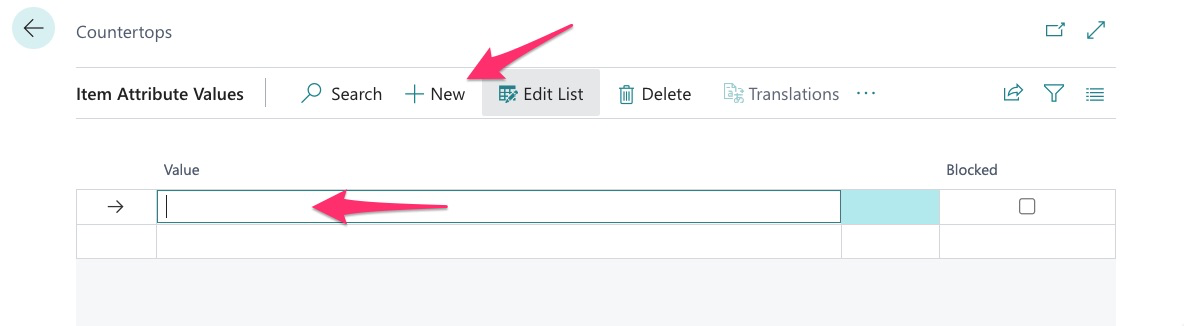
Note – Items will appear by default in the order you enter them so, I recommend that if you have your list:
Granite
Quartz
Silestone
Start entering at the bottom of the list:
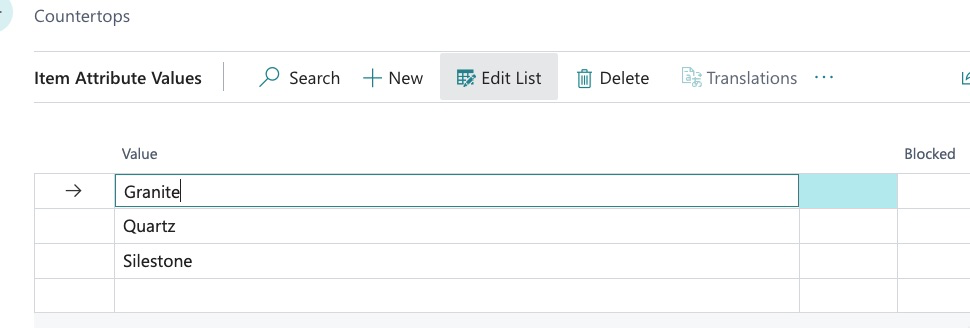
Here I typed in “Silestone”, then clicked “new” and added Quartz, then repeated with granite.
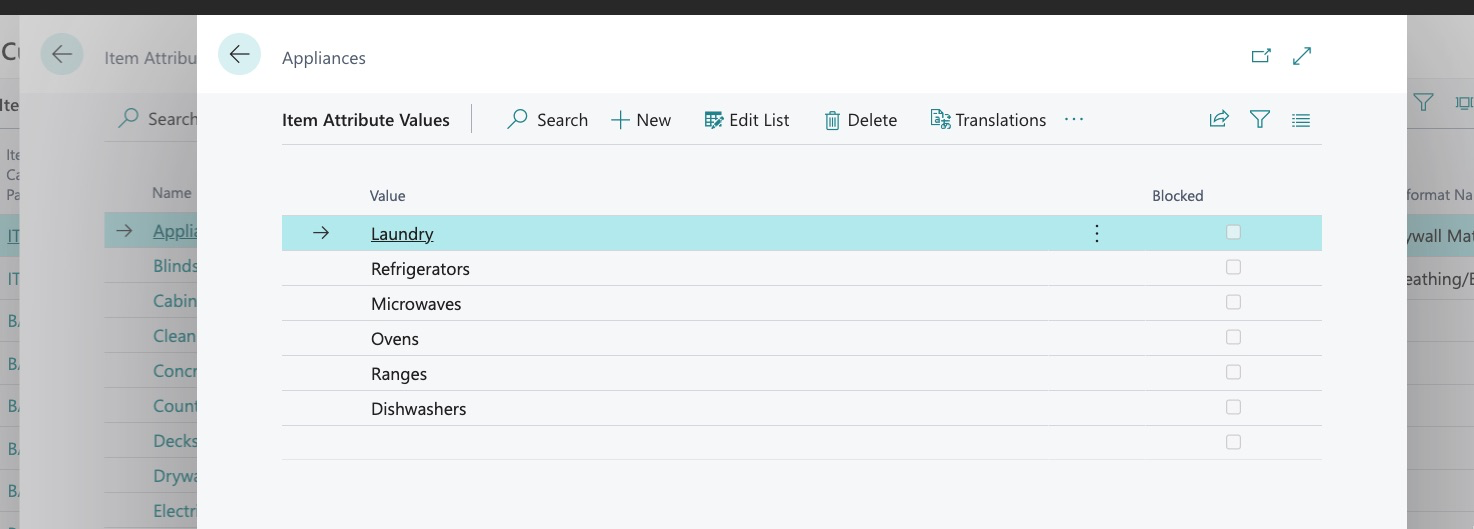
One all values have been entered, simply hit the back arrow and we can now see this attribute and its values have all been created:
Next, we would simply continue creation of all attributes and values.
How to View/Edit/Delete Attributes
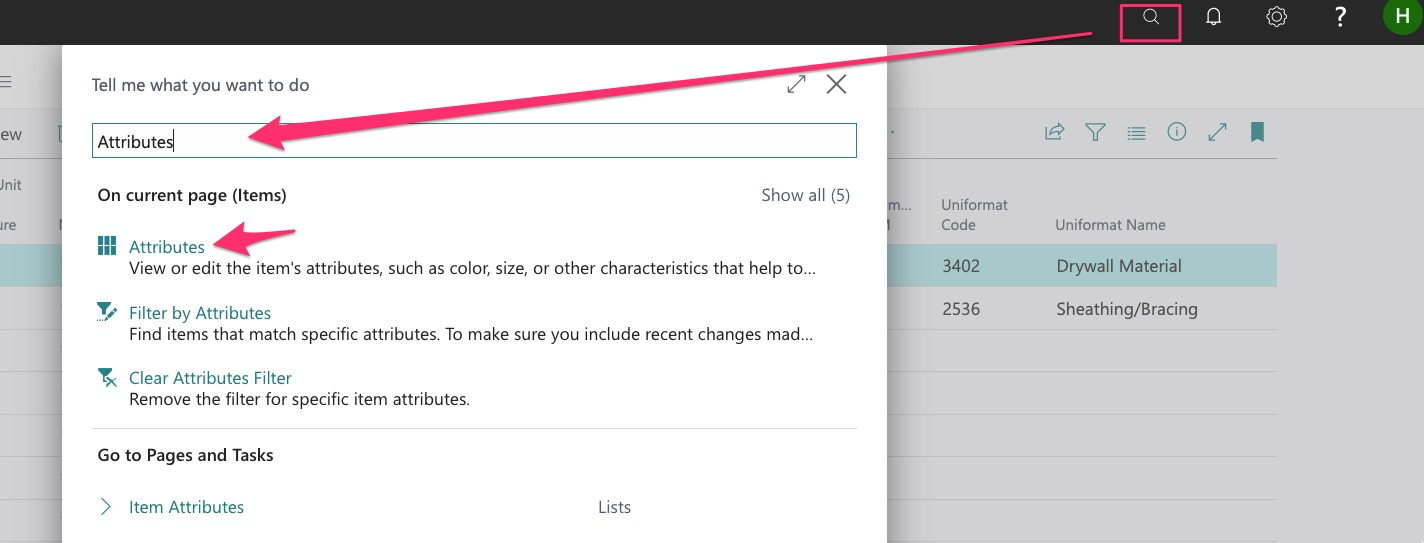
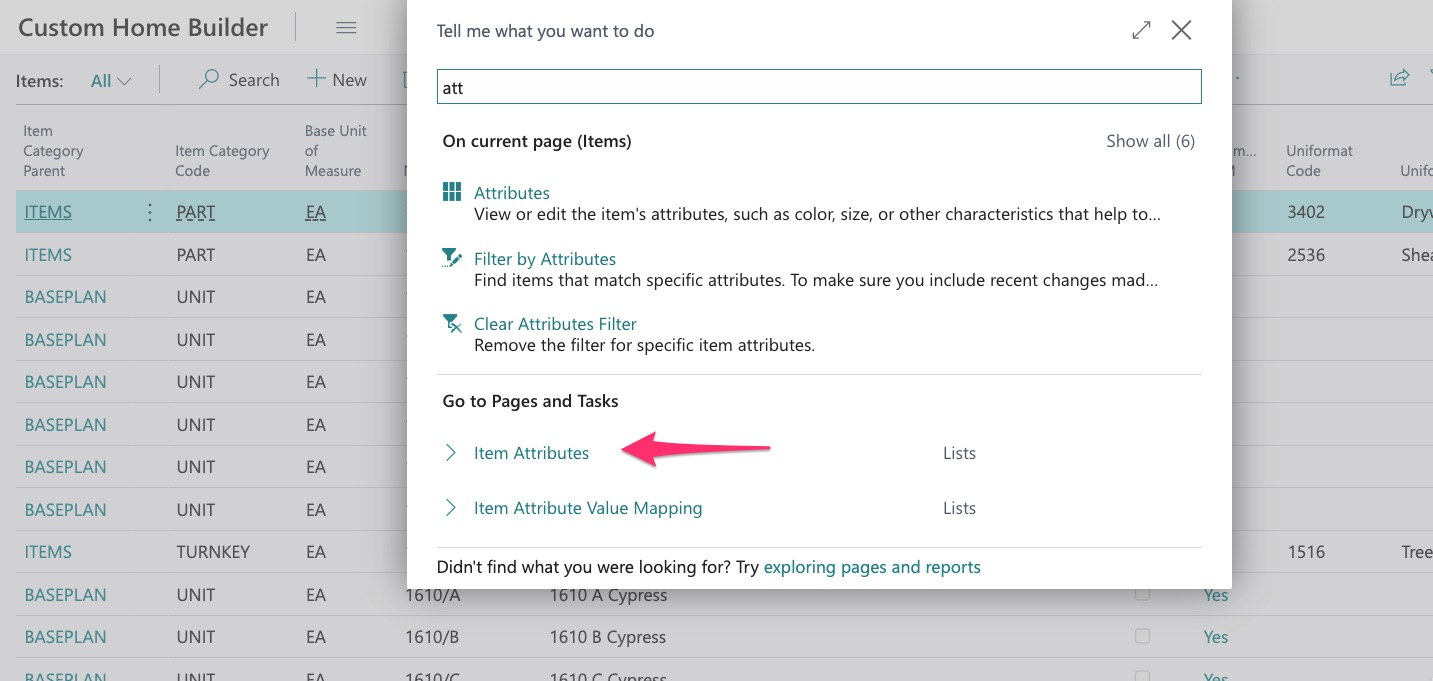
To view the full list of attributes, start by searching here:
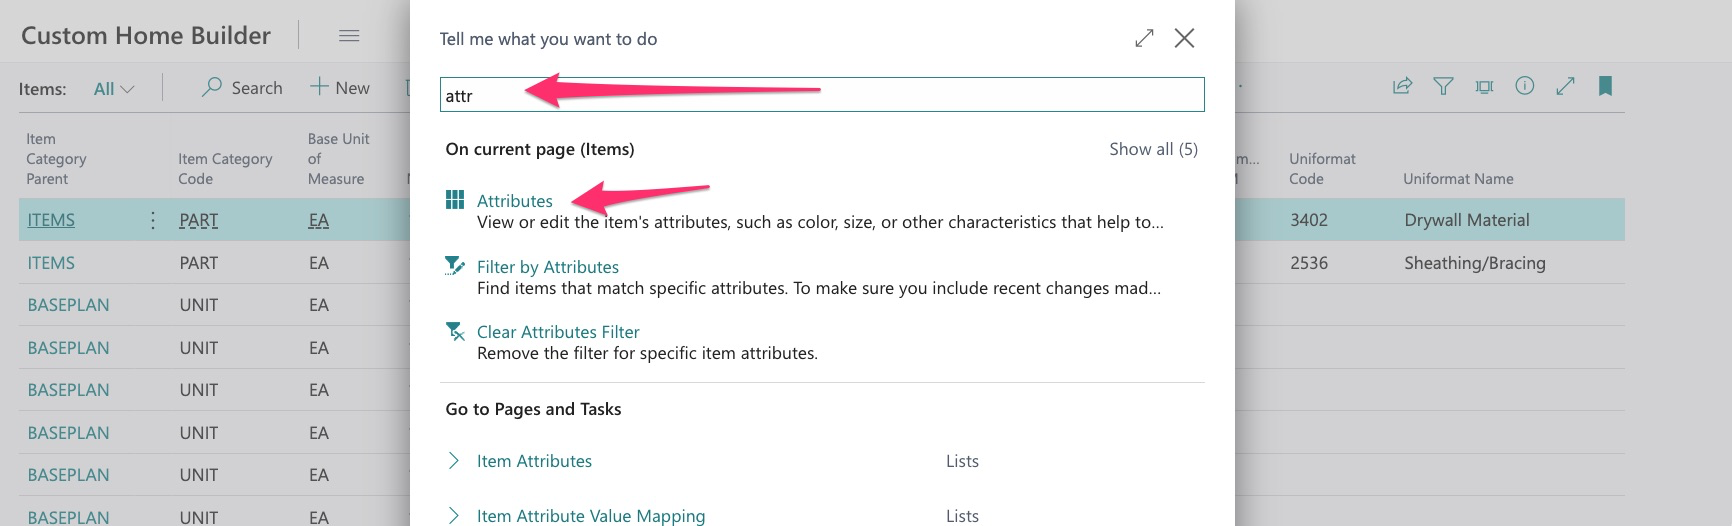
I then click on attributes but you will notice, this is what I see:
Because I am in the Item Library, the system showed me the attribute for this singular item for drywall.
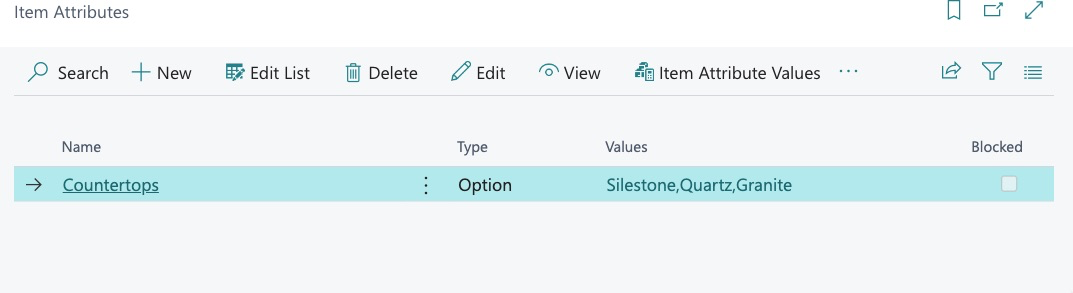
To see the FULL attribute list, we must select this when searching:
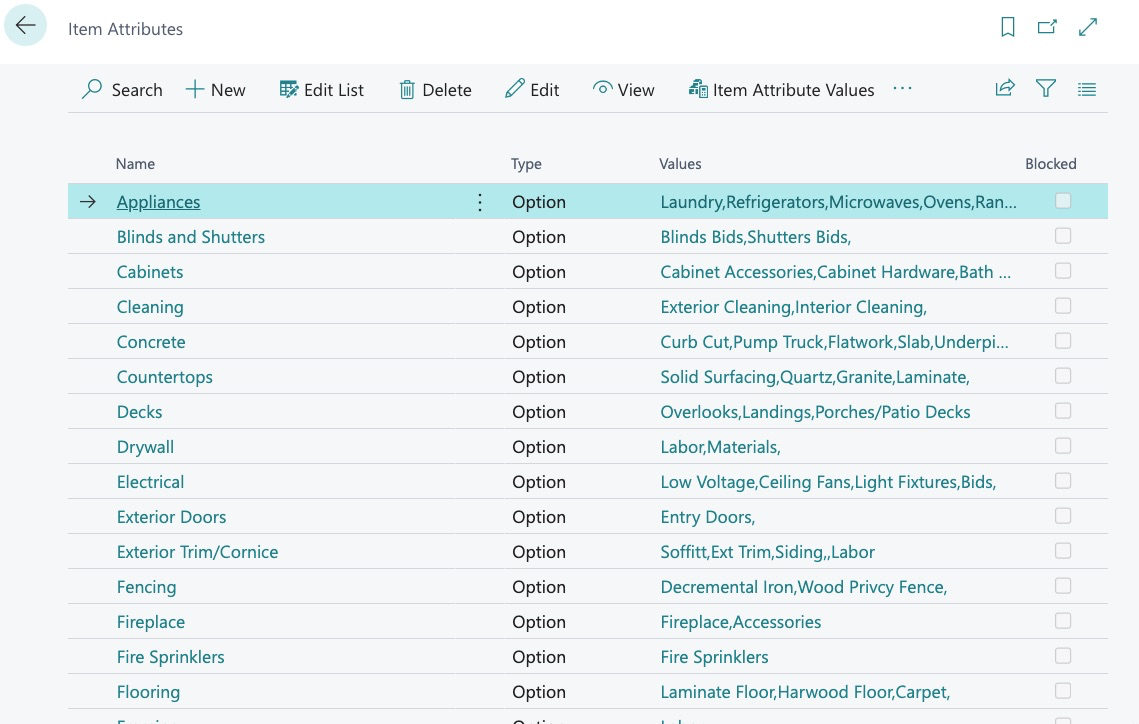
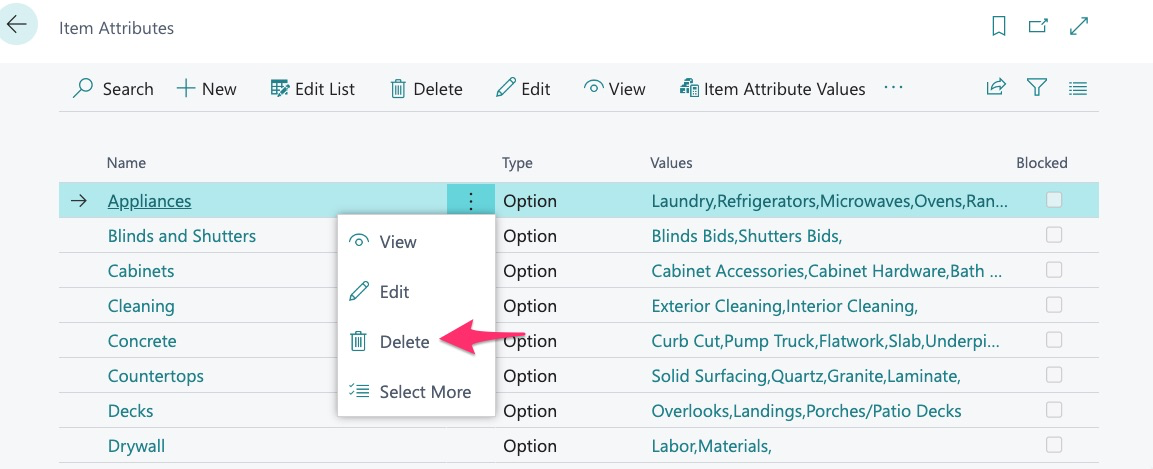
Now we can see our full list of Item Attributes, along with their corresponding values:
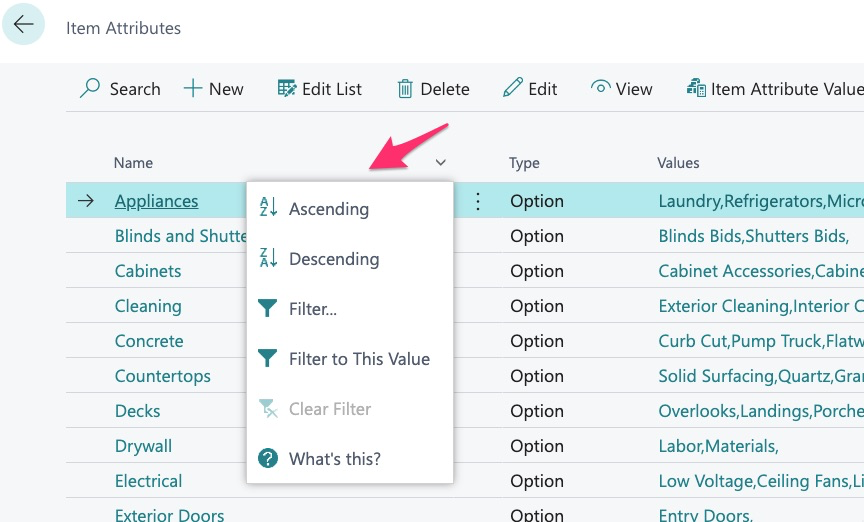
As with most applications in Dynamics, we can change the view here:
To edit an attribute, simply click on the attribute name:
Or list of values:
To edit an attribute or value, click the edit list button at the top of the menu:
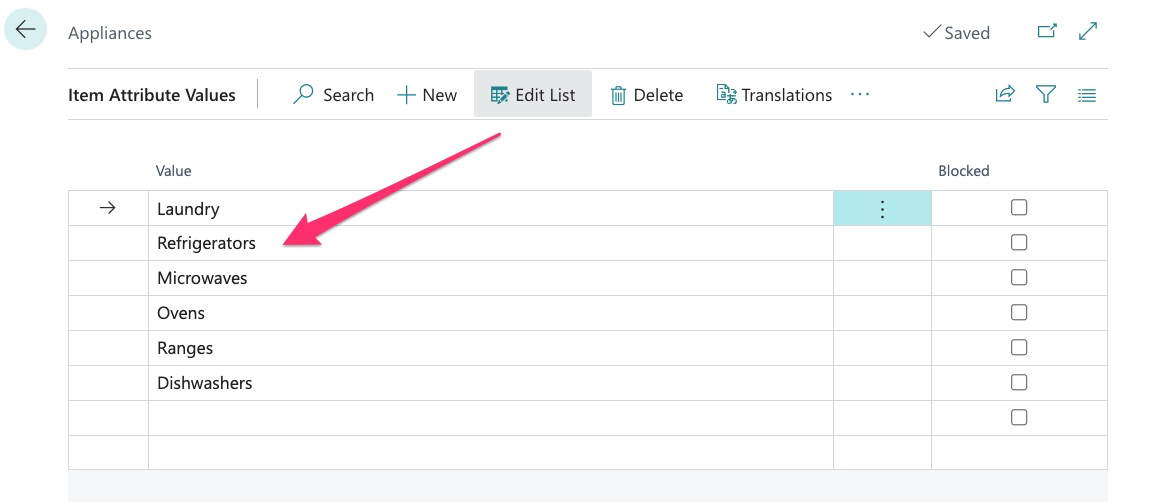
We can then alter the value:
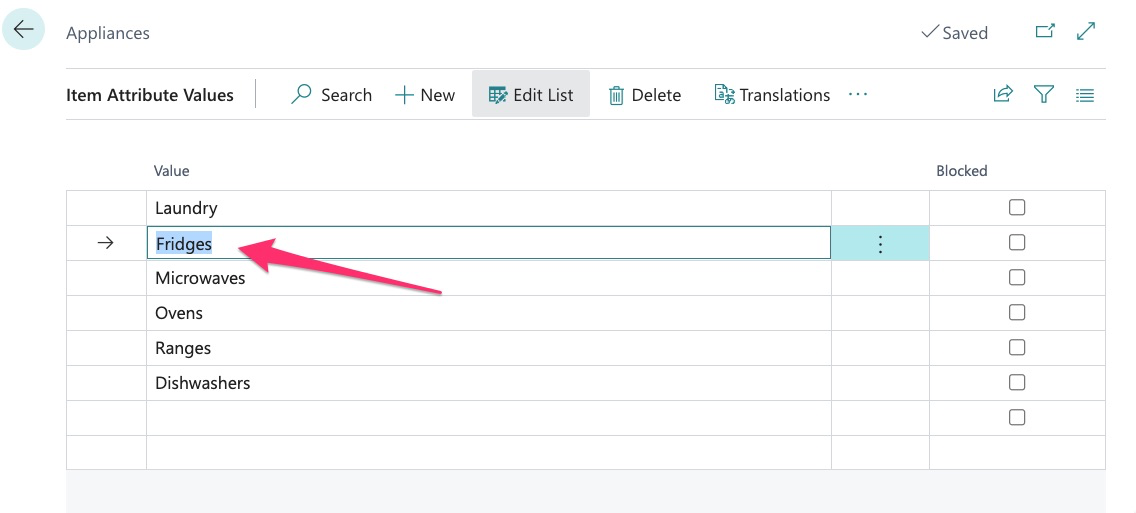
However, we will then receive a prompt from Dynamics:

Because this attribute or value is already in use, we are cautioned against changing the name. This is something to be very careful with. Now in this example, changing from refrigerators to fridges is not that big of a deal but if we were to change the value from refrigerators to granite tops, that would not be a good idea as all the items currently assigned to refrigerators will now be assigned to granite tops. Just use good judgment when modifying any data.
We can also delete values and attributes by using the selection shown here:
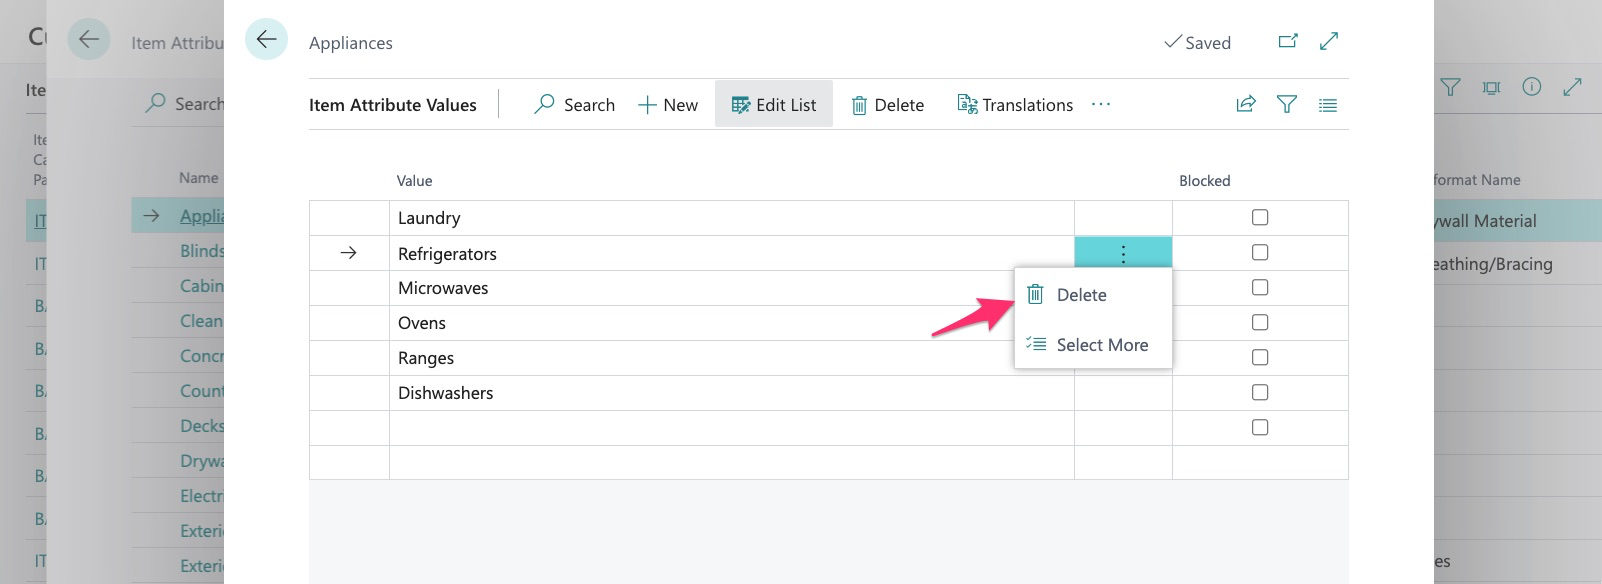
Deleting the attribute and/or values will remove it from all the items to which it is currently assigned.
Again, as with any data, we must always use common sense and determine the impact of modifying or deleting any data/assignments in the system.
Now that we have created and carefully reviewed our attributes, we can now assign them to items.
How to Assign Attributes to Items
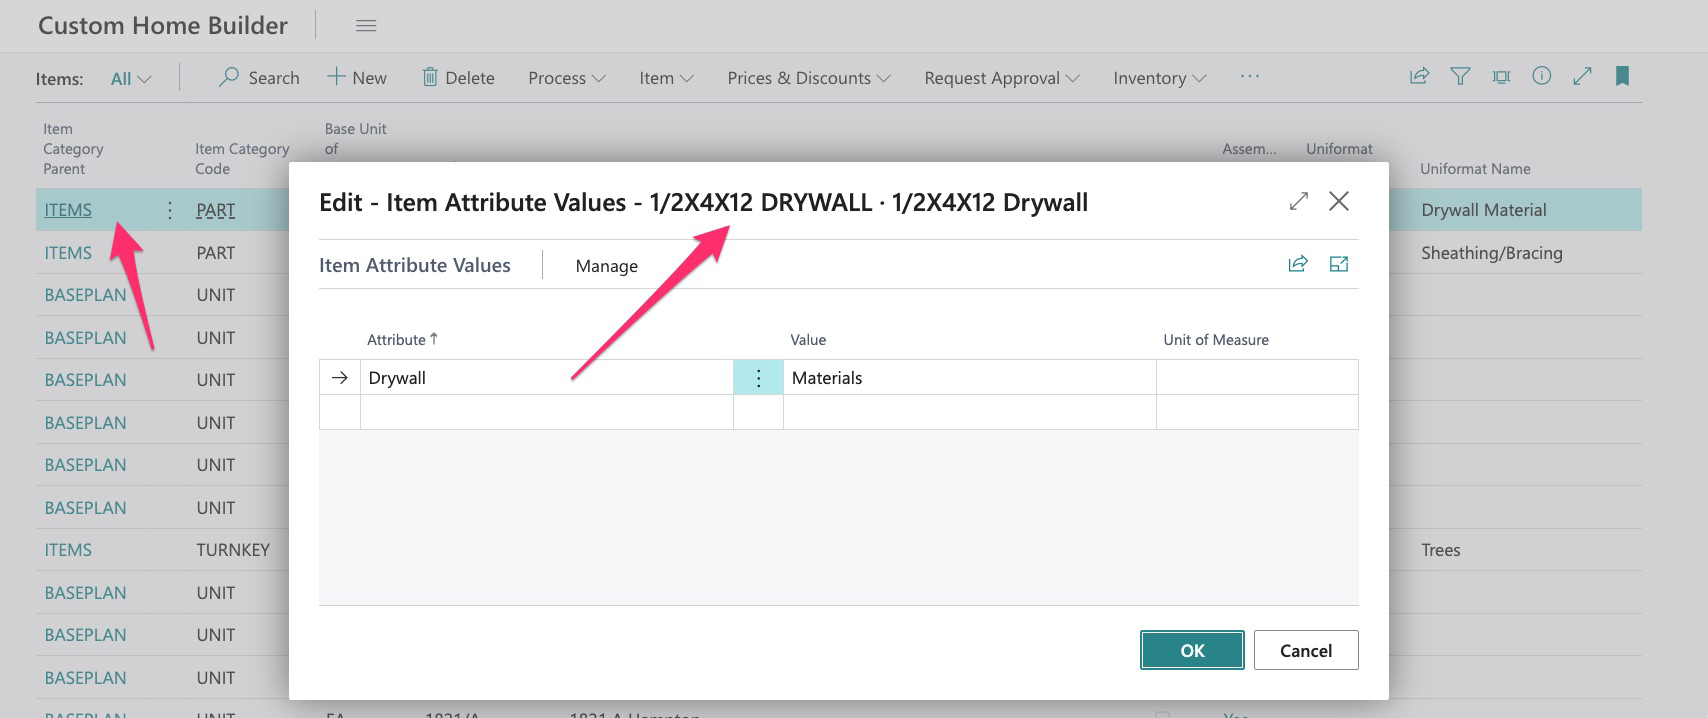
Attributes may be assigned one at a time manually, or in bulk. In this example, I want to assign attributes to this singular item:
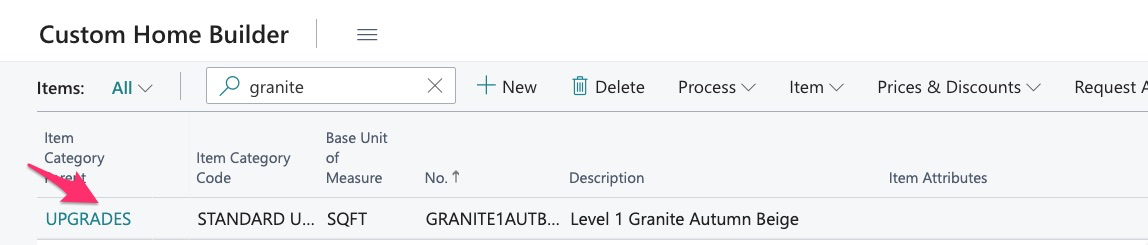
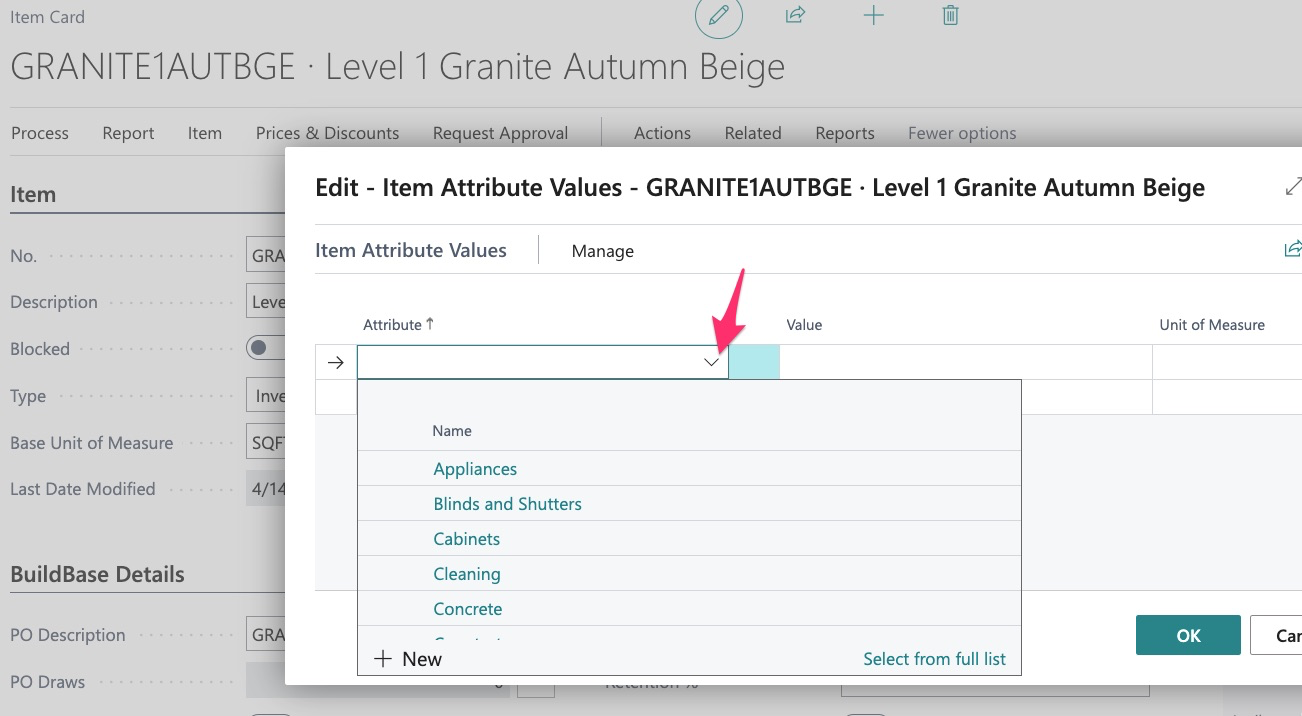
Simply click on the item and then within the item, select:
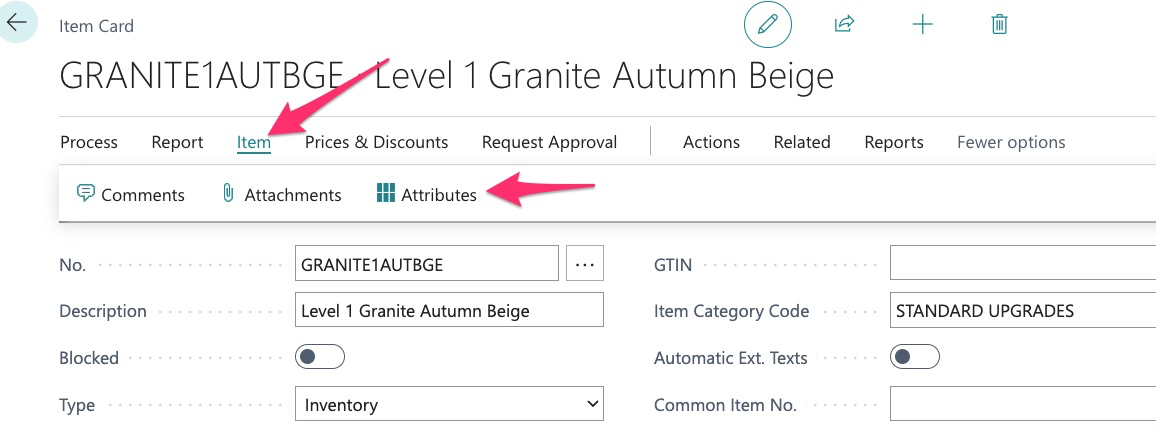
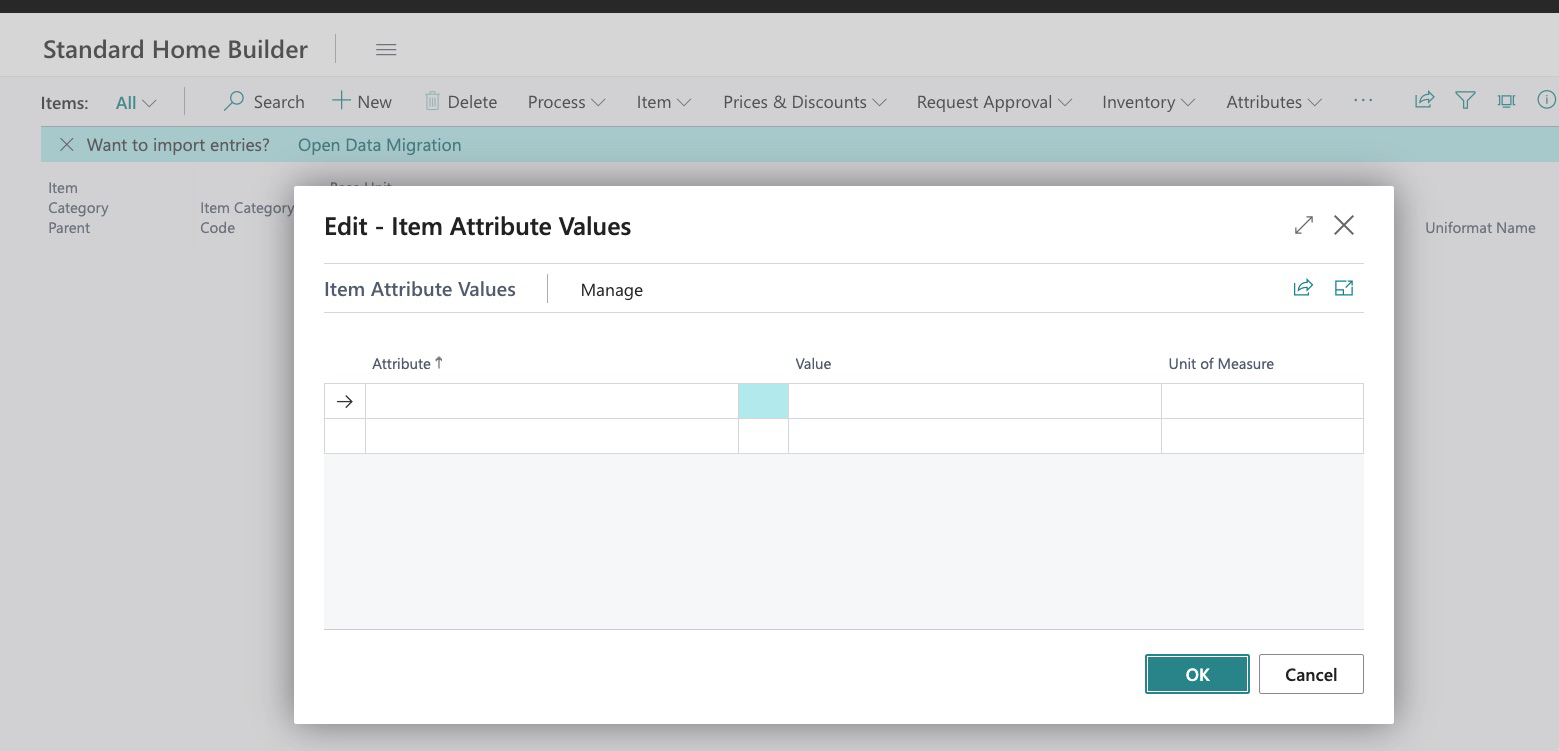
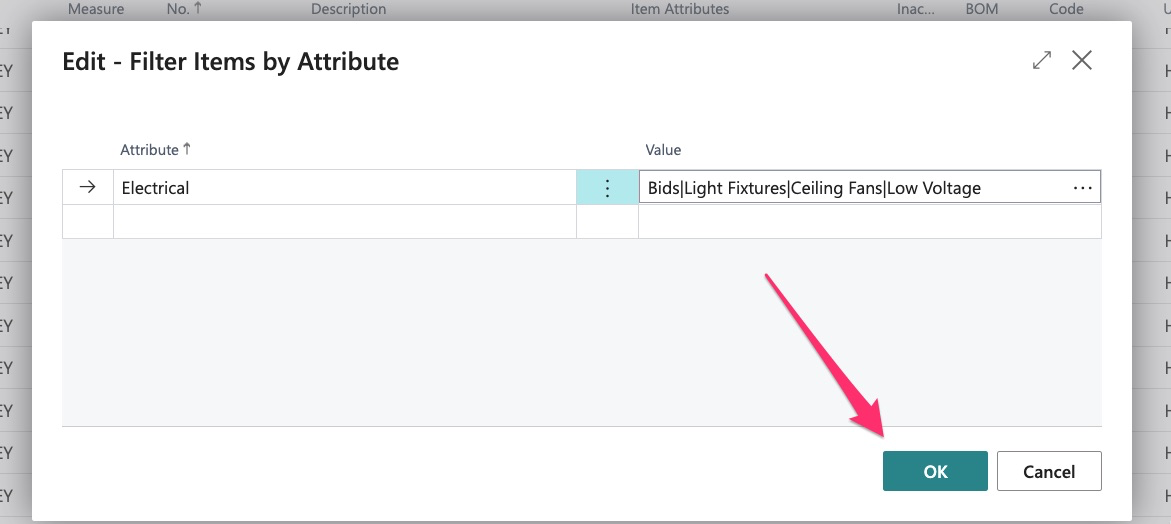
Now we can see the full list in alpha order and select “Countertops”:
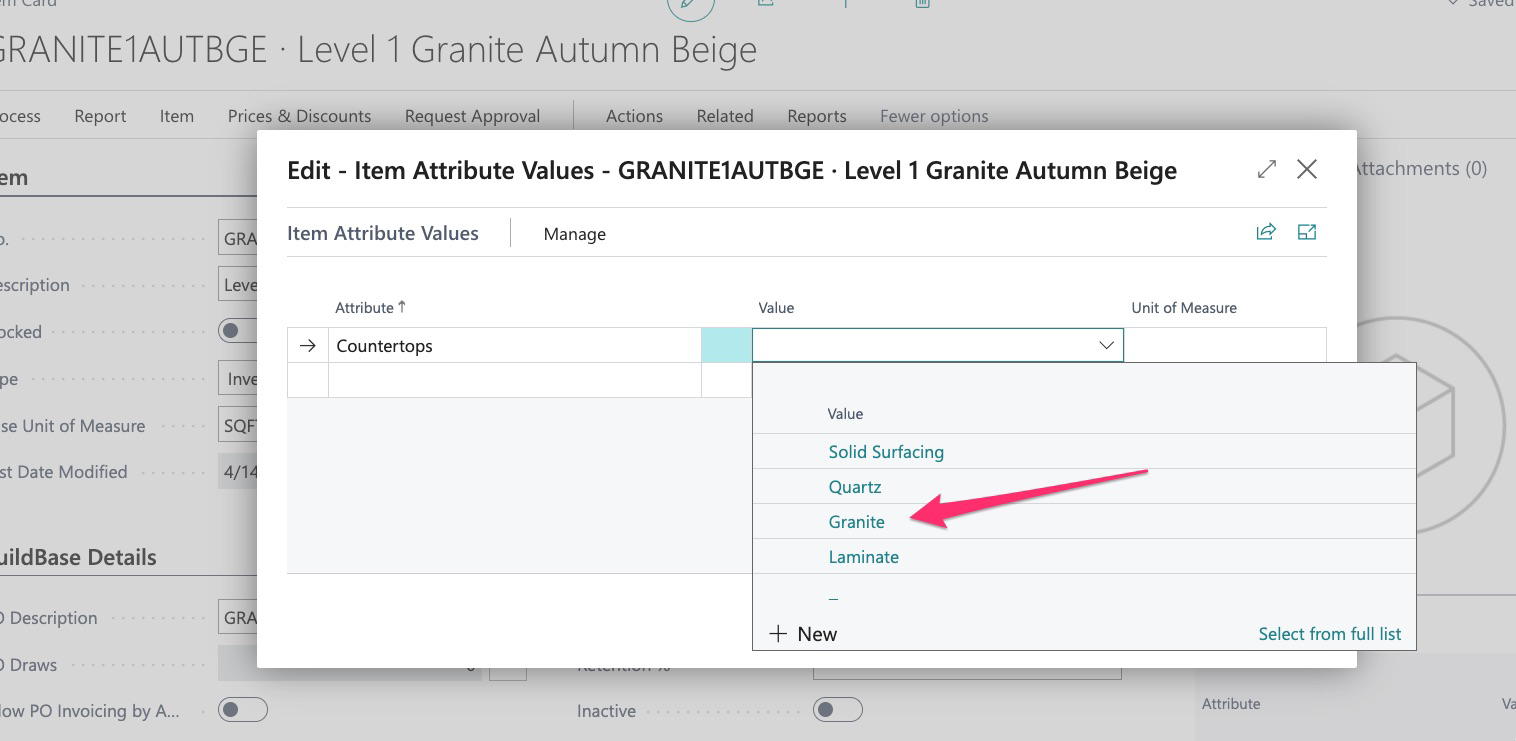
Once the attribute is selected, we then click on the value:
Then click OK:
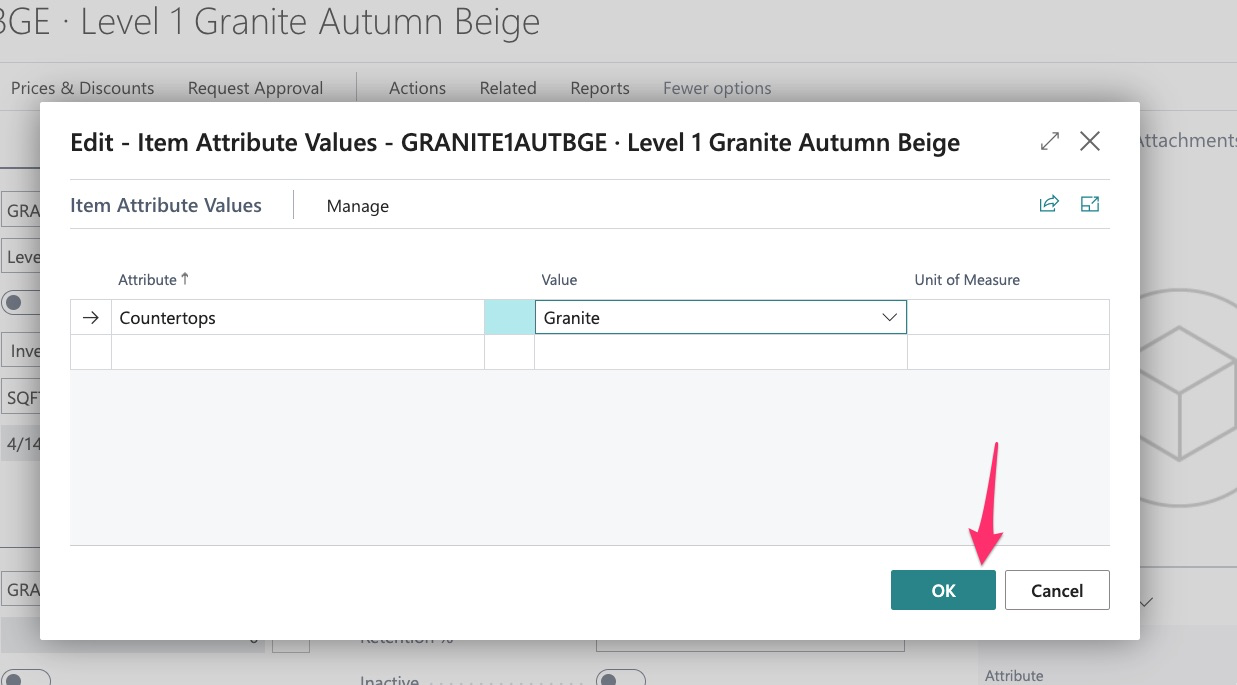
We can now see our attribute and value has been assigned:

Assigning attributes in this singular manner is useful as you review your item library and have a few items that need a quick assignment but, when it comes to assigning attributes across your entire item library, it is recommended that you use one of our bulk tools to make the process quick and easy.
How to Assign Item Attributes in Bulk:
In this example, I have a large number of items that need attributes assigned.
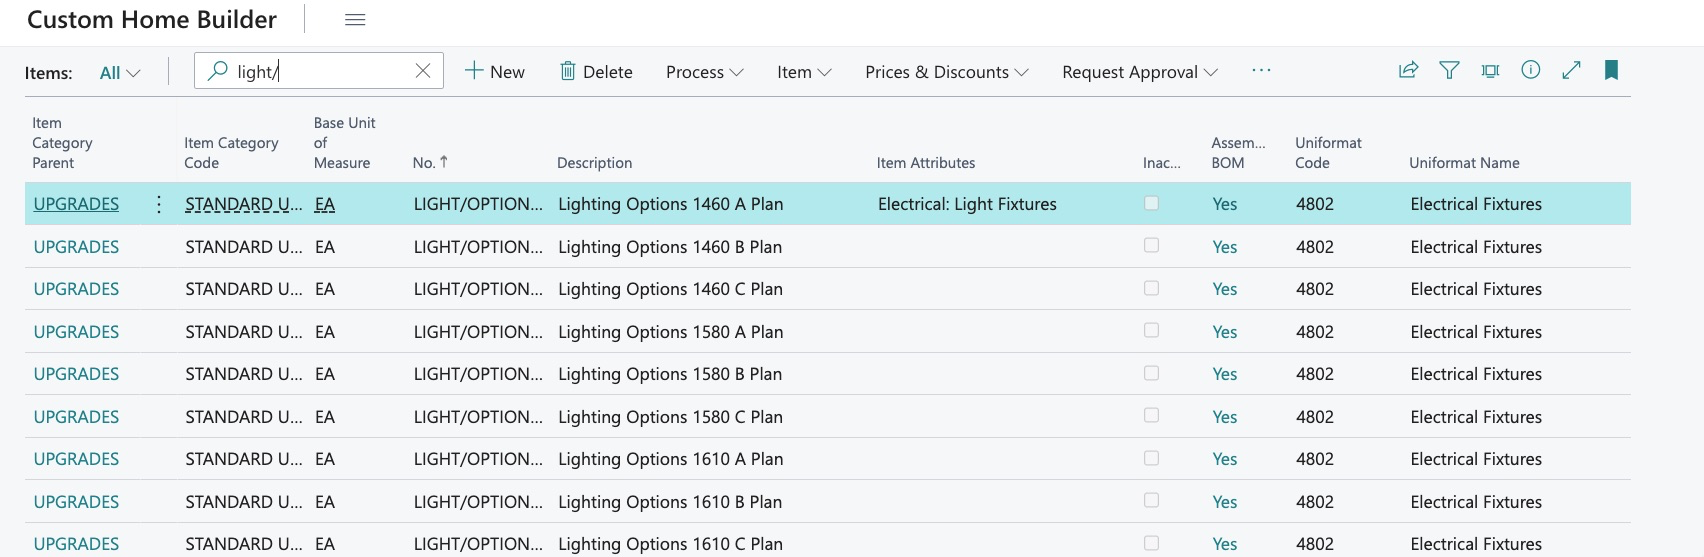
All of these attributes need to be the same (Electrical: Light Fixtures) and I do not want to do this manually.
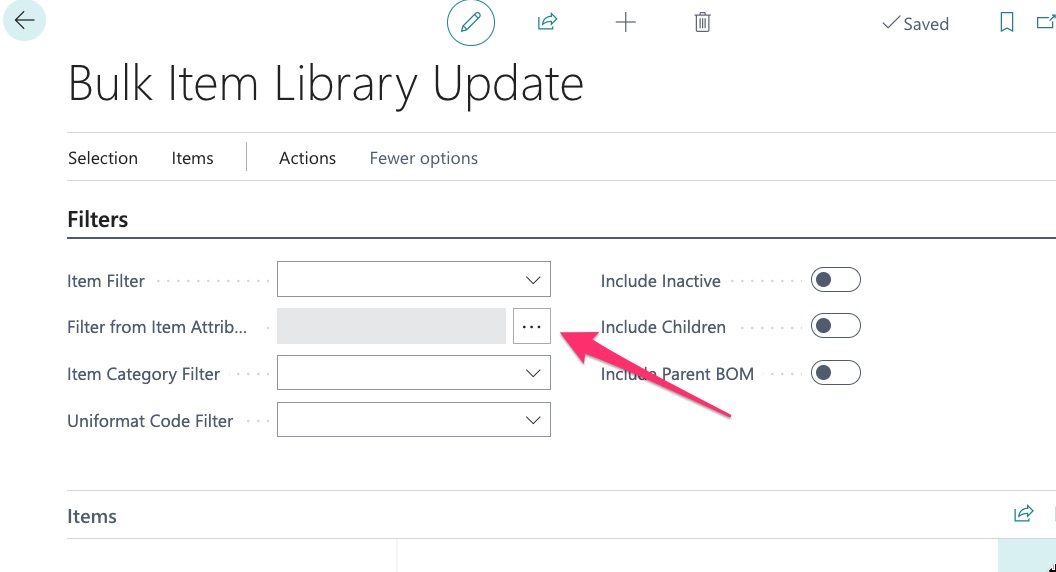
To assign these attributes, we will use “Bulk Item Library Update”.
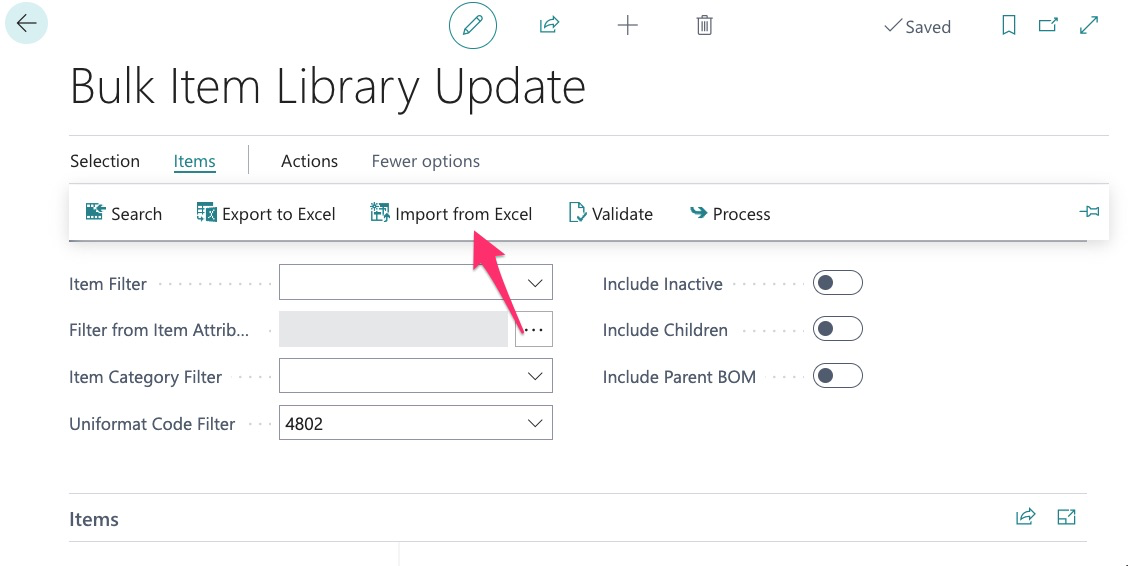
Our first step is to find all the items we want to work with. If we have followed proper item setup, we know that we should have both item category as well as Uniformat/Classification codes assigned. In Bulk Item Library Update, we can use these designations to find the desired items:
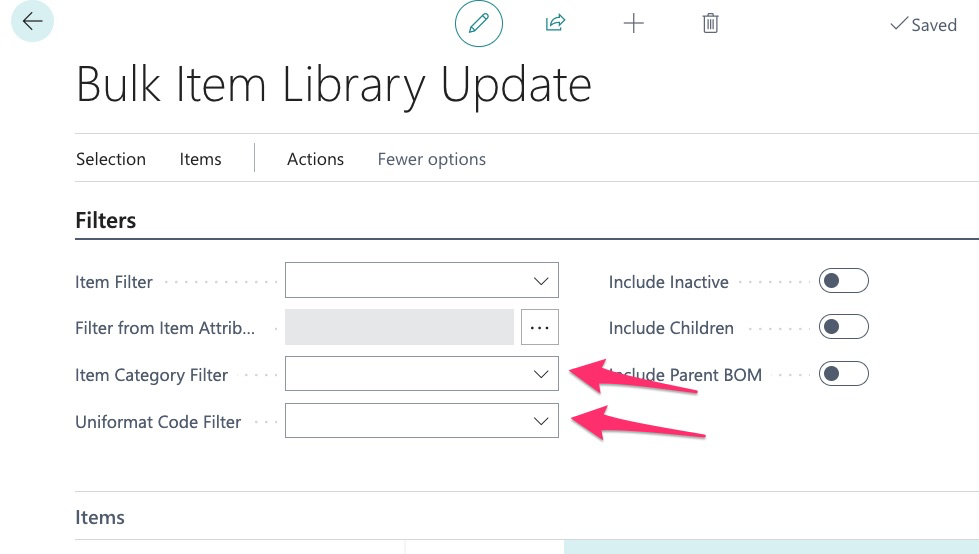
We know the item category code is “Standard Upgrades” and we know that the Uniformat/Classification code is 4802.
In this example we know that we already have a lot of items assigned as standard upgrades, so we will likely get a smaller amount of data if we use the cost type.
Next, we use the dropdown to find the code or type it in, then from the menu, click “search”:
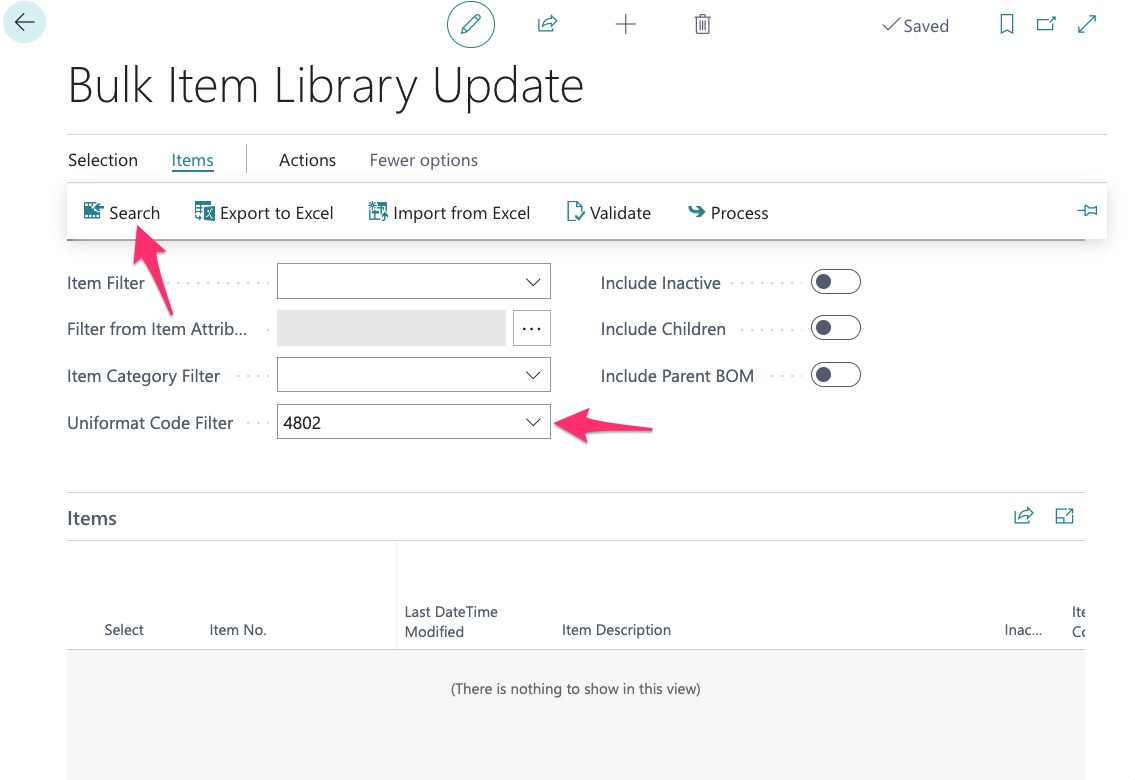
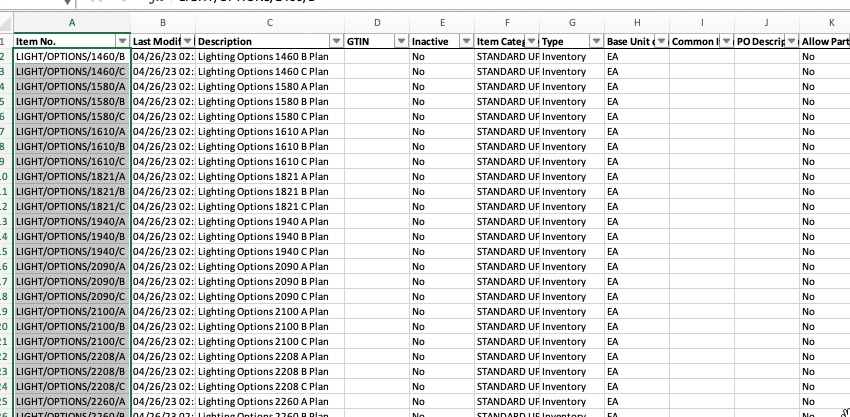
The system then finds all the items with a Uniformat/Classification code of 4802:
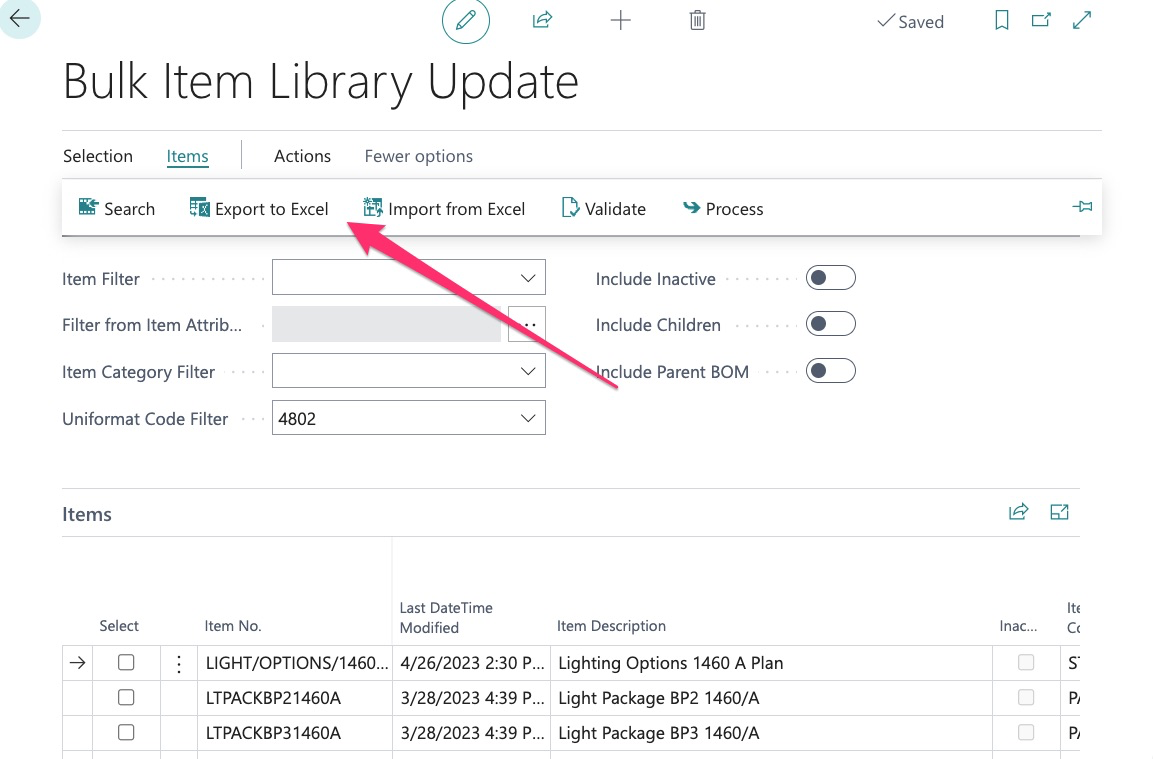
Now we export to Excel.
In this example while working with Bulk Item Library Update, we are going to use the 3rd tab labeled “Attributes”. For more information on the other functions of this tool, see full guide on “Bulk Item Library Update.
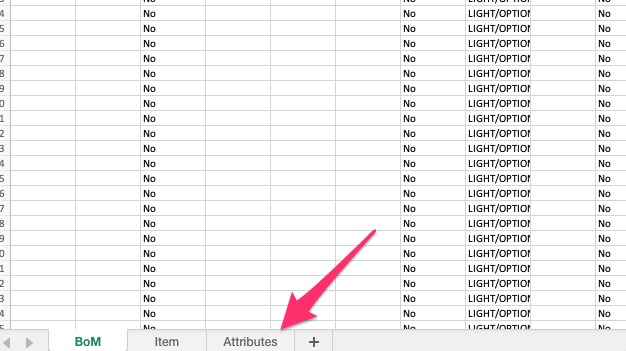
Currently, the attributes tab shows us all the items that already have an attribute assigned:
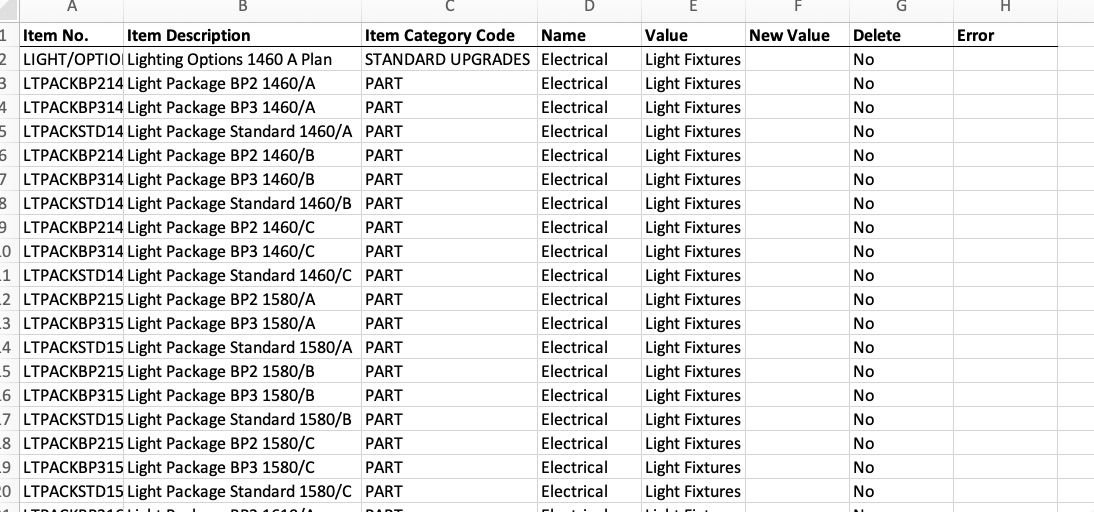
If we want to modify existing VALUES, we can simply type our new value into column “New Value”.
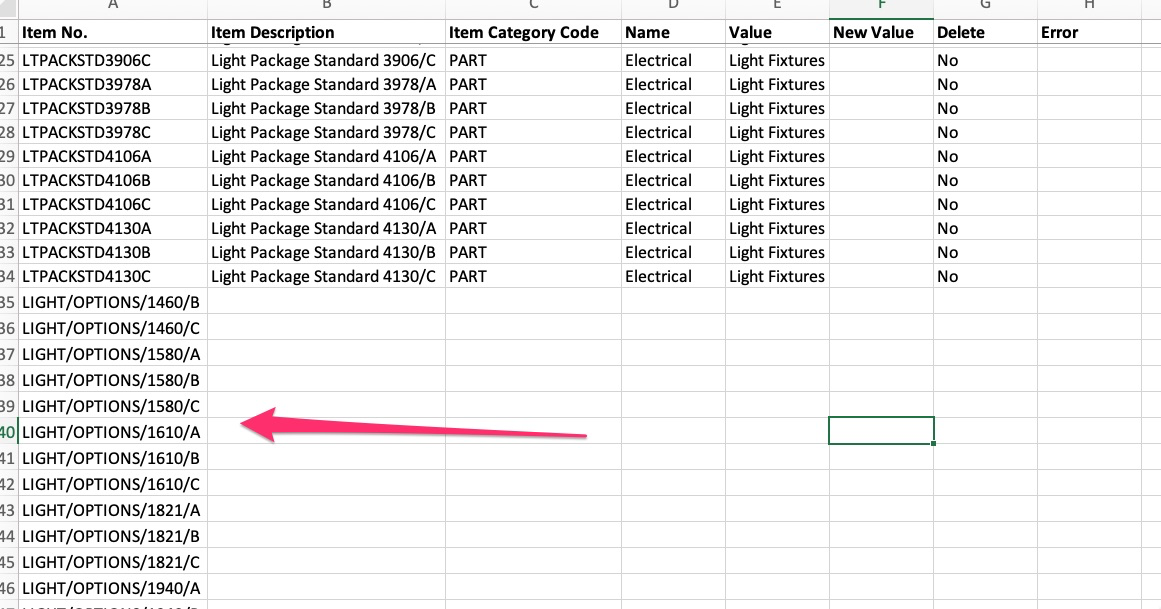
To add the attributes and values to the items we desire, we simply need to copy the item codes from the “ITEMS” tab, and paste them into the attributes tab:

Copy items from the “ITEMS” tab:
Paste into the “ATTRIBUTES” Tab:
But here are some things you need to remember about this bulk tool.
- You can delete the items you don’t want to see (don’t want to work with since they already have an attribute) and it will NOT impact the import however, if you delete just one column of an item or group of items, the system will kick the import back as it may think you are trying to delete data. So, feel free to delete the items you don’t want to see, just be sure to delete the entire line of data.
- You cannot modify item code or “Item No”. If you change this in any way, the system will create a new item as it will not recognize the code. The item number is the unique identifier for the item
Once the new items have been pasted in, we can then copy and paste the attribute. However, you must make sure that the Name of the attribute is added to the column labeled “Name” and the value must be placed into “New Value” as shown here:
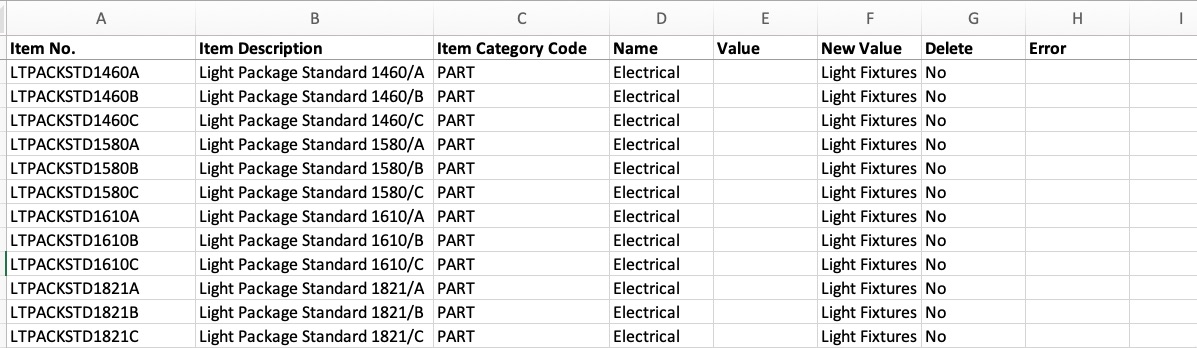
When adding attributes, if the attribute is NOT already assigned where you can copy and paste, be sure that you type it in exactly as it appears in the system or it will not work. For example, if you misspell “Electrical”, the system will not recognize the attribute and will return an error.
Once all of our attributes and values have been added, we can import back into the system:
Once import is complete, click select all:
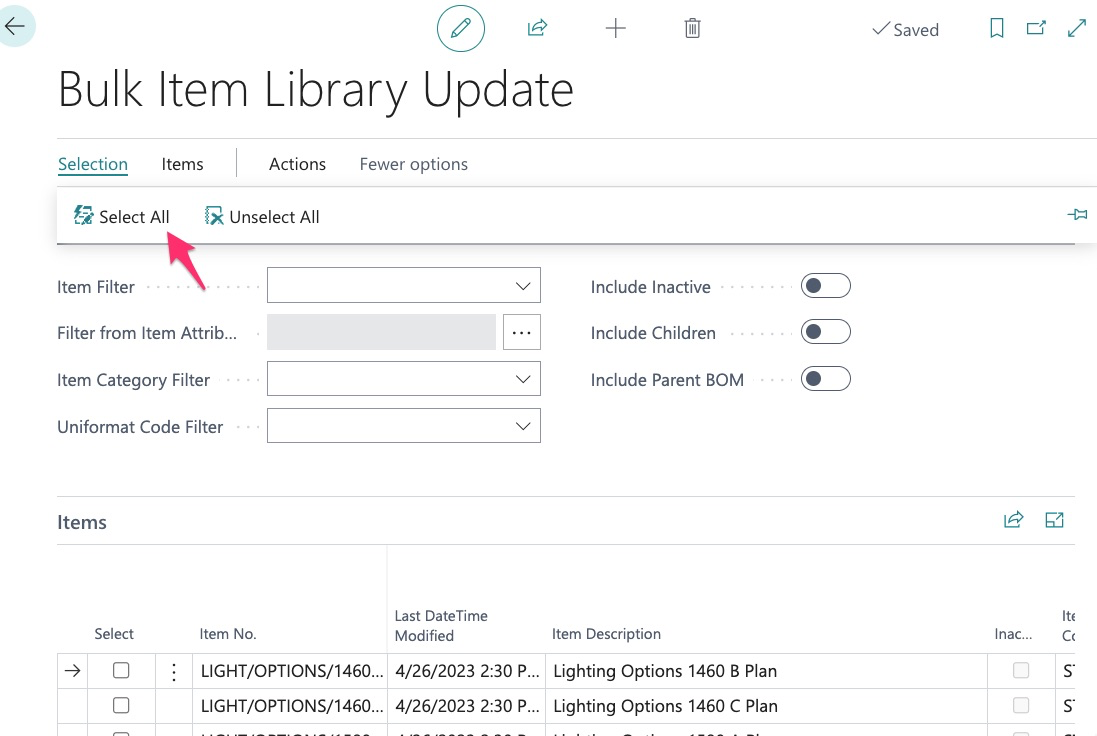
Then click “process”:
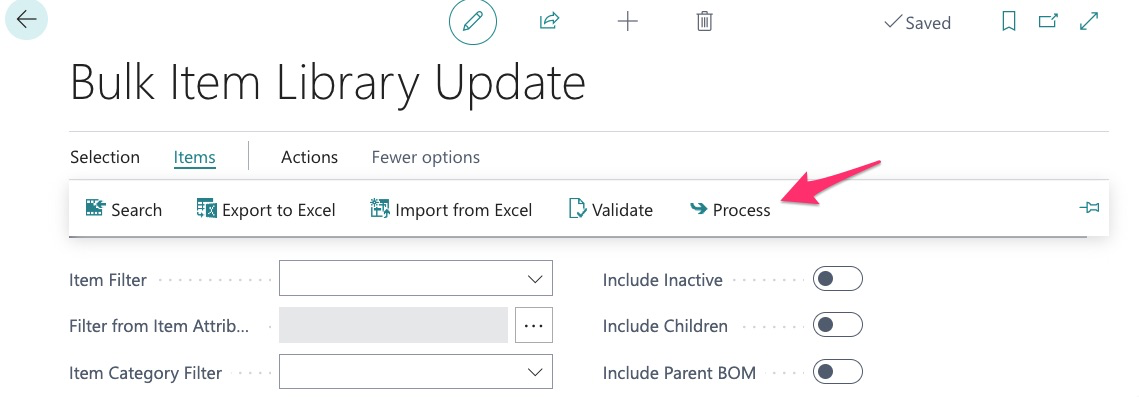
We can now see that the attributes and values have been added:

Searching Attributes
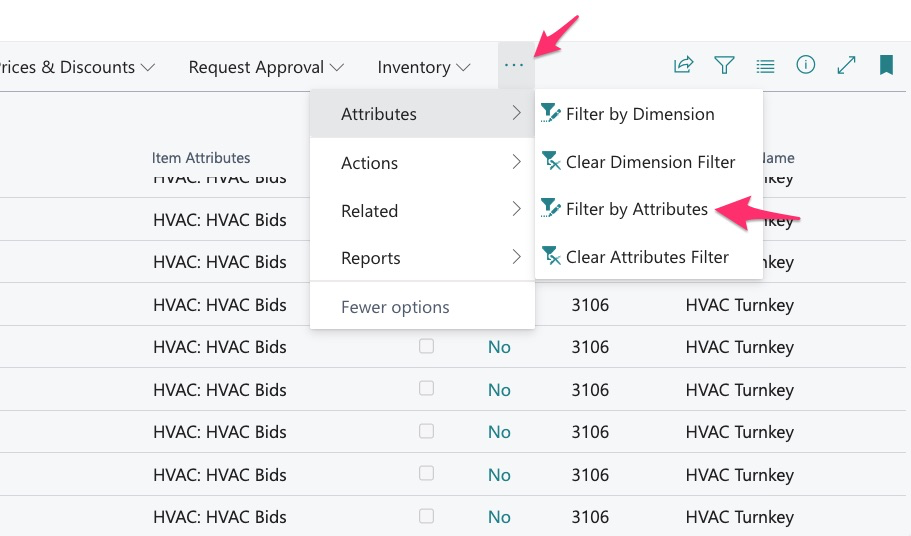
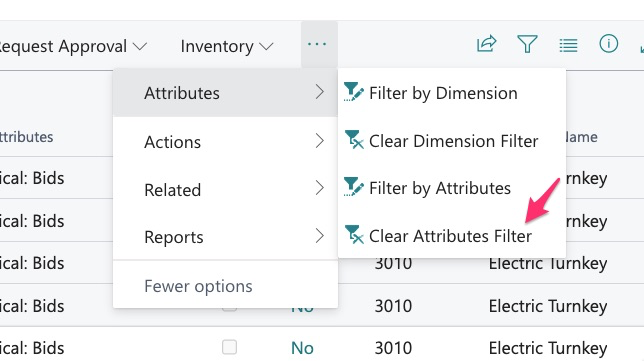
The real horsepower of attributes is the filtering and searching capabilities it provides. Now that these are created, we can use them when searching our item catalog:

Just be sure to clear the filter when done:
We can also use attributes to filter in the bulk tools: