Item Costing & Primary Vendors

This guide will review:
- How to assign items to vendors
- How to assign primary vendors for items by Project (Community)
- How to manage item vendor costs
This guide will not cover how items are created, we recommend you view the guide and video on “Items”.
Before we get started with some examples, we want to first set the stage and state that in these scenarios:
- All vendors have been created
- All items have been created
We will now look at how we cost and assign these items. Ready? Let’s go!
How to Assign Vendor Costs
In our first example, we have a new item:

This item has been created and includes everything we need to use it to the fullest extent of system functionality:
- All required fields are complete
- Classification Code has been assigned (2504)
- Attributes have been assigned
We now want to assign this to the vendors that will supply the item, as well as assign vendor specific costing. BuildBase does offer tools that allow us to do this in “bulk” but we will first illustrate how this can be done for a singular item within the system.
How to Assign Vendor Costs to Each Individual Item
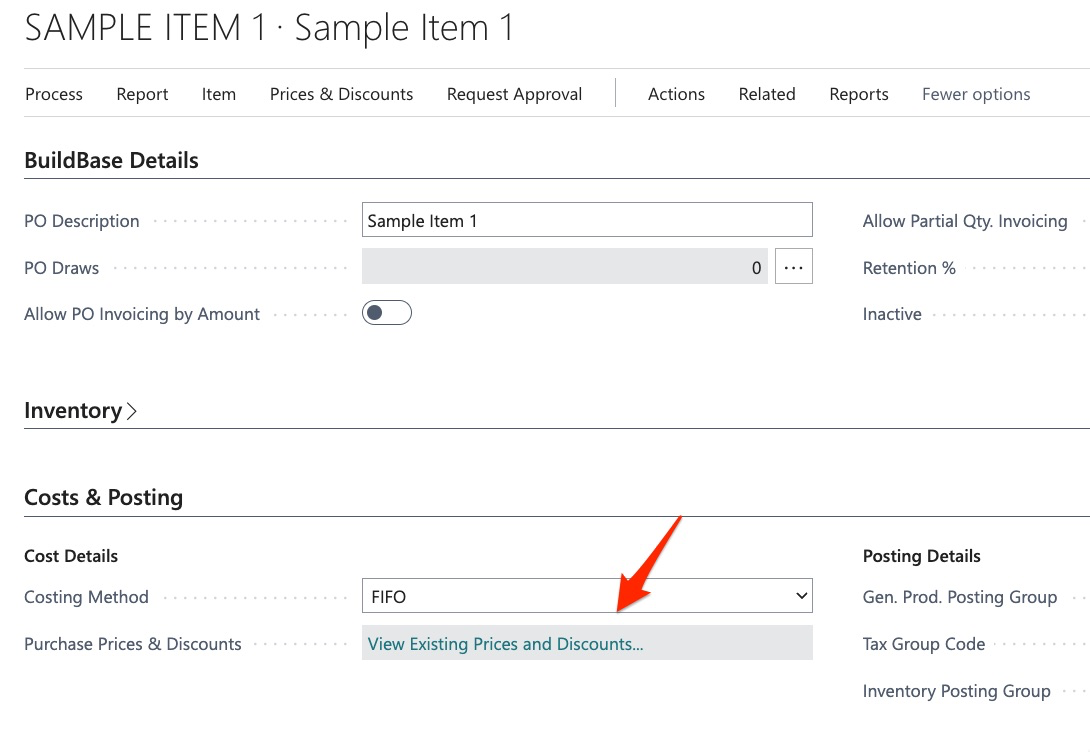
We start by entering the item card:

Next, we choose “Prices and Discounts” then, “Purchase Prices”:

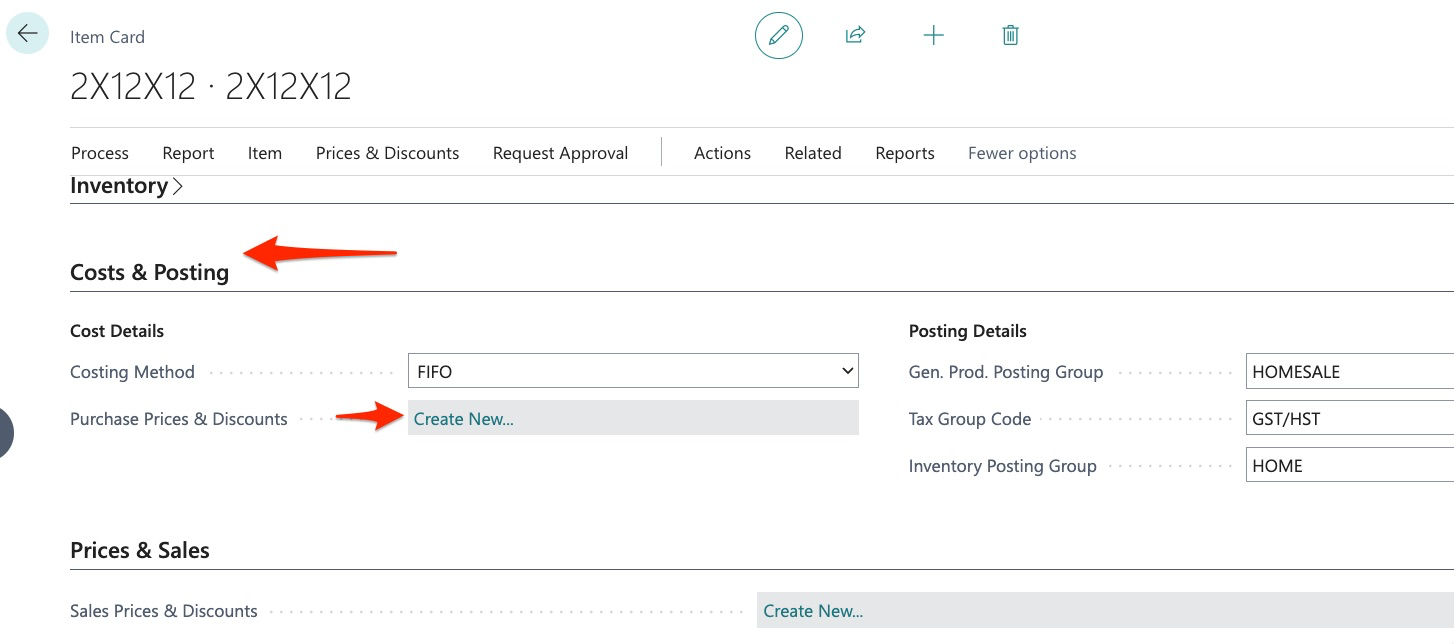
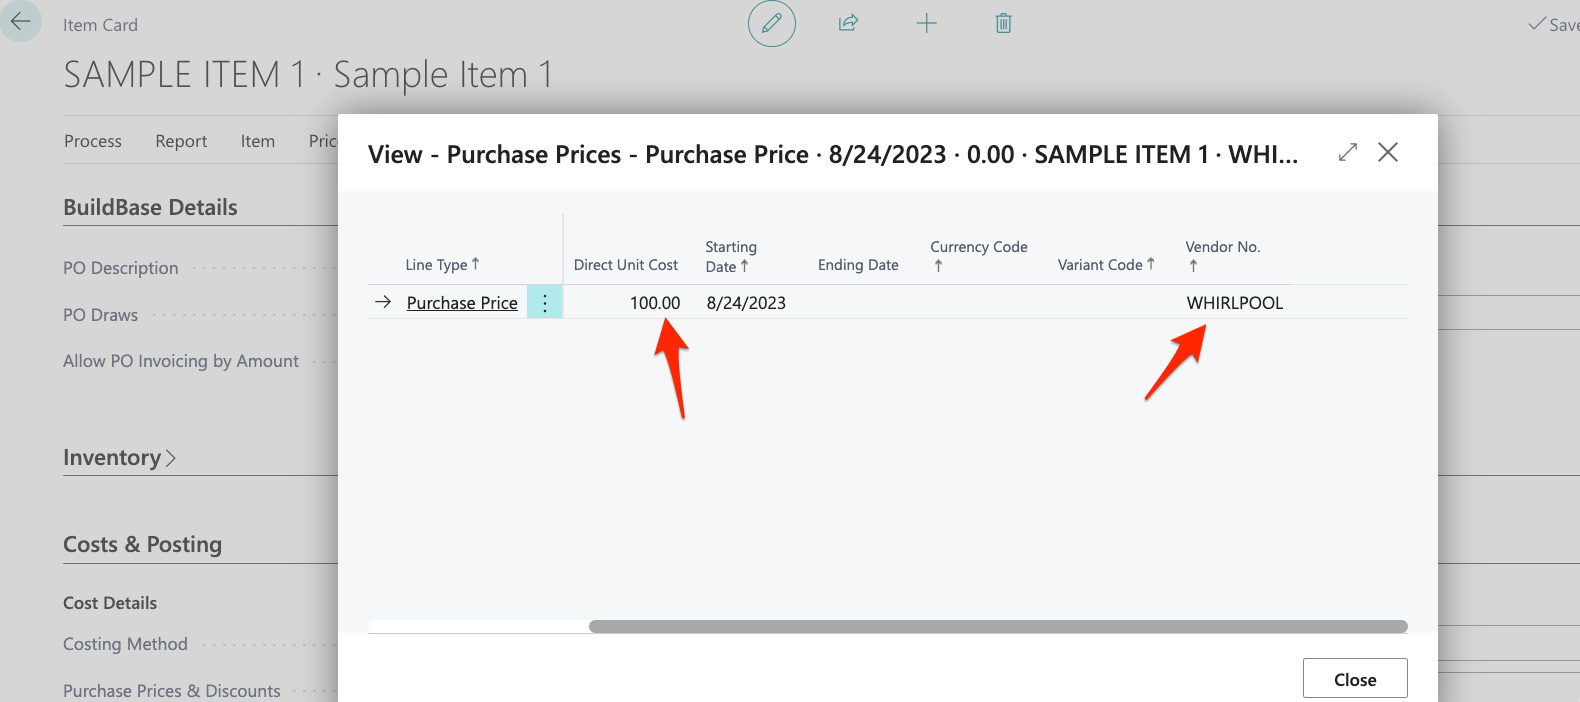
Here we can see that the item information needed is already populated:
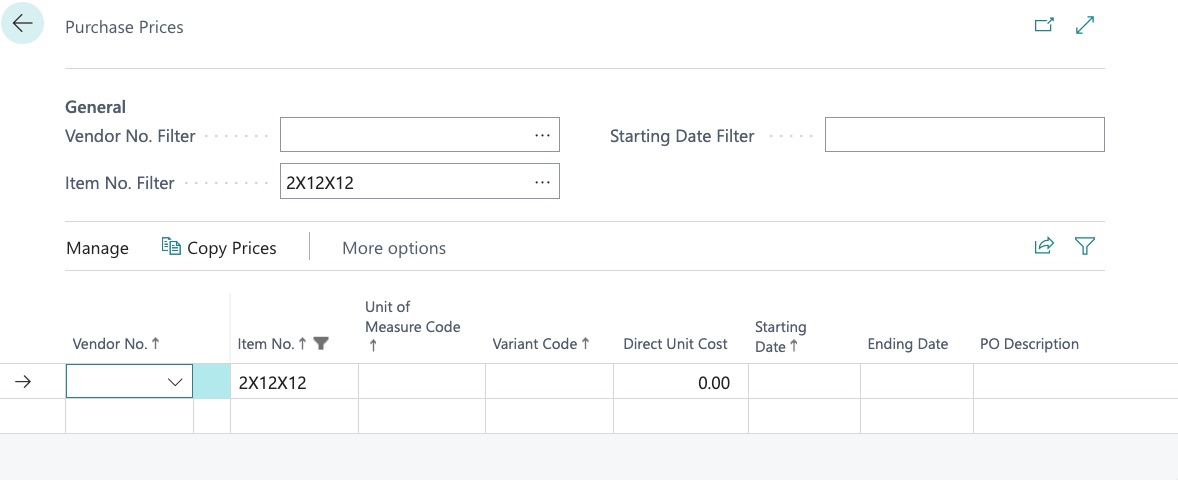
To assign and cost this item for a vendor, we simply complete the following fields:
The required fields to complete this action are:
- Vendor Number (which can be selected from a list)
- Unit of Measure (which can be selected from a list)
- Direct Unit Cost (cost of item)
- Start Date (date you want the cost to be effective)
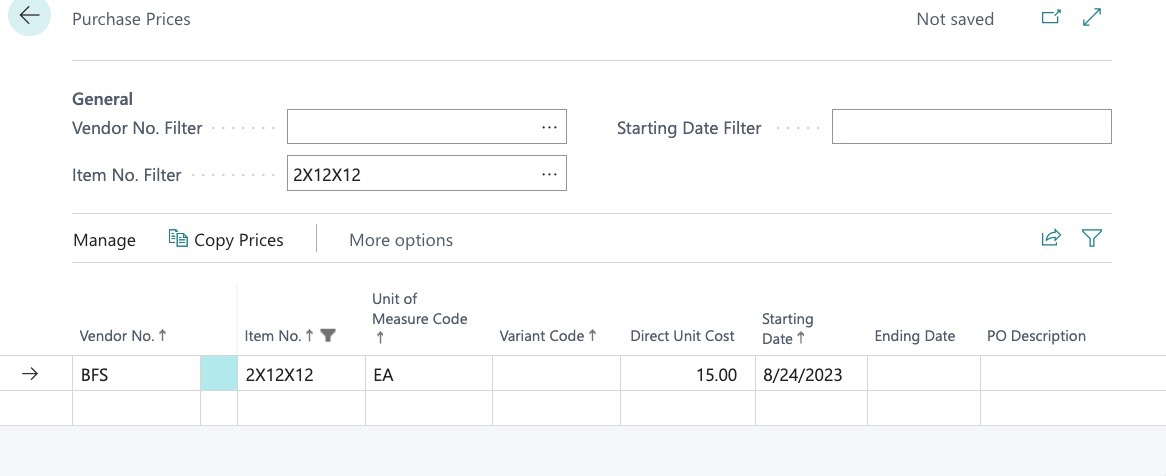
Information will NOT be saved if any of these fields are not completed. We have now successfully added this item to vendor “BFS” and have costed it at $15 per each.
However, there are some additional features of this application.
Ending Date – here we can enter a date in which this costing will expire. If it will expire next quarter, we can enter that date, then create a new record with a new effective date like this:
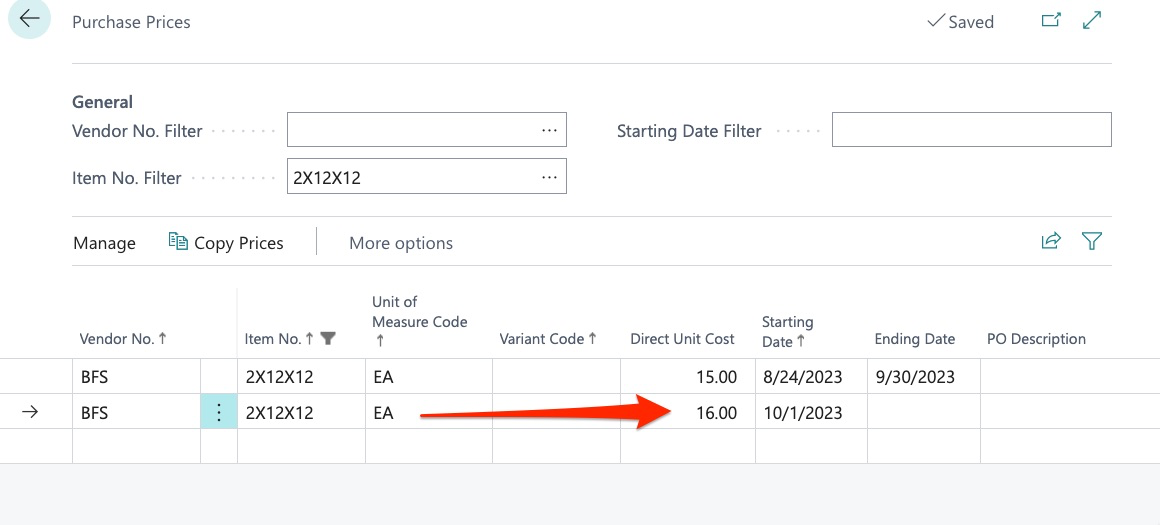
Here we have created a new record which will expire BFS’s cost of $15 on 9/30/23 and will activate the new cost of $16 on October 1st. This makes it very easy to manage cost changes well in advance.
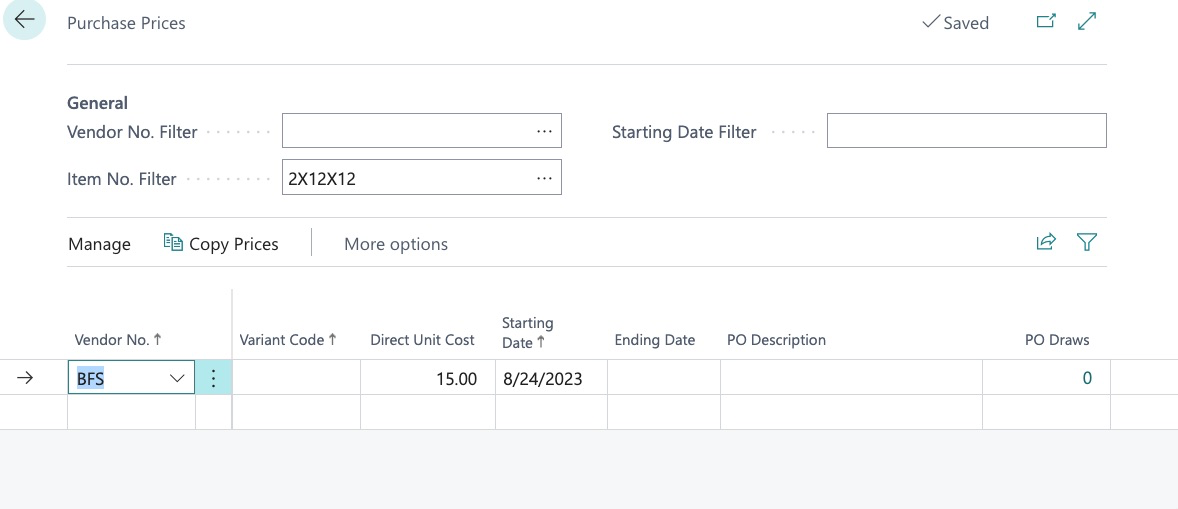
You will also notice 2 additional fields:
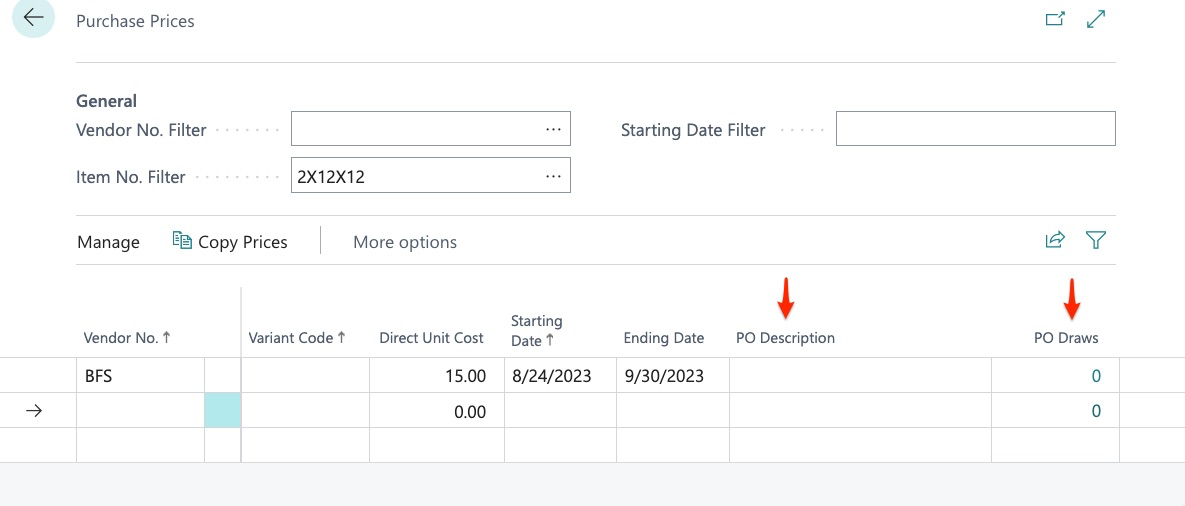
This allows us to customize both PO description and/or PO Draws for this item, for this specific vendor. Information entered here will override the default information/setting in the item card for this vendor only.
Next, we see Variant Code. This allows us to create Project Specific Vendor Costs. For example:
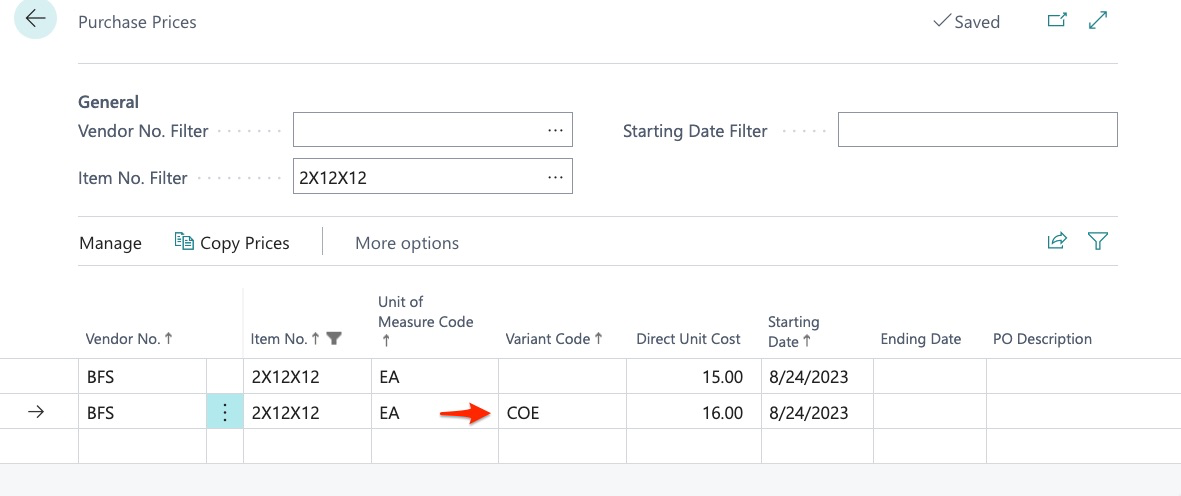
We have now added a new record for BFS but have added COE (Cedar Oaks Estates) specific costing. The system will now use the cost of $15 for this item everywhere except for COE. This allows us to manage costs at the project level for the same vendor.
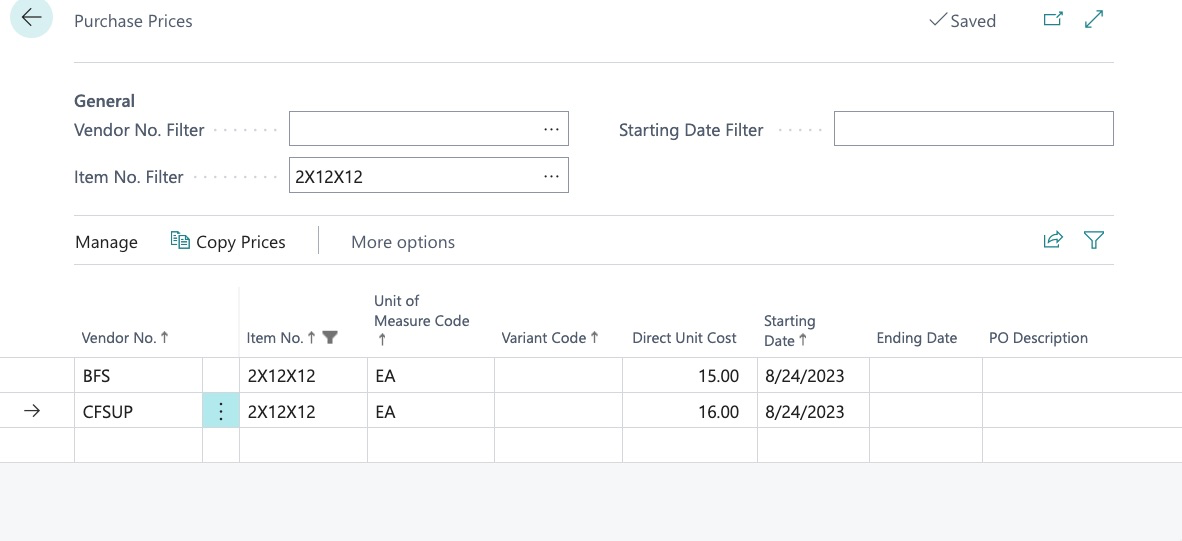
Lastly, we can manage costs for an item across multiple vendors:
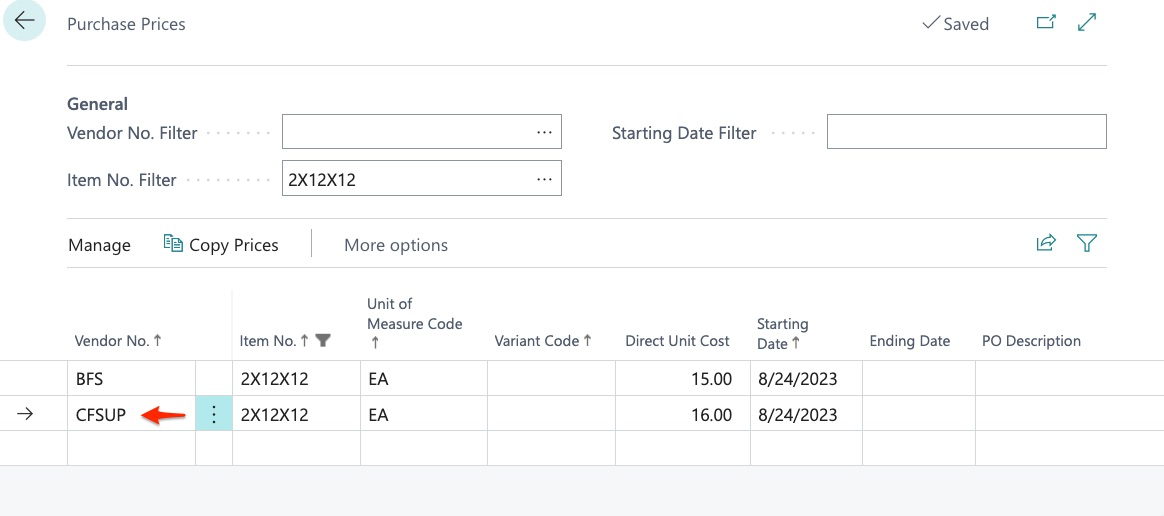
We now have costs for this item for 2 vendors (BFS and CF Supply).
As stated previously, BuildBase does offer a tool in which this can be performed in bulk for many items at once however, it is important to understand how this is done singularly in the event only a few changes are needed.
Now that we have our item costed for 2 vendors, lets learn how we can assign primary vendors for this item.
How to Assign Primary Vendors for Each Individual Item
We now have our 2x12 item costs for 2 vendors:
We can now assign this item to the primary vendor for each project. To do this, we start in the item card and select:
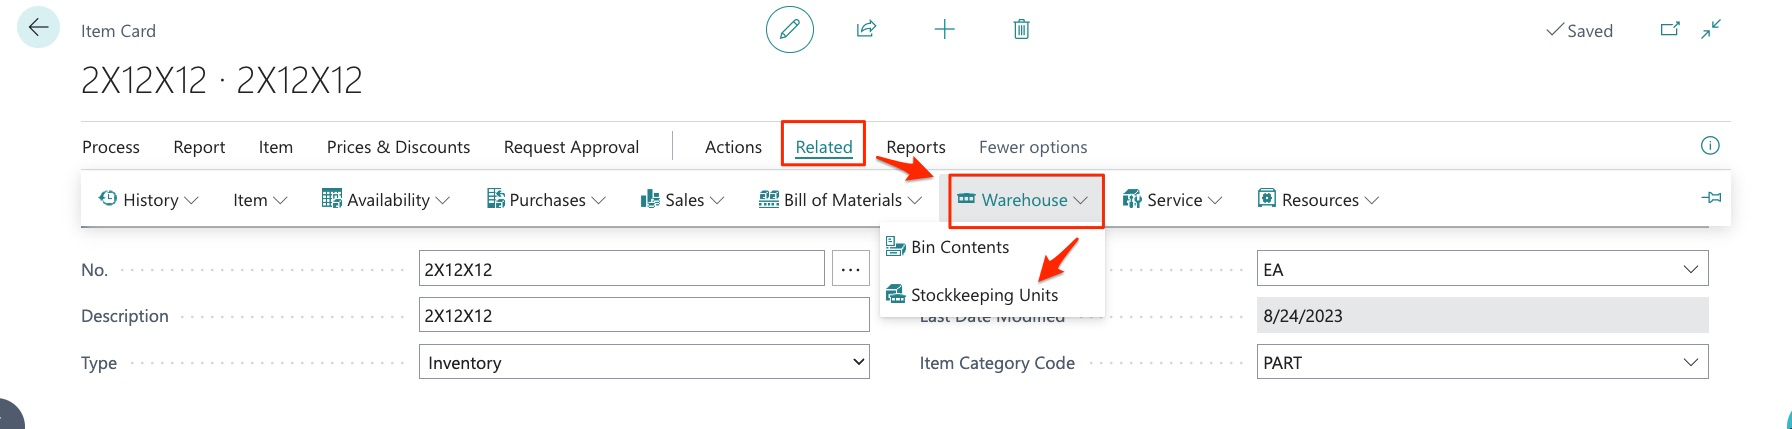
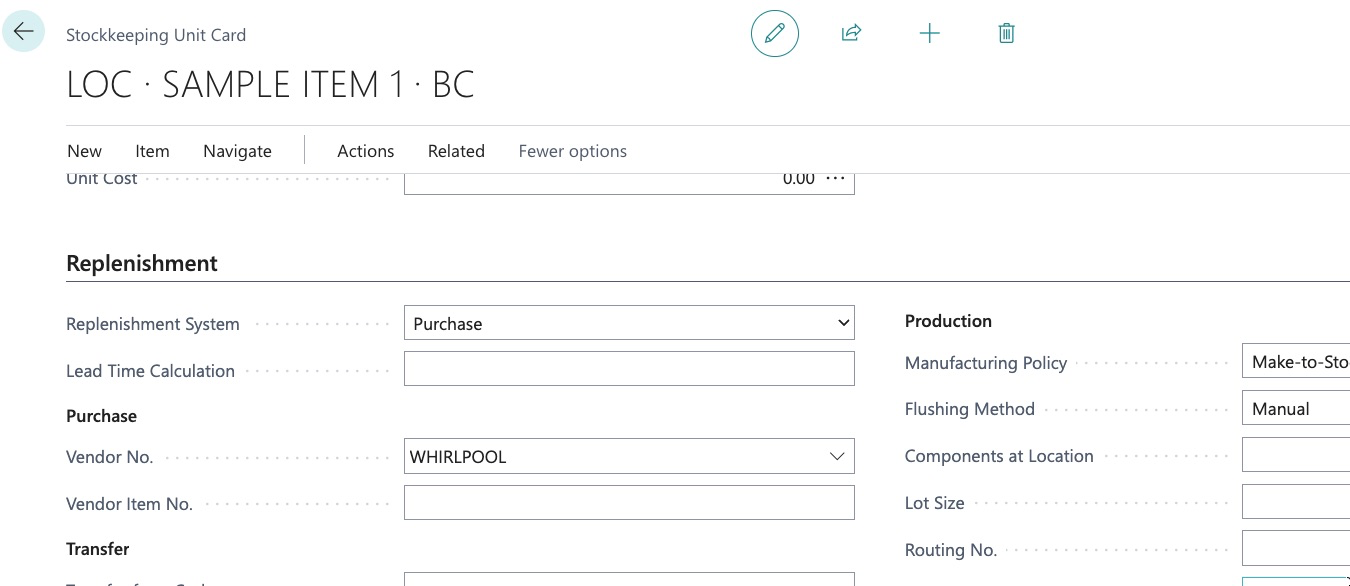
Related/Warehouse/Stockkeeping Units.
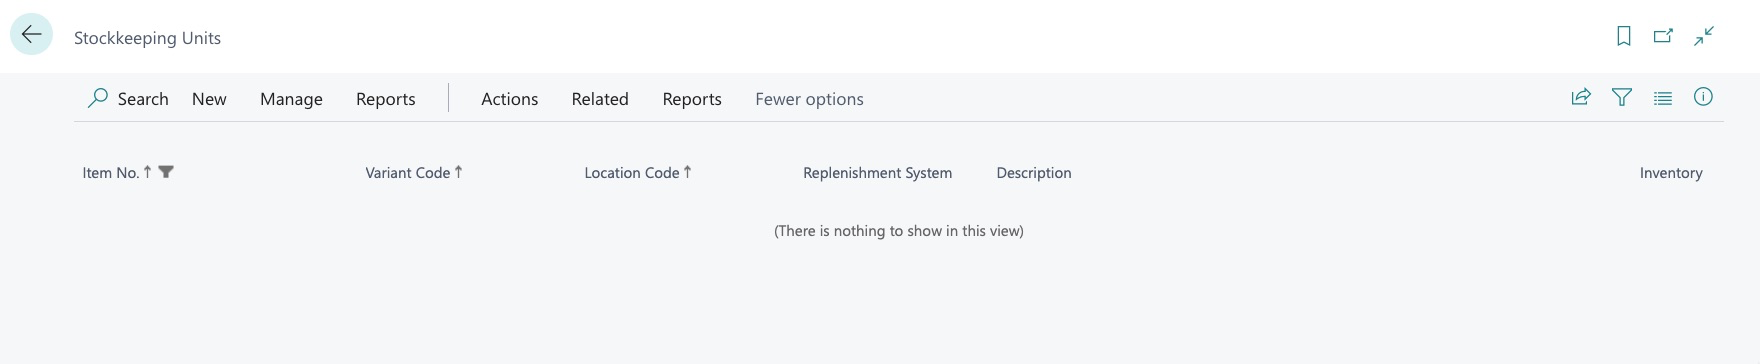
We now see this:
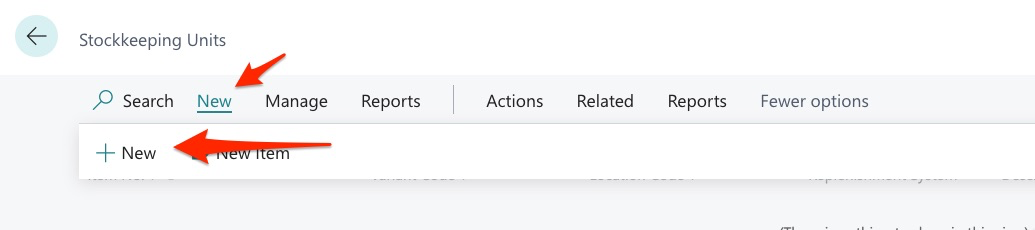
We can now start assigning the primary vendor for each project. To do this, we click “New”:
We then see this and select the project from “Variant Code” dropdown:
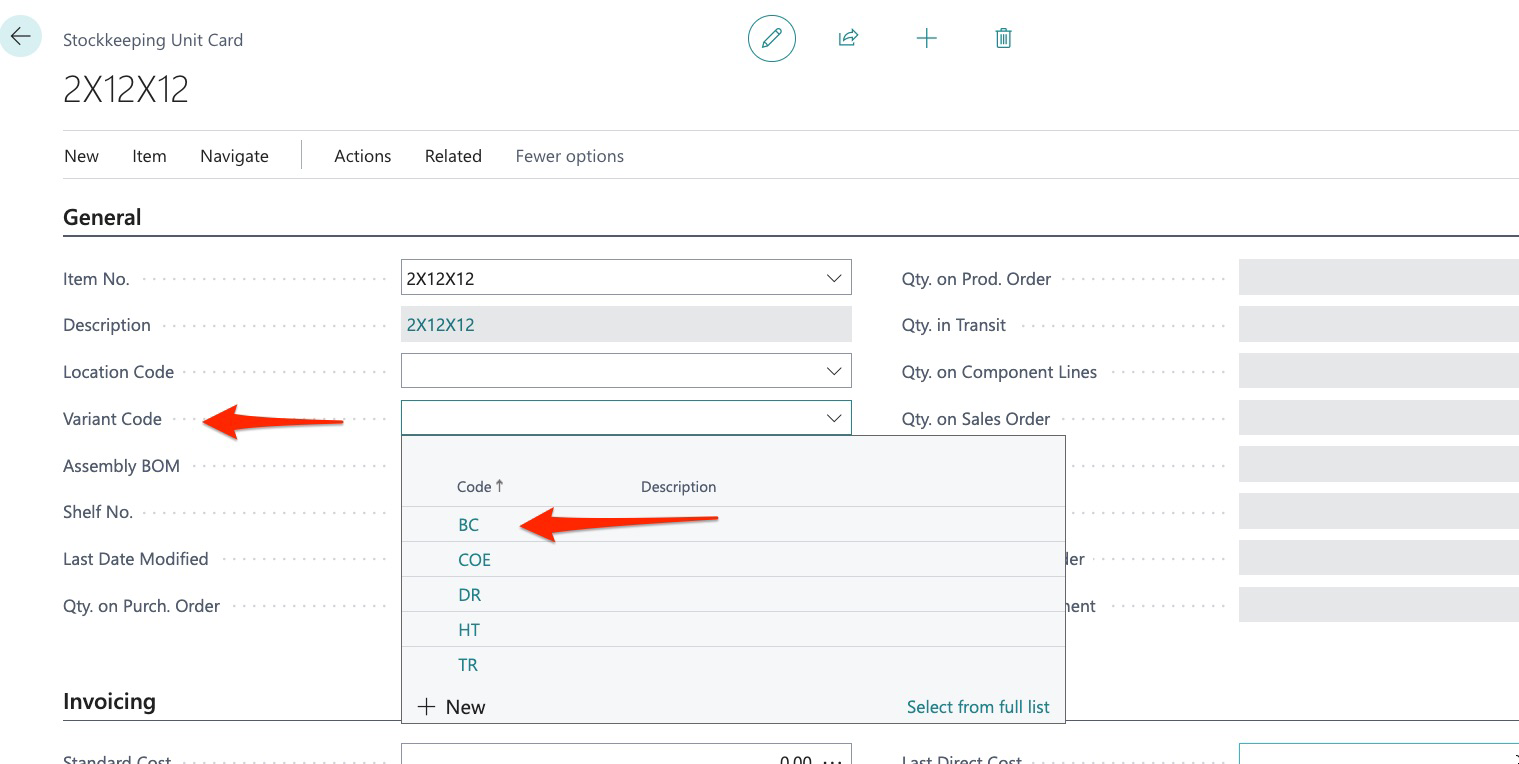
We then select the vendor number we want to assign:
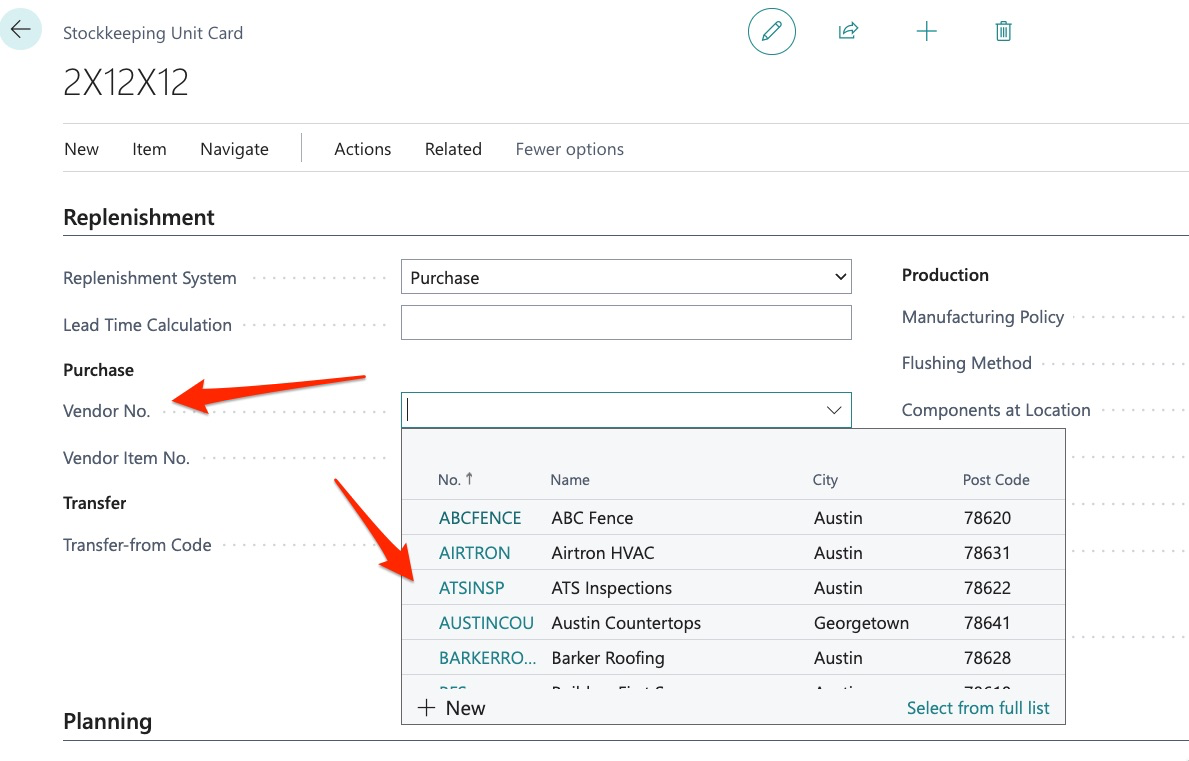
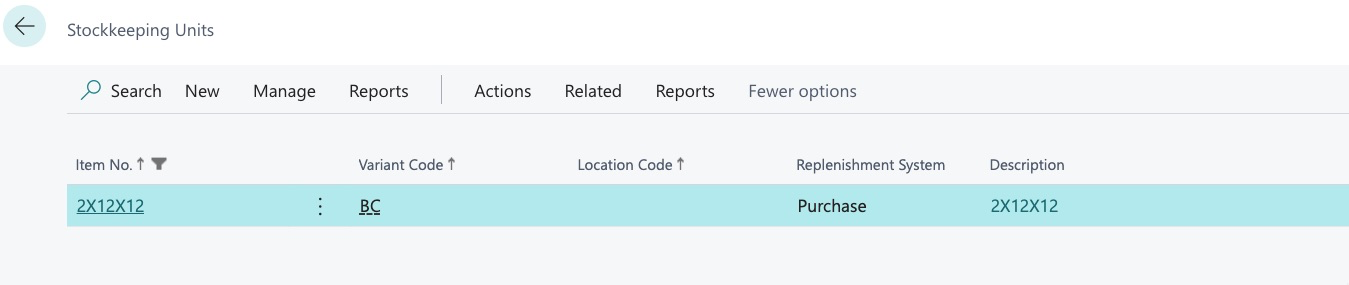
Once we select the back arrow to return, we can now see that BFS (Builders First Source) is the primary vendor for this item in BC (Bunton Creek):
We can then repeat this process for CFSUP (CF Supply) for our next project:
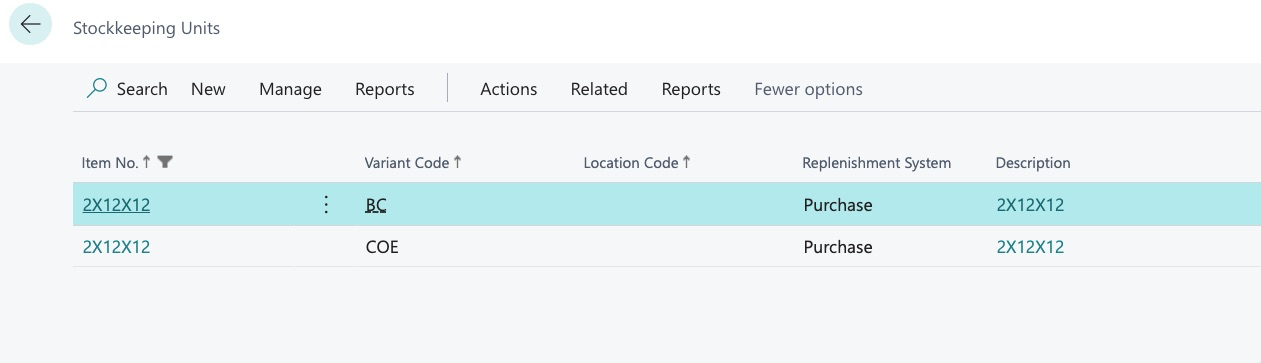
We have now successfully assigned the primary vendor for this item, for 2 projects.
One thing to keep in mind, if you drill in here:
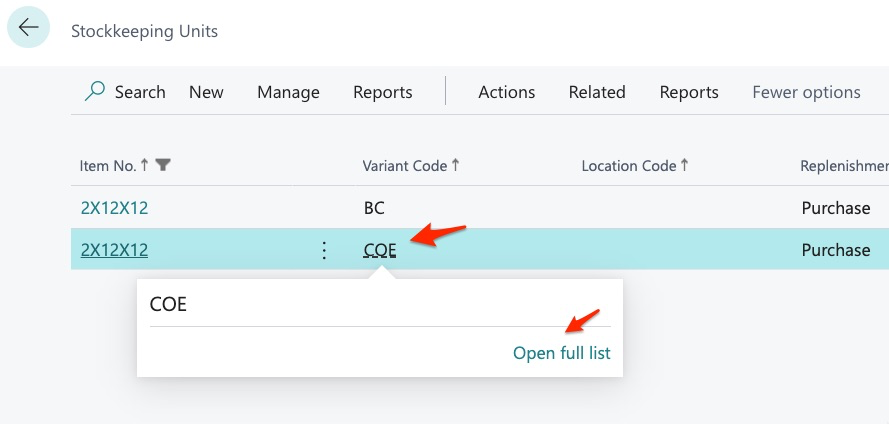
You will see this:

This is a list of all the variants or “Projects” in the system. BuildBase uses the Dynamics “Variant” function to allow for our intended functionality. You do NOT need to work in this menu UNLESS, you want to change the rules of how variants work. For example, drilling in here:
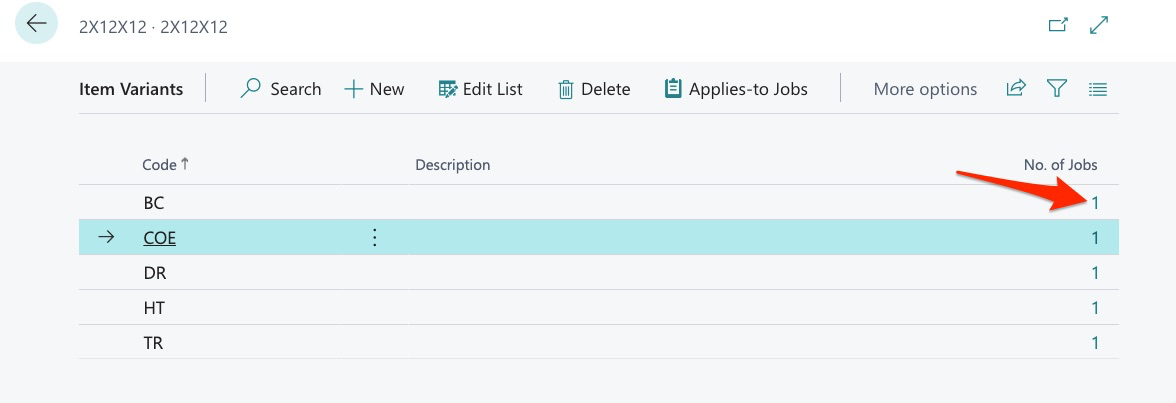
Will show us this:
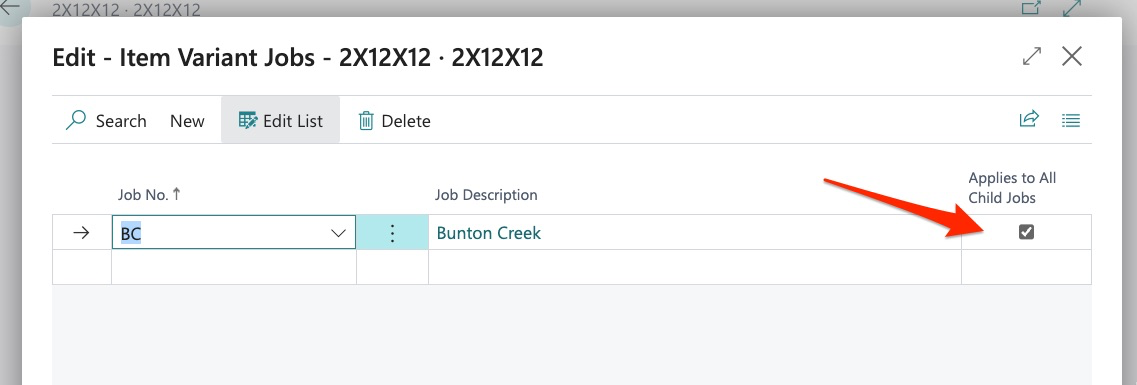
This simply means that the system is set so that Bunton Creek is the parent and all children (jobs) under Bunton Creek will adhere to the primary vendor assignment we just set. MOST users will not alter this functionality.
Summary – We have now set costing for our new item as well as assigned vendors to our new item for 2 projects. We can now issue POS for this item and the system will identify the vendor to which the purchase order should be issued as well as the cost of the item. However, most organizations are likely to have hundreds, if not thousands of items in their item library and following the processes outlined above could be extremely labor intensive.
We will now illustrate how to perform these actions using our bulk tools.
How to Assign Vendor Costs in Bulk
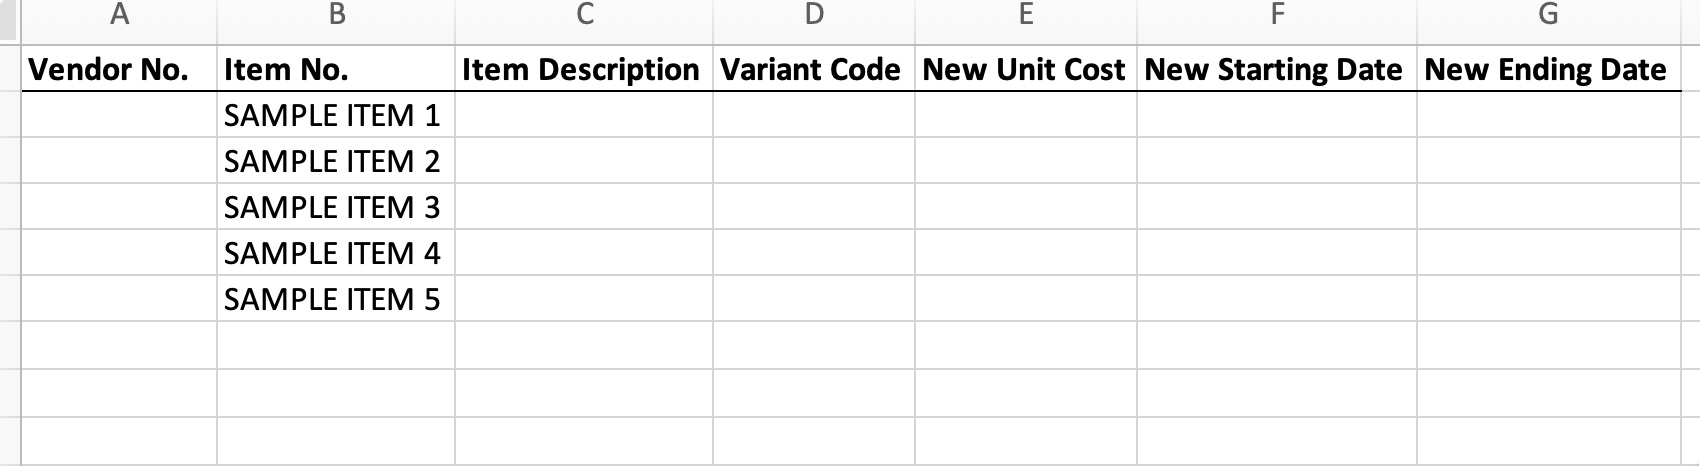
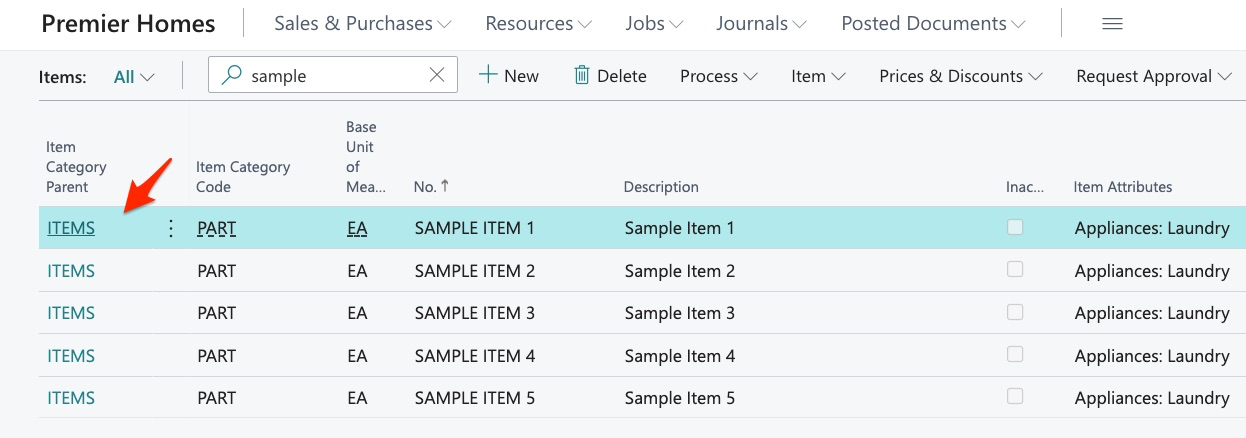
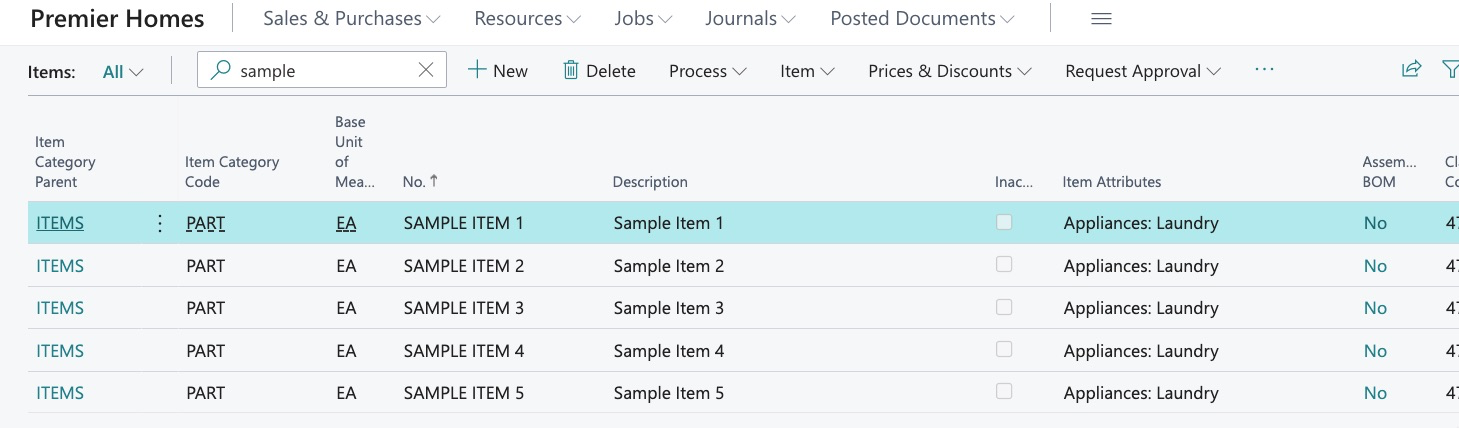
In this example, we have 5 new items:
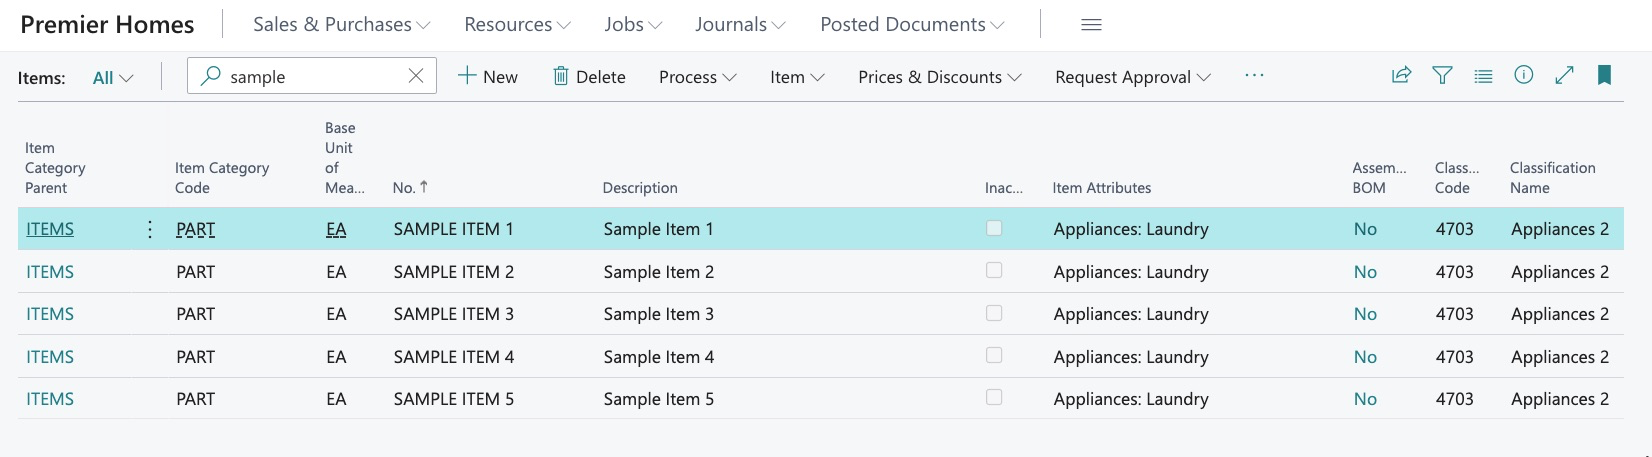
These items have only been created:
- Vendor costs are not assigned
- Primary vendors are not assigned
We want to start by assigning vendor costs to these items but we want to work with all of them at 1 time instead of the singular process we outlined earlier in this guide.
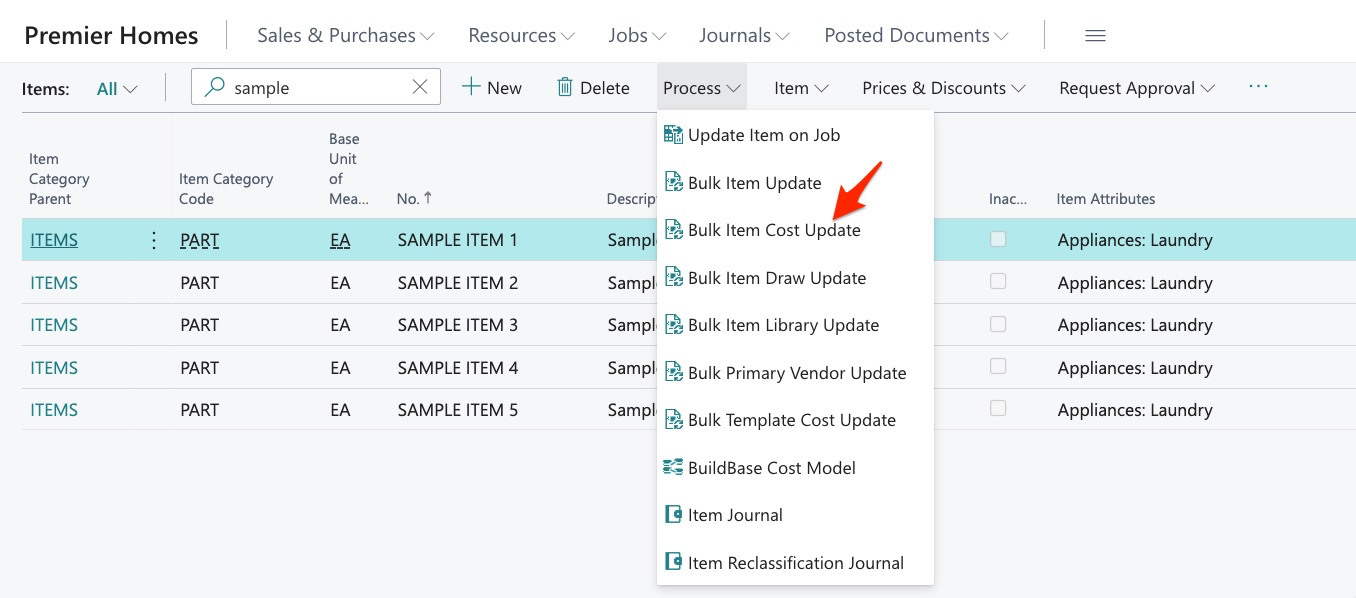
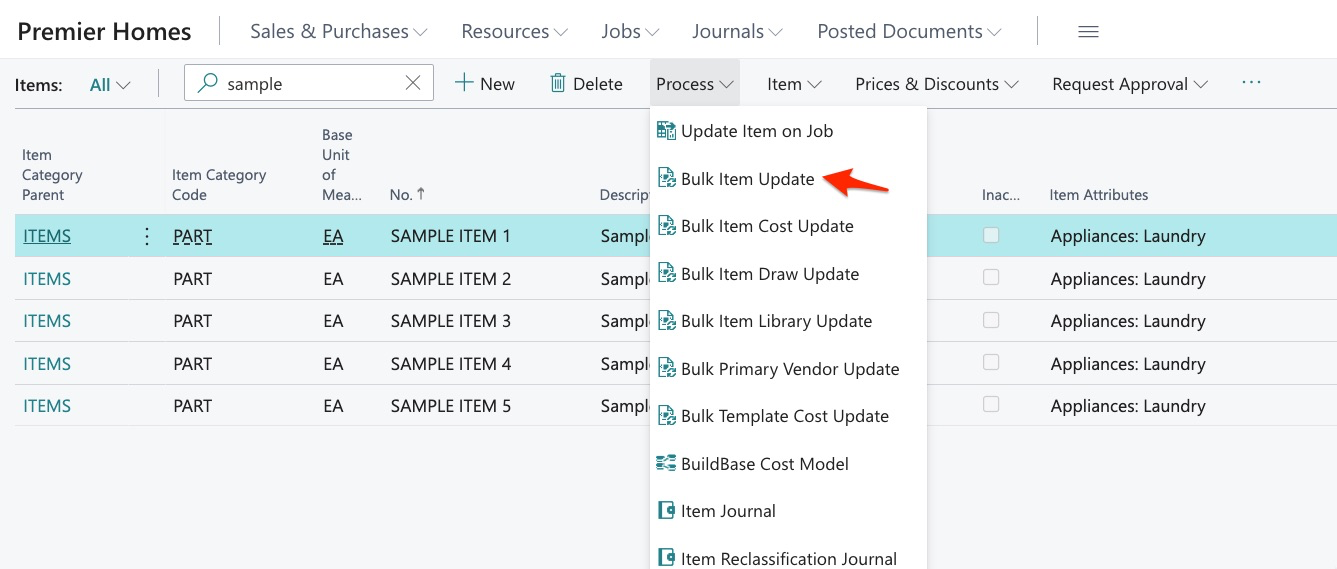
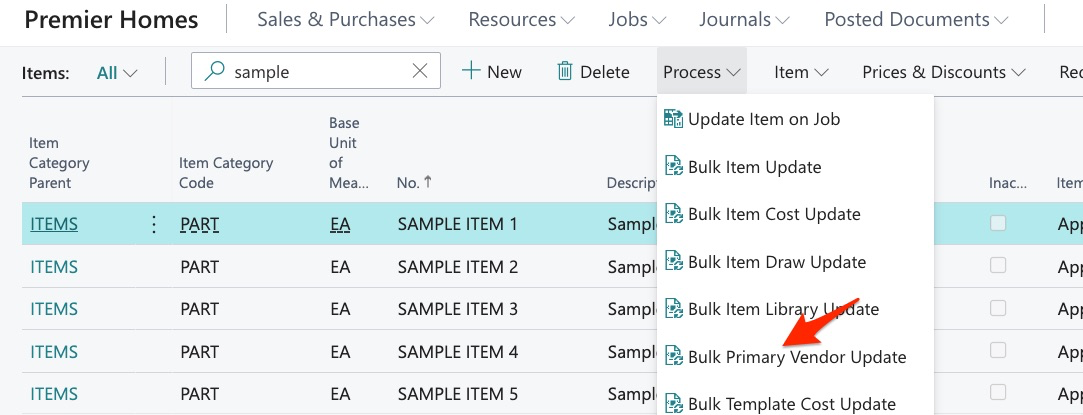
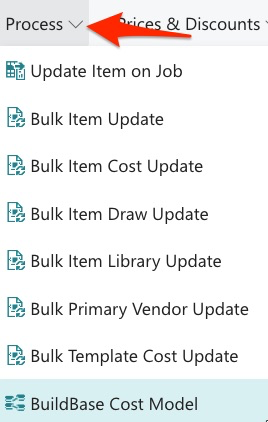
As stated previously, we have a bulk tool for this and it can be found here in the item library:
Next, we can find our items:
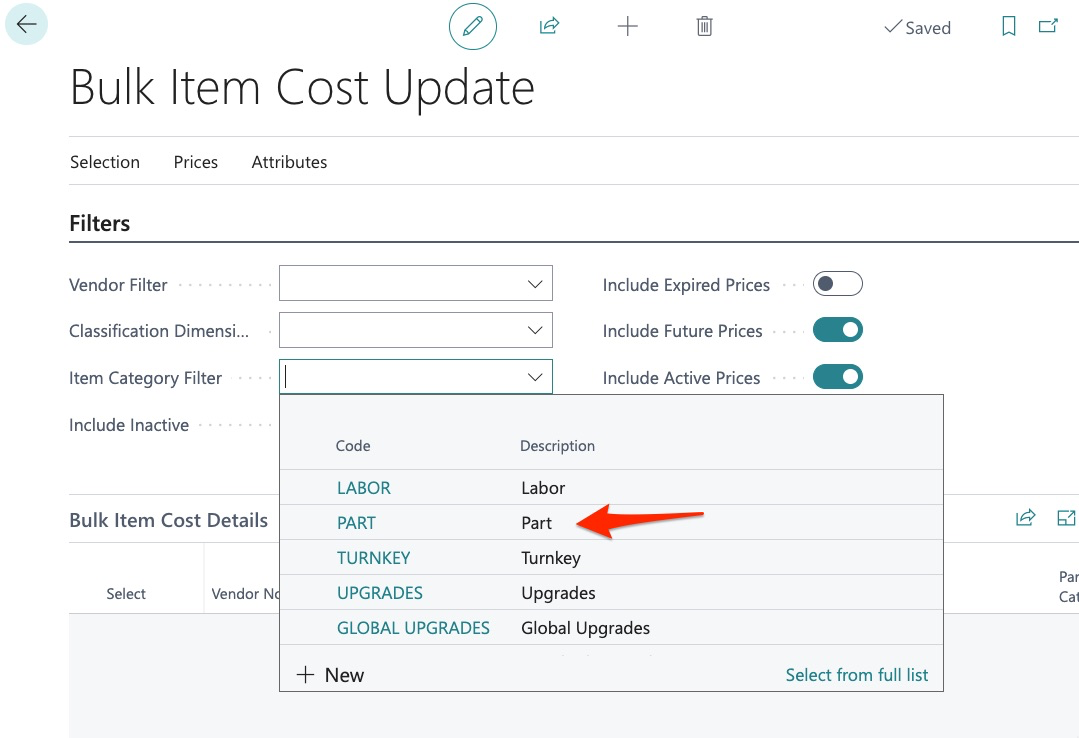
We select “Part” as the item category code and then search:
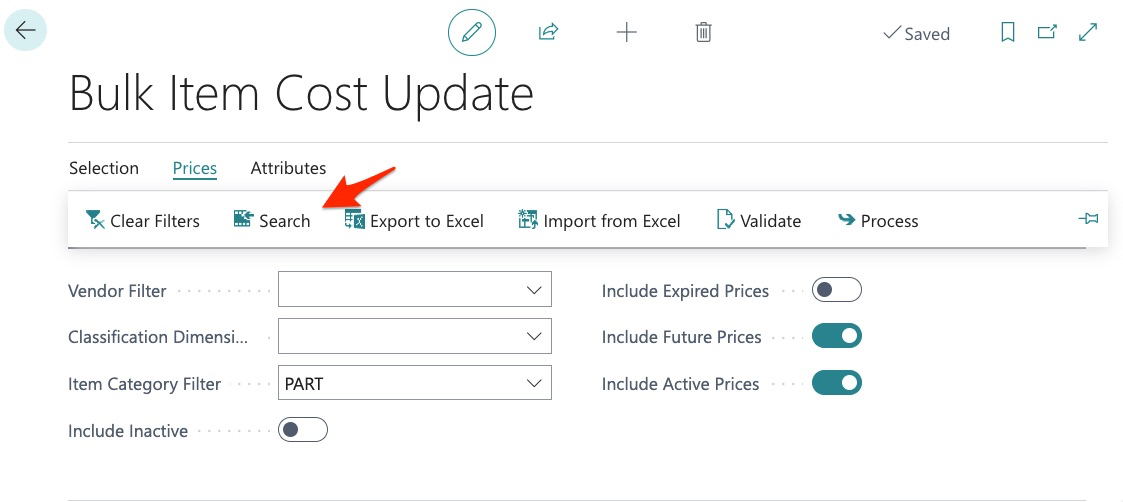
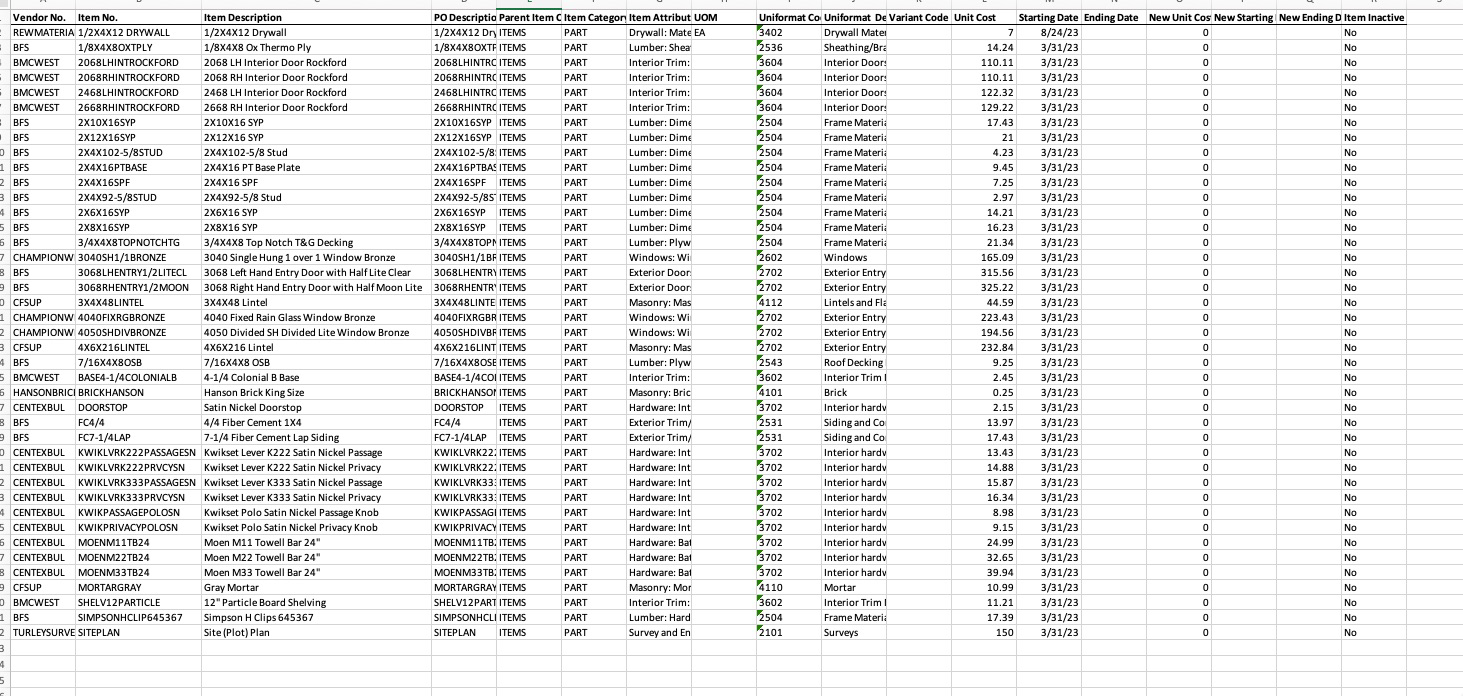
We can then export our report:

Because we filtered to a specific item category code, our report is very manageable:
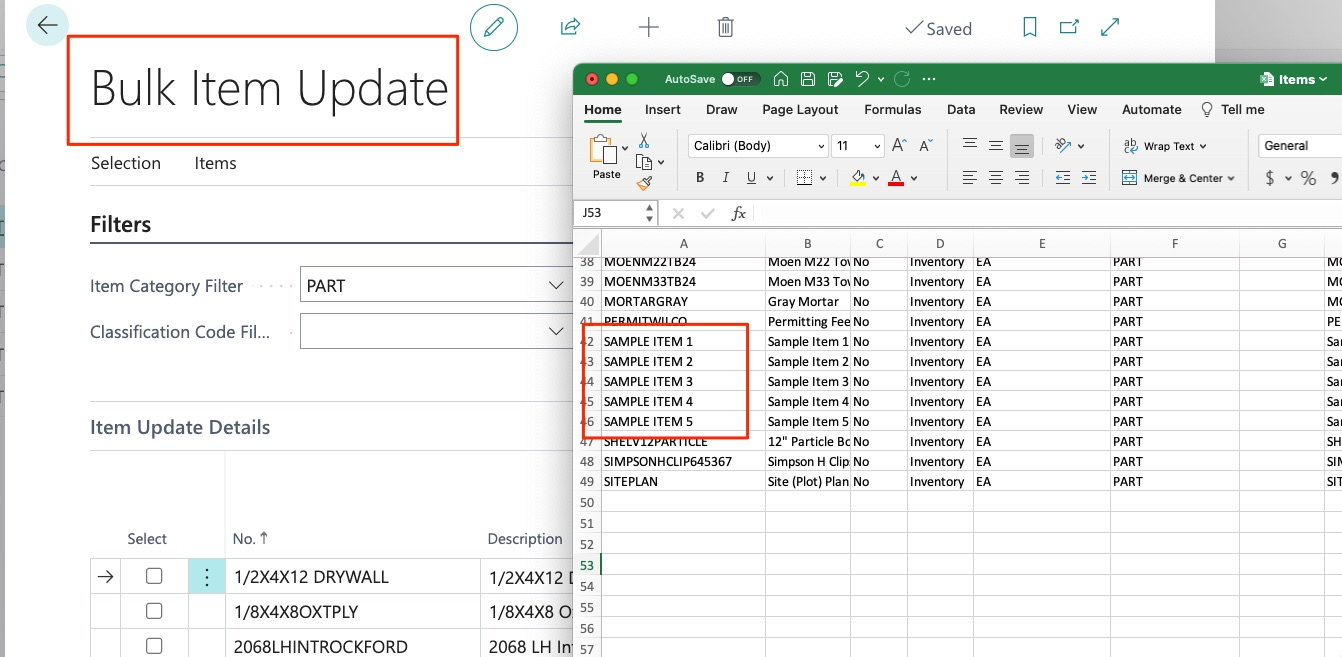
But if we look closely, we will find that our 5 new “Sample” Items are not here.
But why are our new items NOT on this export?
This is because our new items do not yet have a cost assigned and this export is used for both updating existing vendor costs, as well as creating new costs.
This allows us to input our items and vendor costing. So here is how we should create new cost records. First, we use this tool:
We then find our new items (or export the entire report):
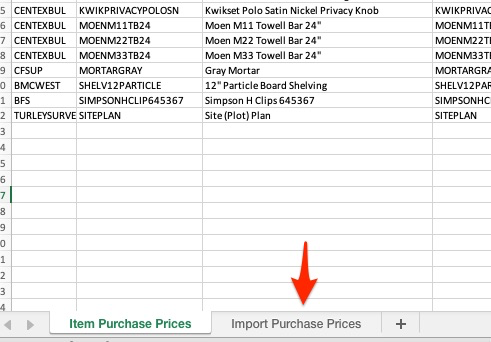
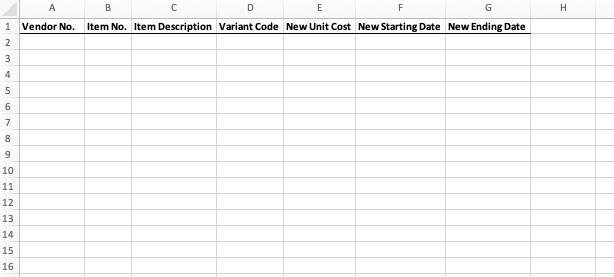
Then, we use this tab in the Bulk Item Cost Update export:

We then copy and paste the item information:
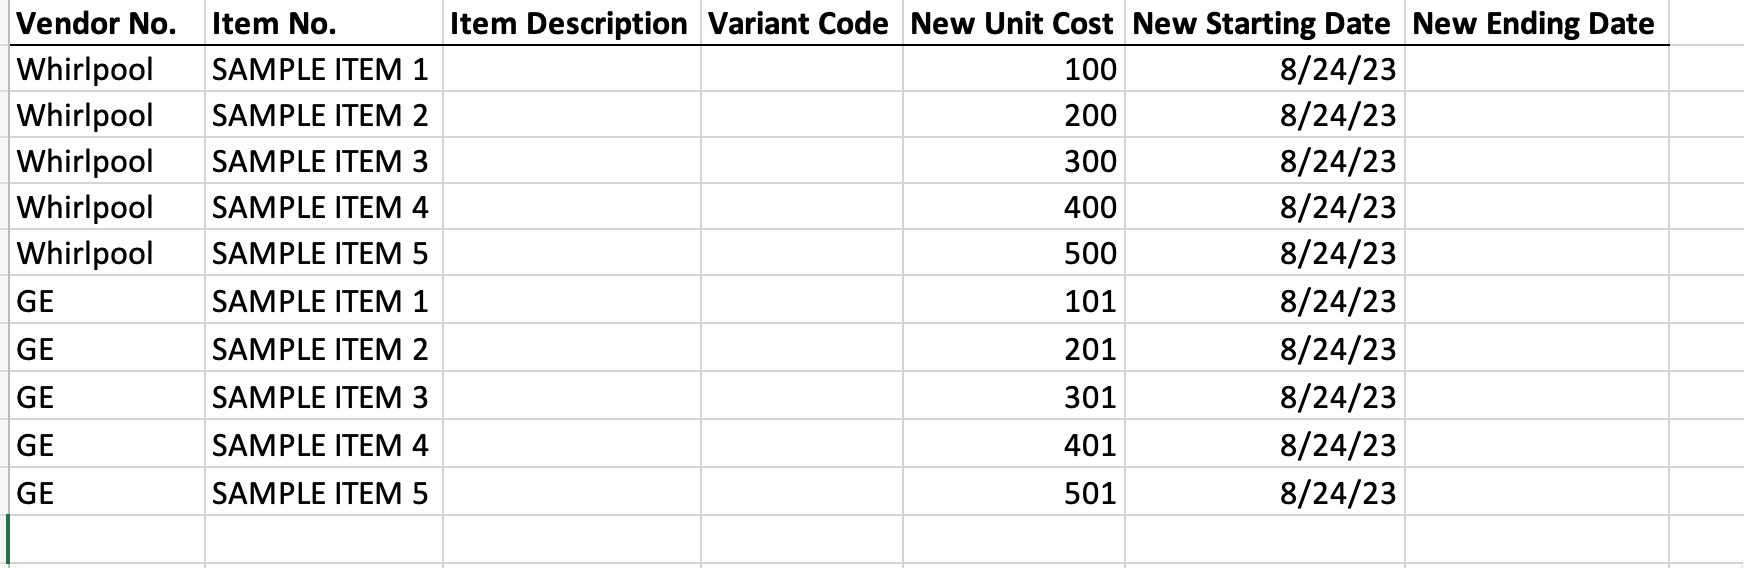
Next, we assign vendor id, cost, and new starting date:

The same rules apply in this bulk tool as we saw in our singular example:
- Can enter multiple vendors
We can assign project specific costs:
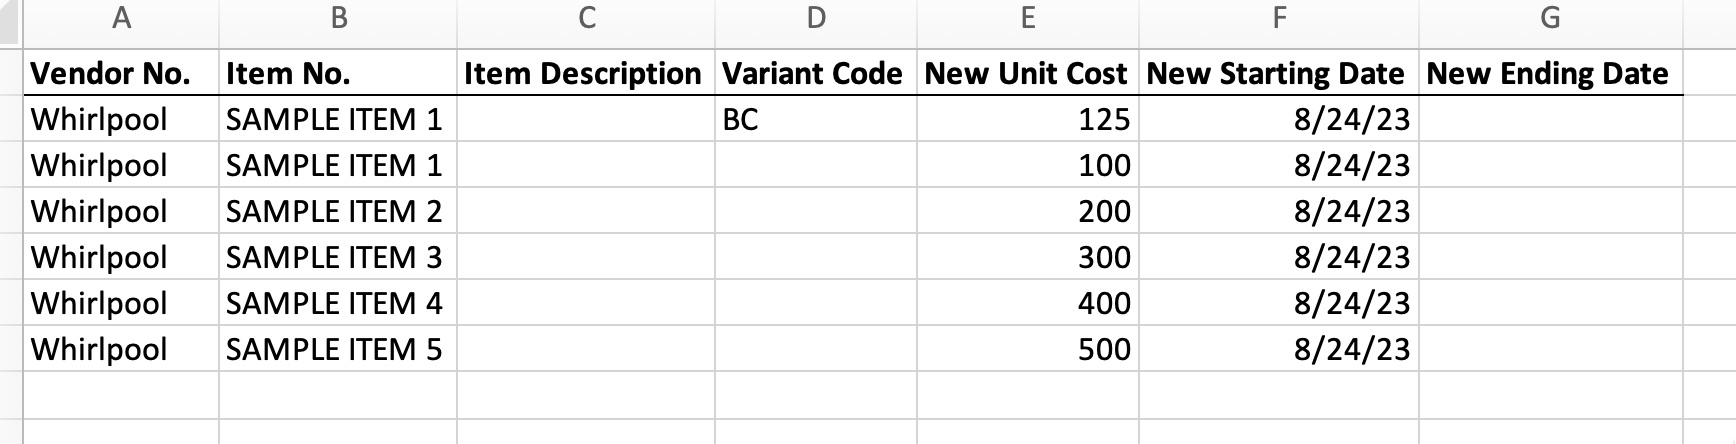
And, we can set expiration dates.
If we choose to use these features, the information will display in the system just as it did when information was entered singularly.
In this example, we are going to use a simple scenario:

We now save our excel export and import it back into the system:
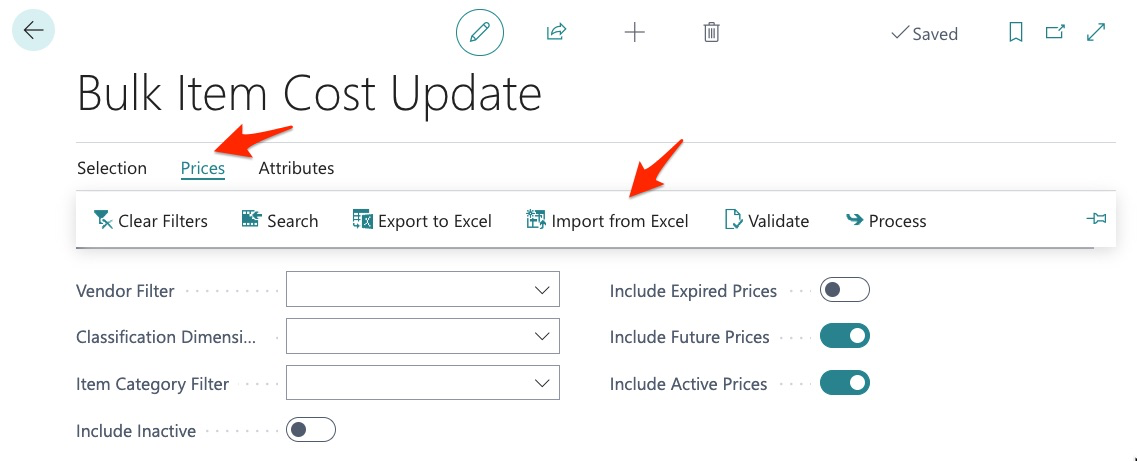
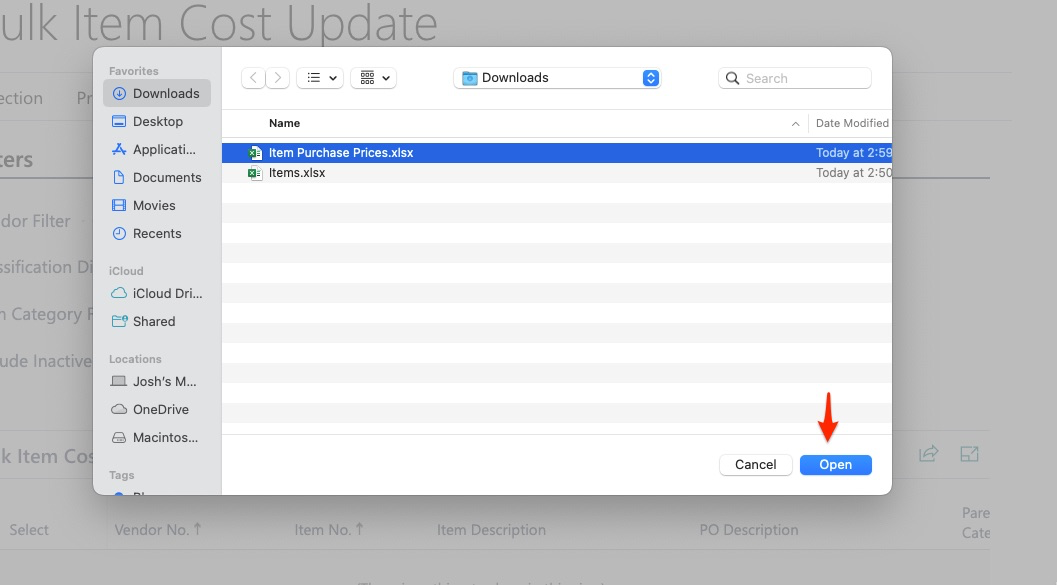
Since the import has multiple tabs, the system will ask you which tab to import:
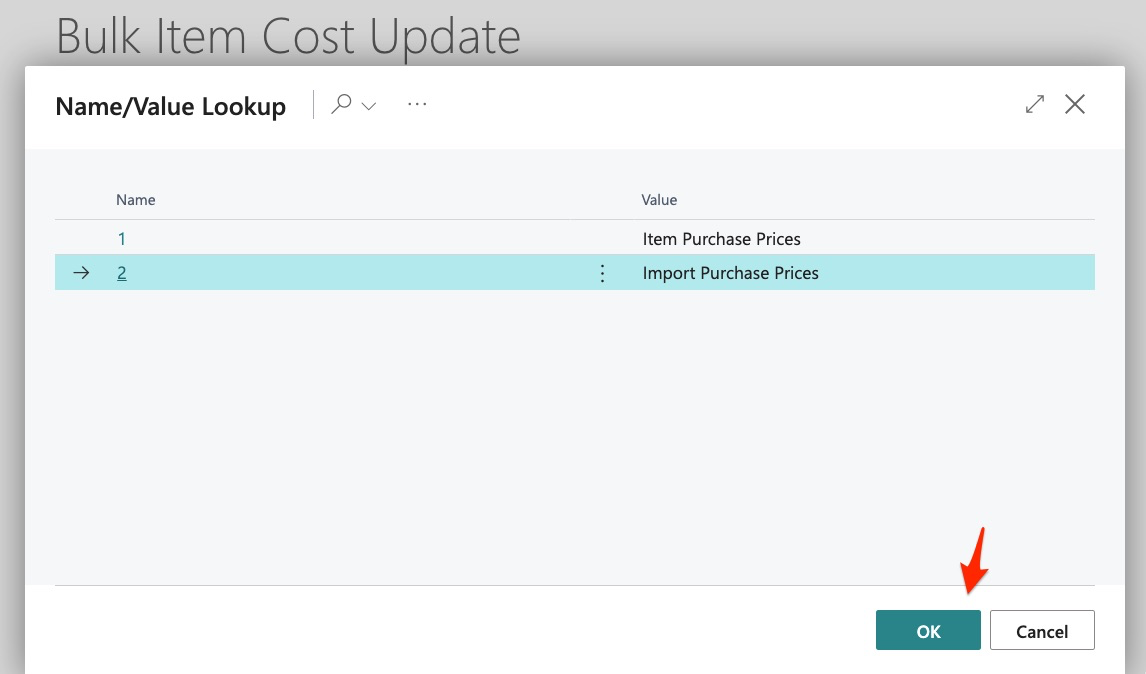
And in this example, we are importing new pricing.
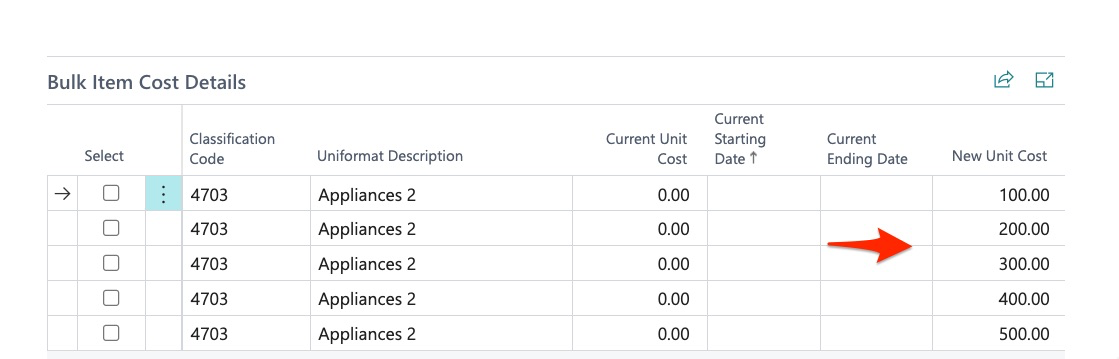
The import is now complete and we can review:

We can see our new costs:
To complete this process:
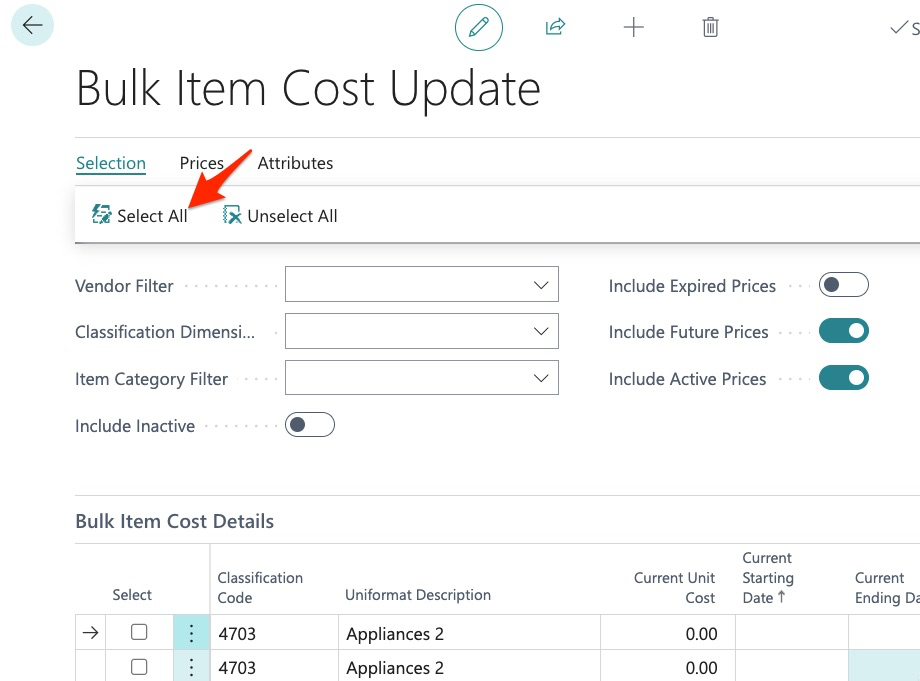
Then validate (check for errors), and process:
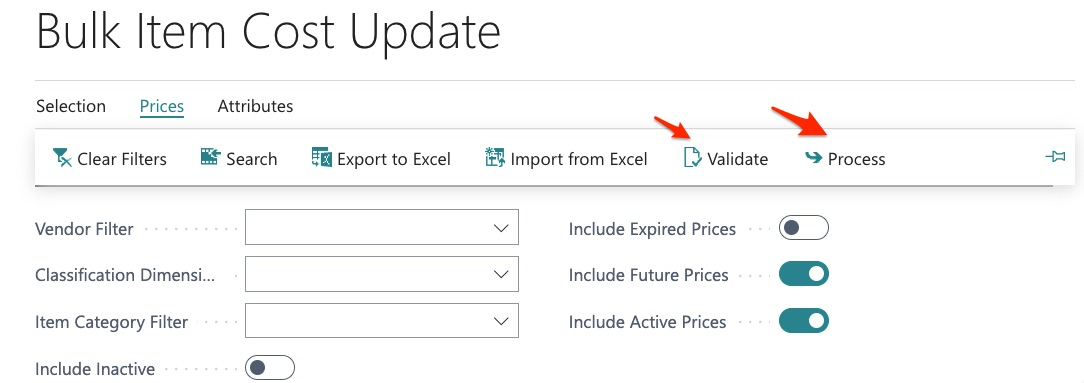
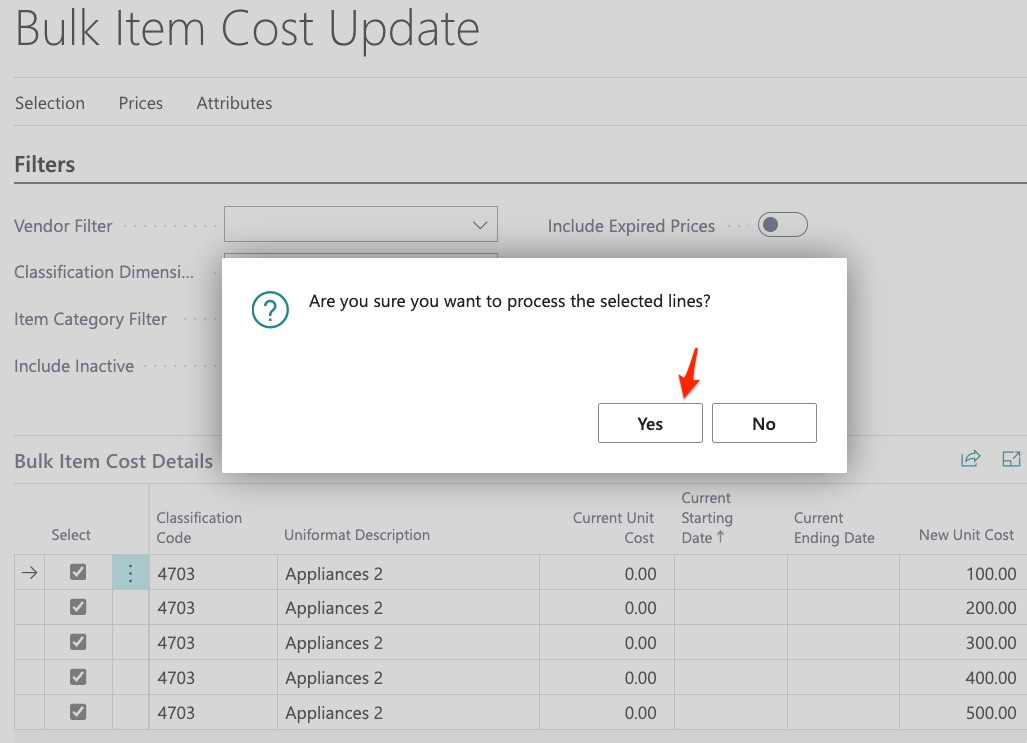
We are now finished:
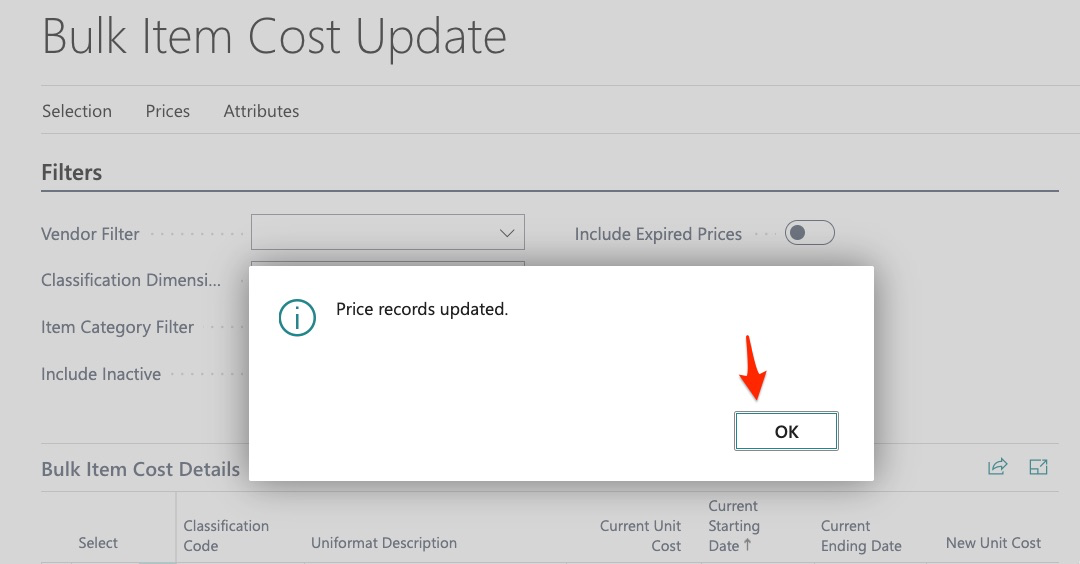
We can now check our items:
In the costing and posting section, we can see we now have a price record:
Success.
We can also now see that our items have costs when we run Bulk Item Cost Update:
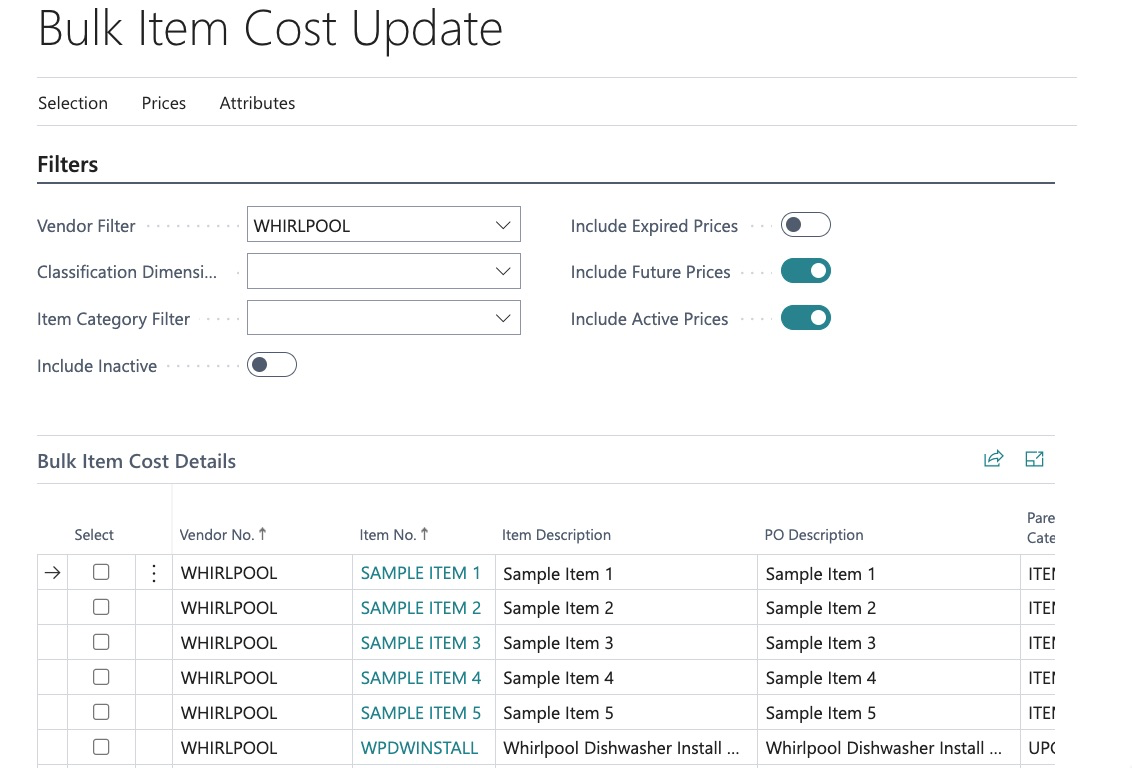
This means that moving forward, we can adjust our vendor costs using Bulk Item Cost Update. If you are new to BuildBase and creating your item library and vendor costs from scratch, keep in mind that you can leverage these tools and import all new data which will make implementation a breeze.
Now that we have assigned item costs in bulk, it is time to illustrate how to assign primary vendors using our bulk tool.
How to Assign Primary Vendors in Bulk
In this example, we want to assign our sample items to a primary vendor for each project:
We know we already assigned costs to these items for Whirlpool Corporation and that is important, we cannot assign a primary vendor to an item that does NOT have a cost.
To start this process, we simply select:
Next, we find the items:
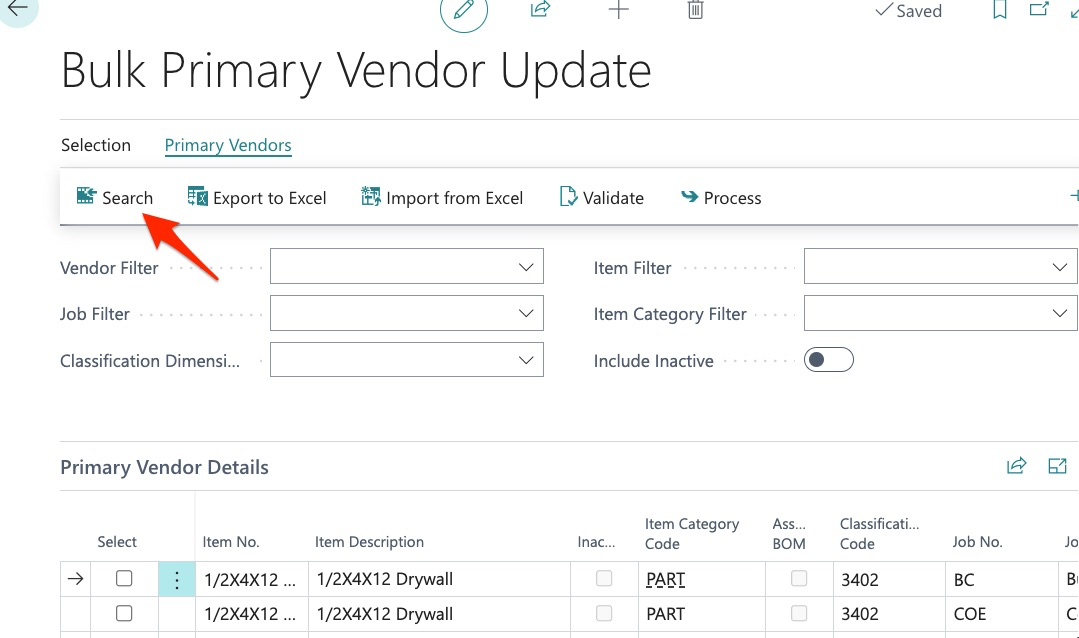
In this example, we run it with no filters so that we get the entire list.
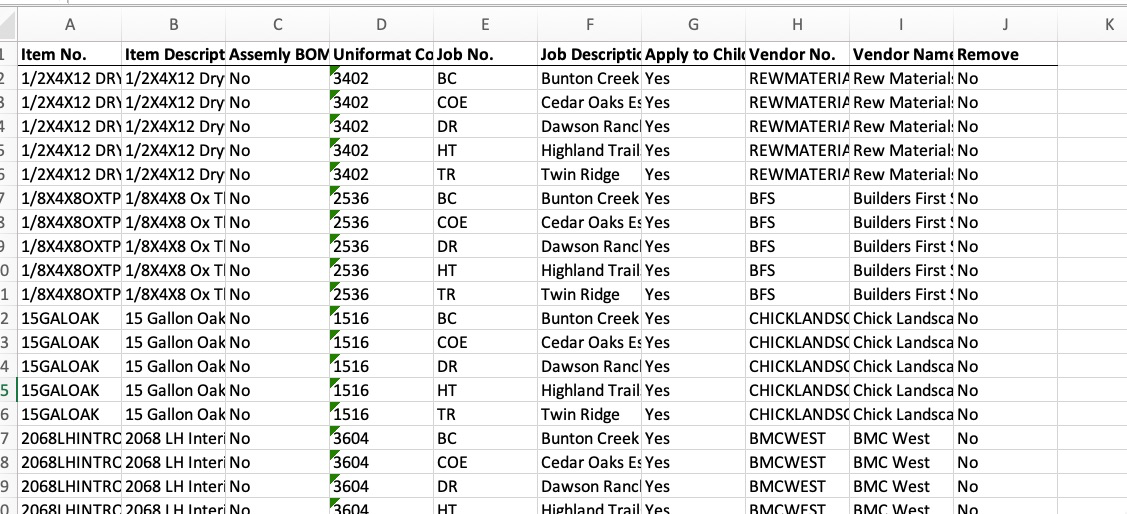
Just as we saw previously with Bulk Item Cost Update, our items are not here. This is because they have not yet been assigned. We must create a record and assign the desired vendor. However, we can simply use our previous exports to copy and paste the required information:

The only information required to accomplish this are the fields completed above.
We then follow the same import steps:
- Import
- Select all
- Validate
- Process
And then, we are finished.
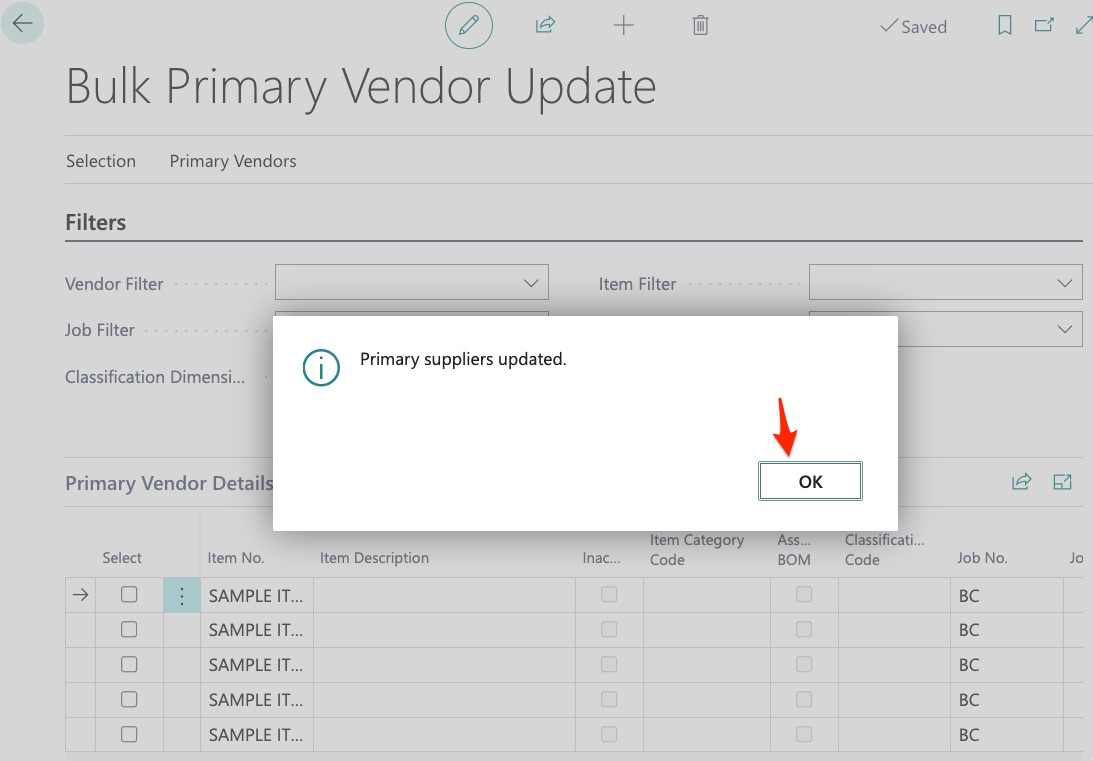
We can now see that our assignment was a success if we look in Stockkeeping Units:
We have covered a lot in this guide so let’s review the steps for each process.
Steps for Vendor Cost and Primary Vendor Assignment
Prior to this process:
All vendors must be created in the system
All items must be created in the system
Singular method - Vendor Costs
- Navigate to Item Card
- Select Prices and Discounts, then Purchase Prices (OR Cost and Posting fast tab in the item, click on Purchase Prices and Discounts)
- Enter Vendor, UOM, Cost, Start Date
- Keep in mind you can also assign vendor project specific costing and can assign this item to multiple vendors and manage their costs as well.
Singular Method - Primary Vendor Assignment
- In the item card select Related/Warehouse/Stockkeeping Units
- Click New
- Select Project
- Select Vendor
- Repeat until item has been assigned to a vendor for each project
Bulk Vendor Cost Assignment
- In the item library select Process/Bulk Item Cost Update
- Filter and search to find the items. If items are not currently costed, the items will not appear in the report and you will need to run Bulk Item Library to find the items, then copy and paste into “Import Purchase Prices”
- Complete the spreadsheet and import back into system
Bulk Primary Vendor Assignment
- In the item library select Process/Bulk Primary Vendor Update
- As with bulk cost assignment, if the items do not currently have a vendor assignment, you will need to use Bulk Item Update to find the items and paste them into this sheet.
- Once item numbers are entered in Bulk Primary Vendor Update, just add the job NO (Project/Building/Unit) code as well as the vendor number.
- Then import sheet back into system
Tips/Tricks
How do I find items that are missing costs?
Answer: BuildBase Cost Model
How do I find missing primary vendors?
Answer: BuildBase Cost Model
If you are new to BuildBase and need to assign ALL items to a vendor, start with 1 project, and then use the import sheet for each additional project and simply change the JOB NO. However, be very careful when using find and replace in Excel as you do not alter data incorrectly.
Example:
You may want to change BC (Bunton Creek) to COE (Cedar Oak Estates) and it will work…but it could also find a vendor like ABC Fence (whose vendor number is ABCFENCE and change it to ACOEFENCE. As with any alteration of data, just be disciplined.
As you add new items and your library grows, you will need to continue assigning costs and primary vendors but with these tools, it should be a quick process.
Searching and filtering by using a vertical line or “Pipe” key
Multiple parameters may be used when filtering through use of the vertical line key. For example, here in “Bulk Item Library Update”:
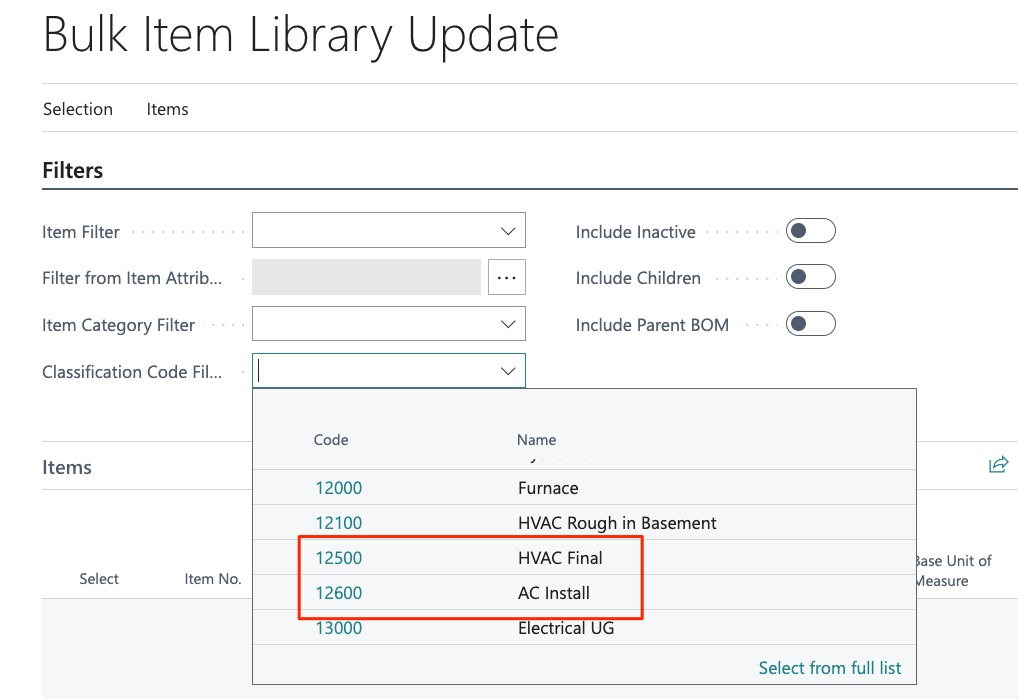
We may want to filter to multiple classification codes, we can do this by separating each parameter with a vertical line:
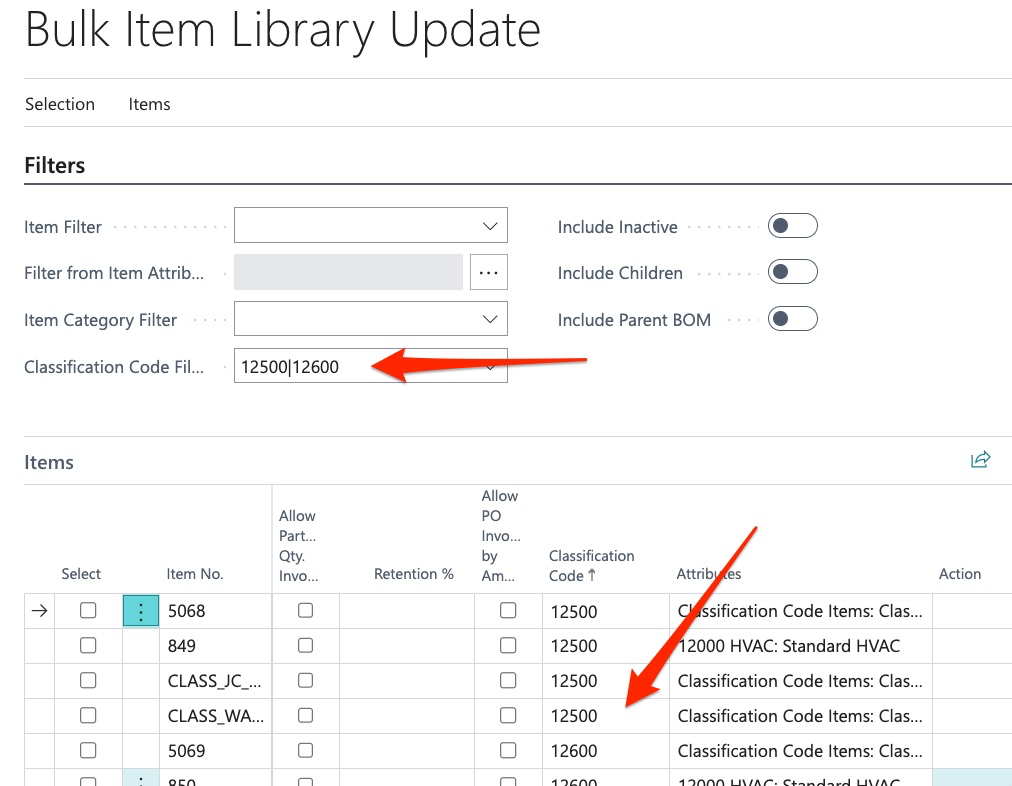
We can now see all classification codes that were searched. This method may be applied to ALL fields within the BuildBase Bulk Tools:
We hope you found this guide helpful, please don’t hesitate to reach out to the MyHomebuilder Team with questions!