Sales Document Configuration

The following guide will take you through the steps needed to successfully operate and manage the Sales Documents section of BuildBase. You will require a standard or pro version of Adobe Acrobat in order to configure sales documents. For the purpose of this guide, we will approach it as if the document is new and has not yet been configured.
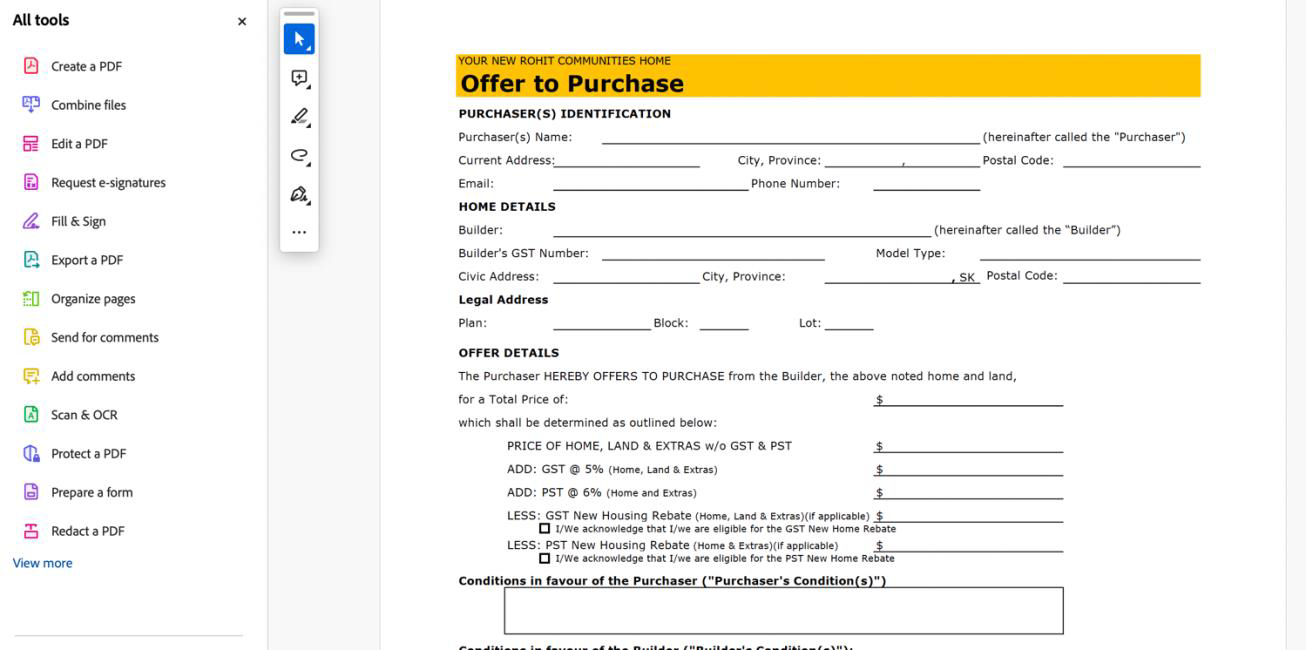
STEP 1 – UPLOAD DOCUMENT INTO ADOBE
Within Adobe, upload the sales document needing configuration:
Once uploaded, we will use the Prepare Form function inside Adobe to configure fields withing our document.
STEP 2 – INPUTTING PRE-MAPPED FIELDS FROM BUILDBASE
The Sales Fillable PDF excel file below contains a list of the system fillable fields that can be used in sales documents.
Sales Fillable PDF Available Fields V0.1.xlsx
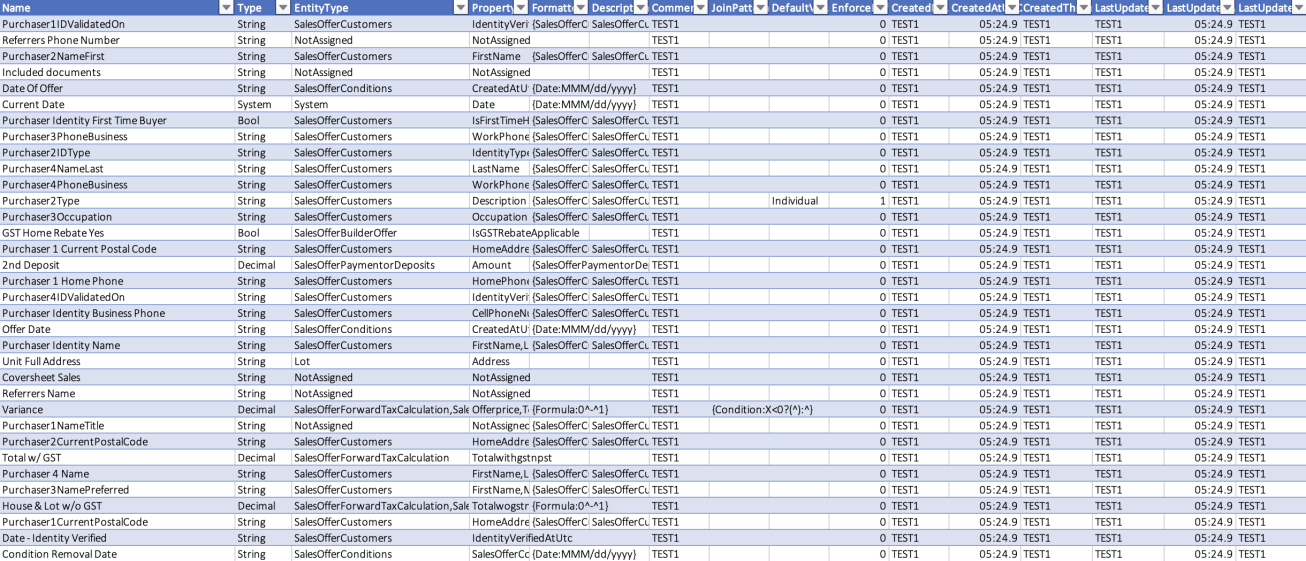
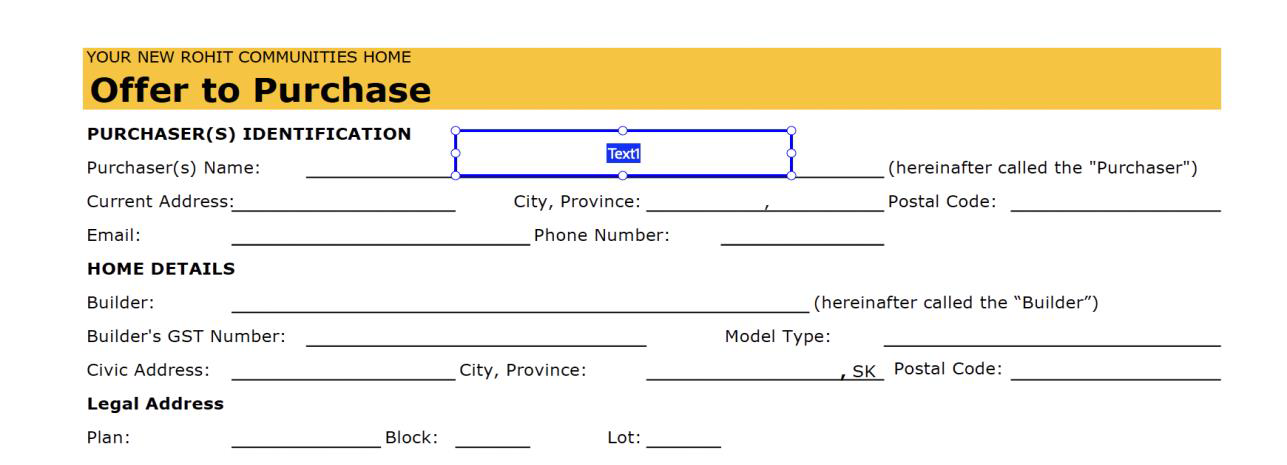
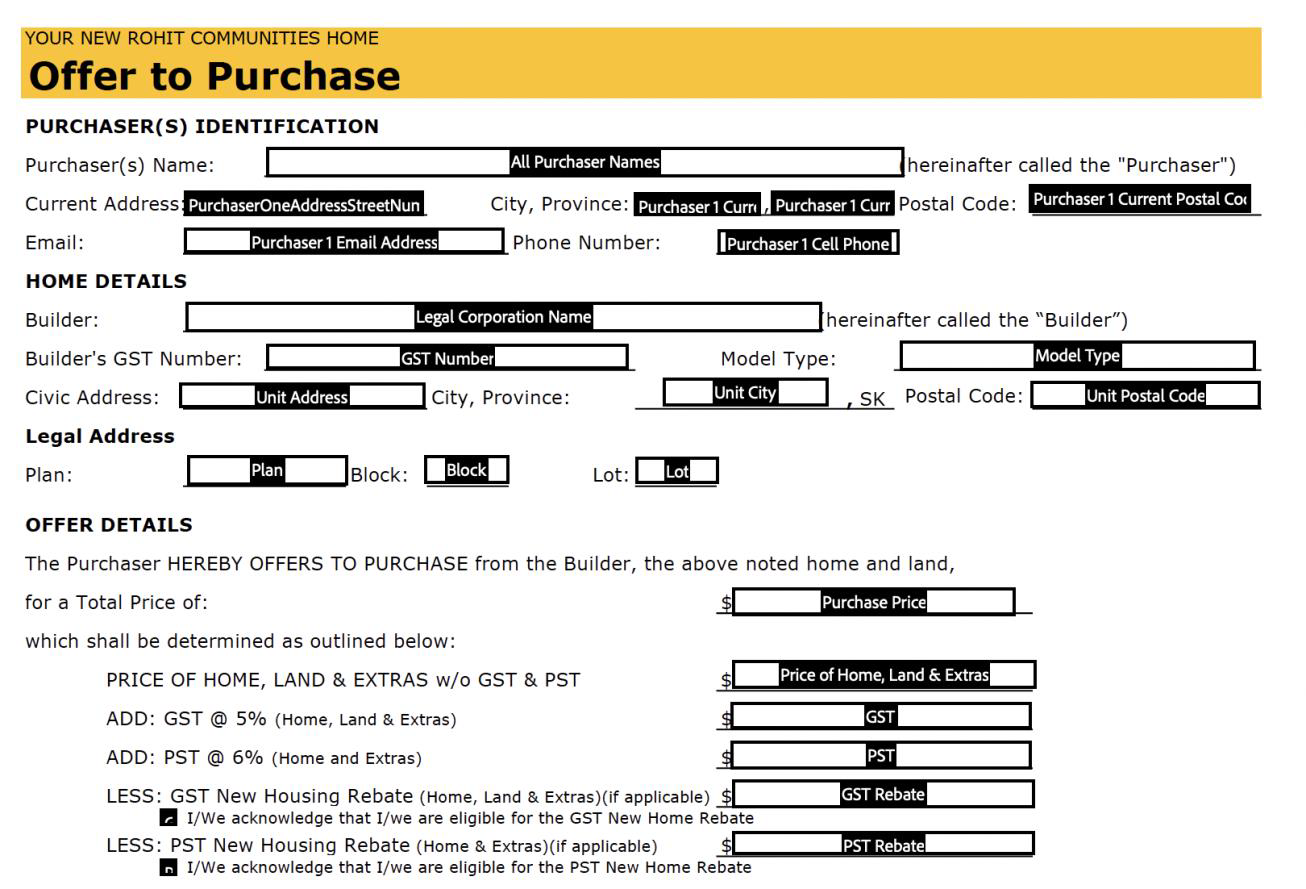
Column "C", Field Name, holds the exact names of the fields we will use to populate most of our sales documents. These naming schemes are fairly intuitive, and must be followed to the exact case sensitivity, spacing, etc. We will insert these field names into our document where needed, and upon contract generation, they will automatically pull from our database – eliminating the need for manual entry. An example of populating a field is done below:
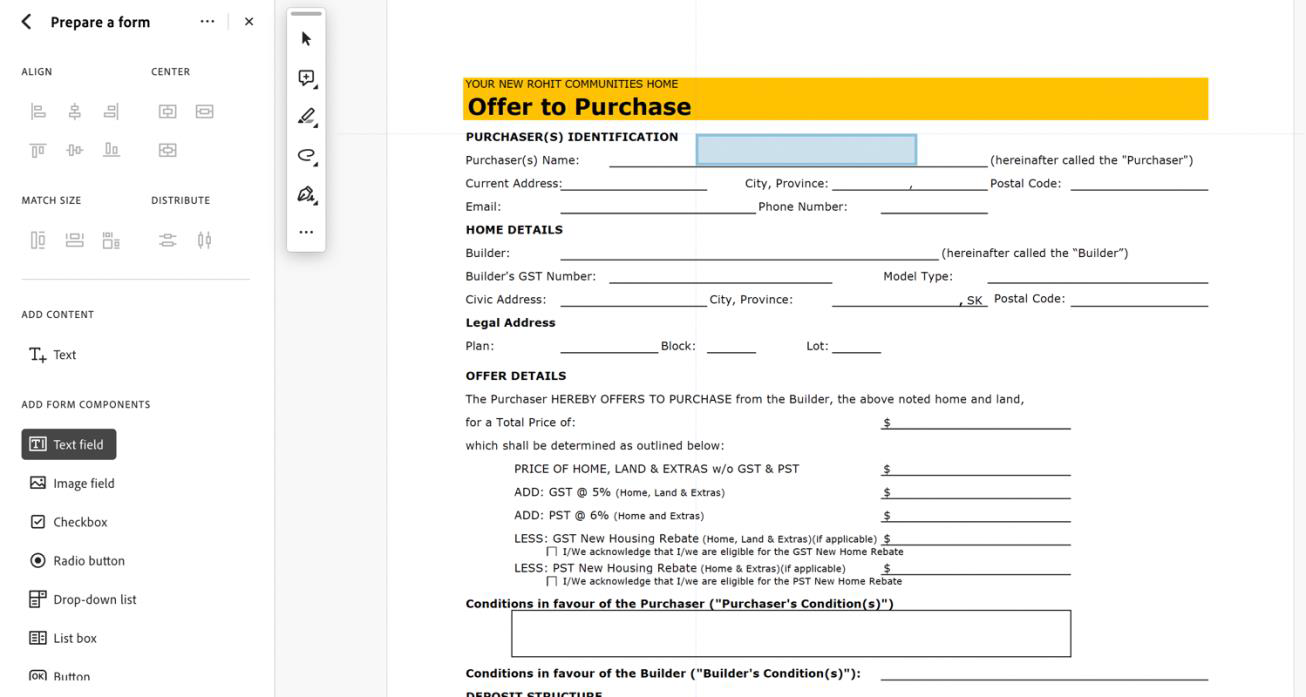
Using the Text field component, drag and drop a new field into your document.
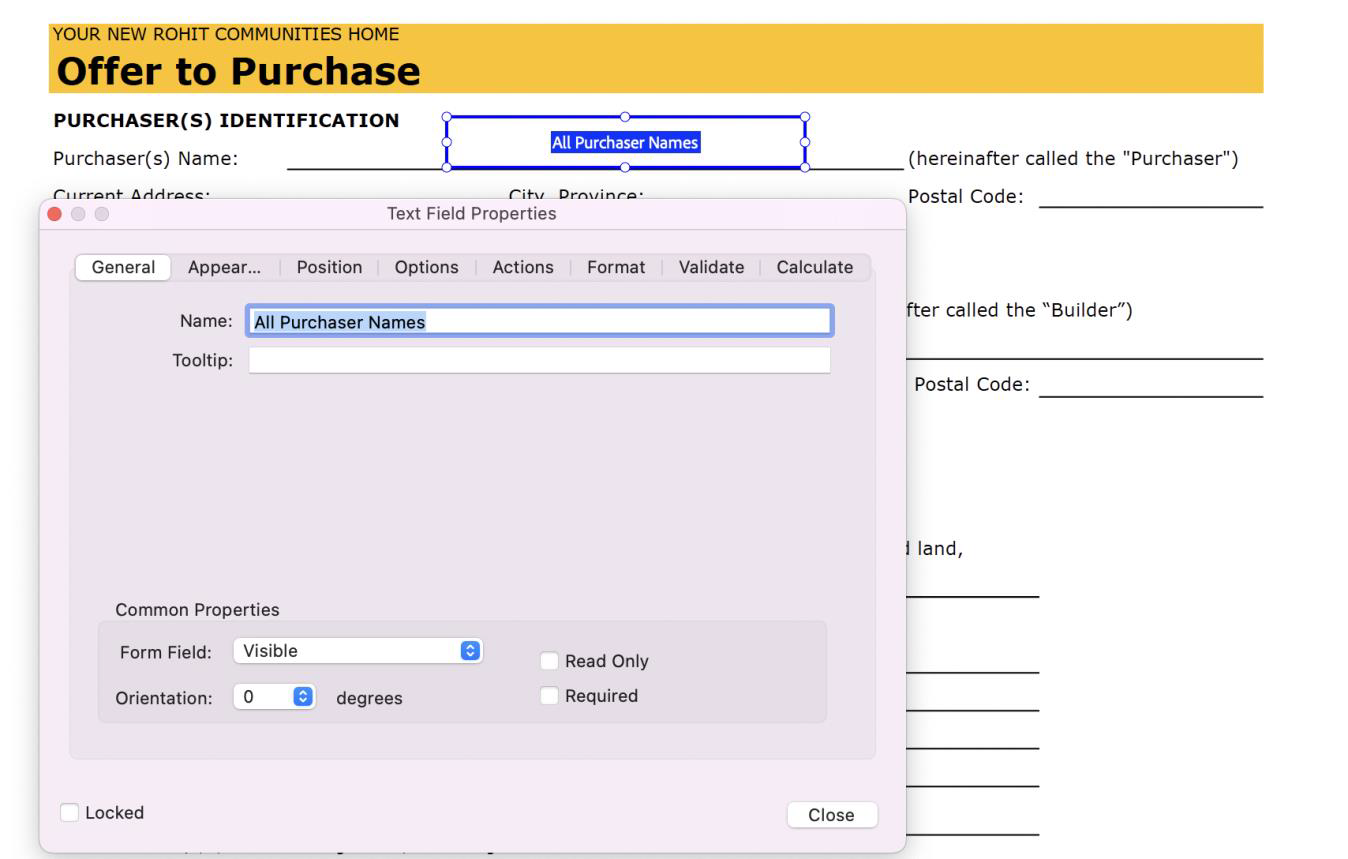
Edit the name of the field, to match your desired field:
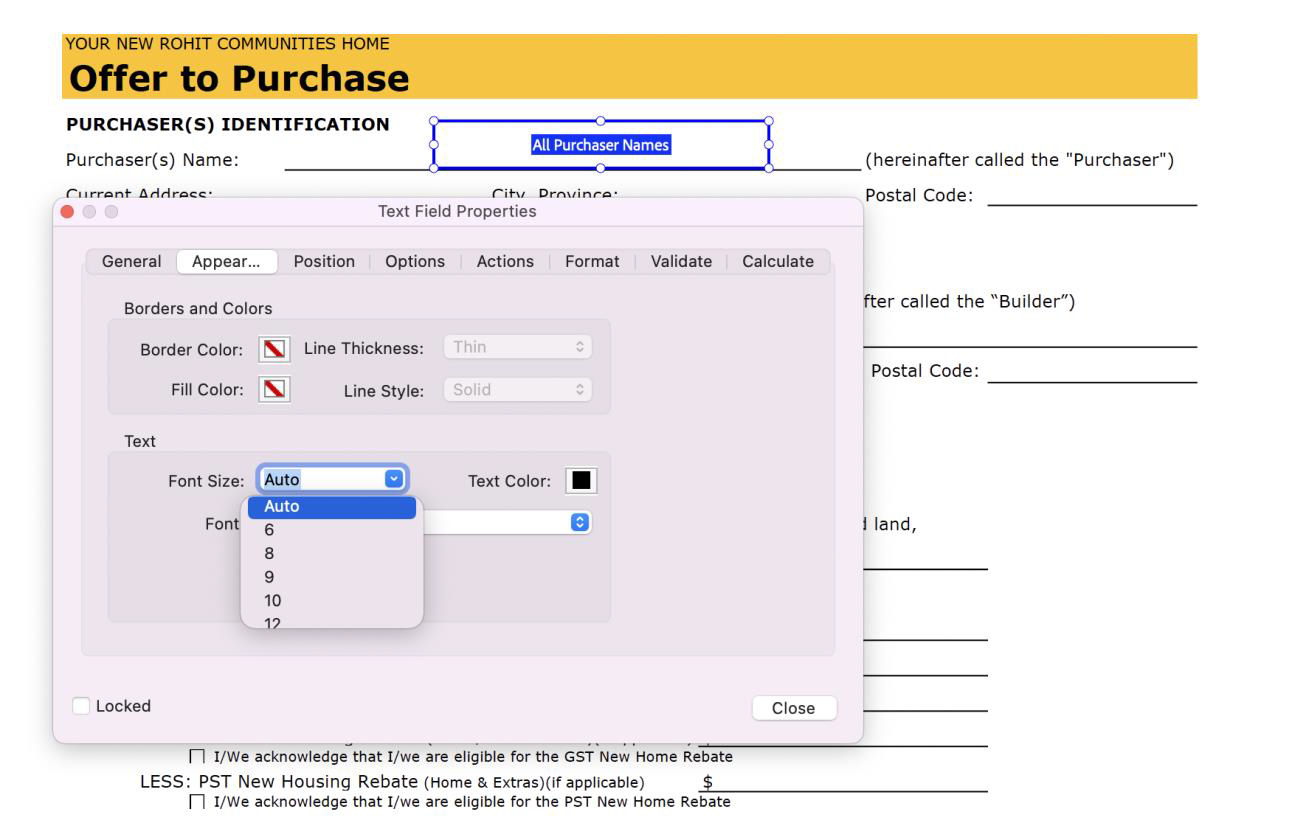
Under the Appearance tab, ensure that the front size is set to automatic. Otherwise, you will run into scenarios where lengthy names/titles run out of space in the box and get cut off. Additionally, configure the font style to match the branding of your document is desired.
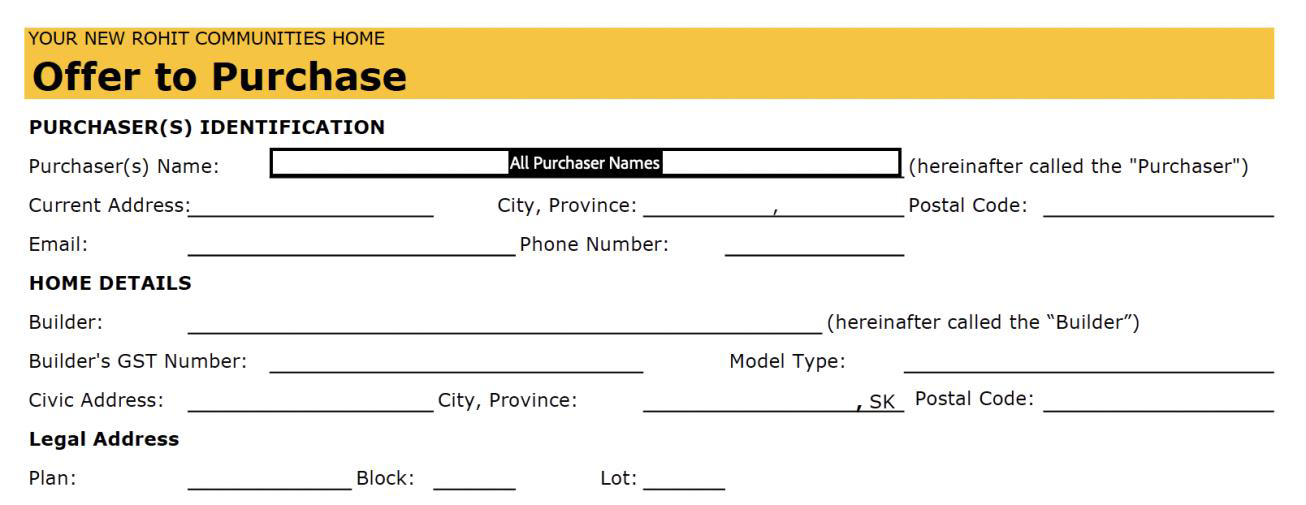
Adjust the shape of your field box – to align and match the line space given:
Repeat this step for all fields in which we have automatic fields for:
STEP 3 – CREATING A CUSTOM FILLABLE FIELD
There exists the option to have fields that are manually fillable by the user generating the contract. To do so, we need:
- Create a new field name in the document
- This can be any name you choose, but ideally have it make sense.
- Apply this new fillable field inside BuildBase on the specific document.
- Buildbase -> Sales -> Documents -> Documents Sub Section -> Find Document (Add if new) -> Actions -> Edit -> Add Field -> Enter field key name, Type, Display Label, Display Sequence, Description, Default Value -> Set as Active.
Let’s take our OTP for example. We would like users of the app to be able to manually type in Sales any ‘Builder Conditions’ that may exist on a given deal. We will set a field name of our choosing inside Adobe’s Prepare, and log this field name. Let’s name it ConditionsInFavourOfBuilderSK.

You just follow the same steps, setting the field and shaping it, along with ensuring the text size is set to AUTOMATIC. From here, we will navigate to the document inside BuildBase as outlined above in point II.

We will add a new field on the bottom of the document Edit section.
- There will be fields needed to be selected. First, we will select the document we are making the fillable field on, in this case it is our ‘OTP’ document.
- We will enter the Field Key Name – this is the name of the field we configured on our document above.
- Select TextBox as the type.
- Set the Display Label and Description. These are how the user will identify the field they are filling inside BuildBase:
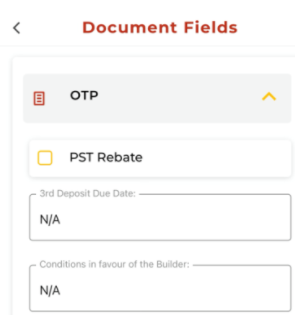
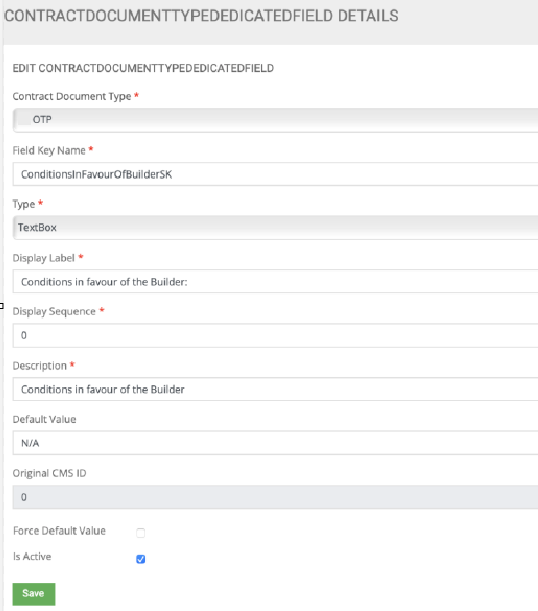
You can additionally set a default value in the box. For this field, we have set it to Default to ‘N/A’ unless overwritten by the user. Ensure the field is set to active and saved for it to appear inside BuildBase.
STEP 4 – VERIFY FUNCTIONALY OF ALL FIELDS
The final step in the process is setting the document status to whatever is required (Hidden, Mandatory, Is Fillable, Is Multiple, Is UnEditable, Is Active). Documents selected as Mandatory and Active, while applied to an active selling region, will mandatorily pull into all contracts generated. If the document should fall into the Optional Documents section of BuildBase– the ‘Mandatory’ field should be left unchecked, however the document still needs to be applied to the desired projects.
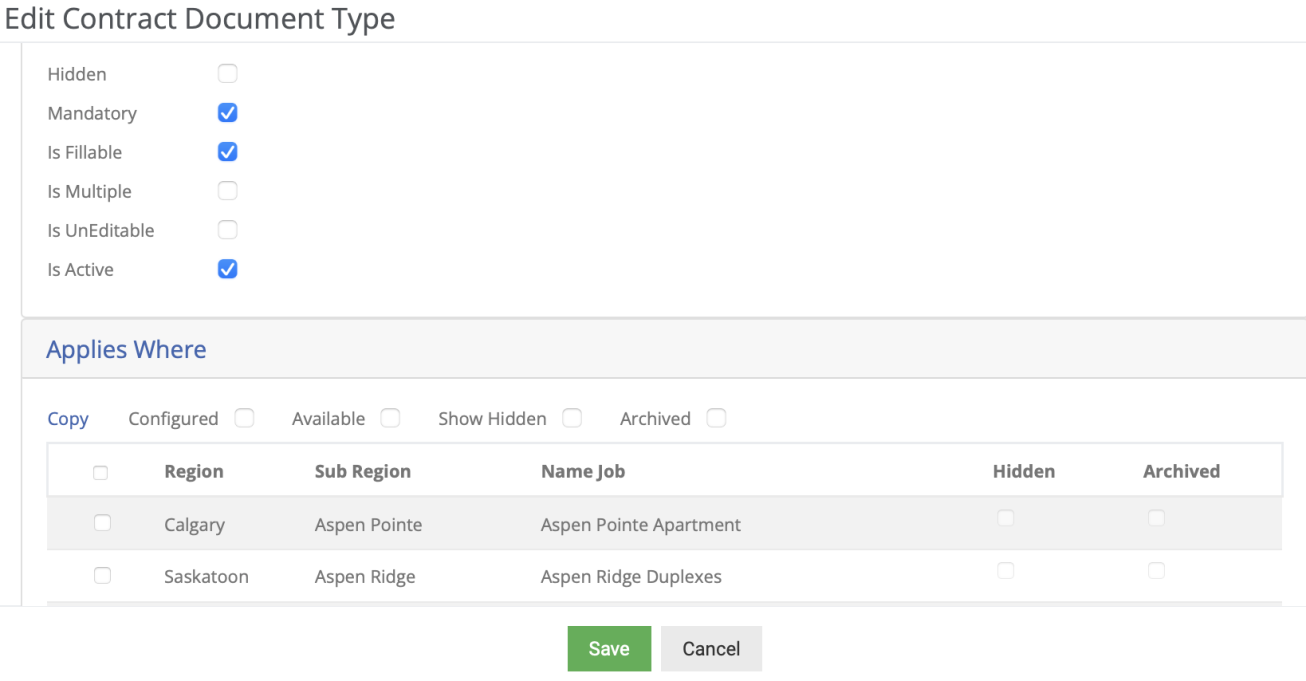
Document application can also be done in bulk across multiple projects in the document configuration section of the Documents module.