Bulk Item Creation and Modification Tools

BuildBase offers 2 great tools for bulk creation and modification of items:
Bulk Item Library Update
AND
Bulk Item Update
While these 2 tools are very similar, their intended functions and uses are different. In this guide, you will learn how and when to use each tool.
Let’s start with a brief summary of each tool.
Bulk Item Library Update can:
- Create new Items in Bulk
- Create and manage Item Attributes in Bulk
- Create and Manage Assembly BOMs in Bulk
Bulk Item Update can:
- Modify existing Items
Bulk Item Update is NOT used for:
- Creation of new items
- Creation/modification of attribute assignment
- Creation/modification of assemblies
If you understand these primary functions, you will always know which Bulk tool to use when working with items.
Now that we have covered the basics, let’s take a look at both of these features, we will start with Bulk Item Library Update.
Bulk Item Library Update
If your organization is just getting started in BuildBase, this will likely be one of the first bulk tools you use as you create your item library.
Primary Use:
- Create/import new items
Creation of new items using Bulk Item Library Update
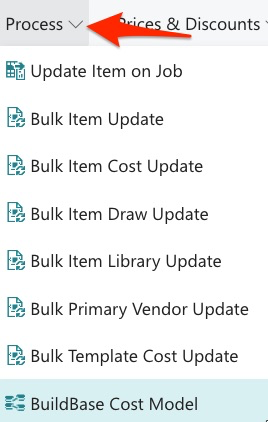
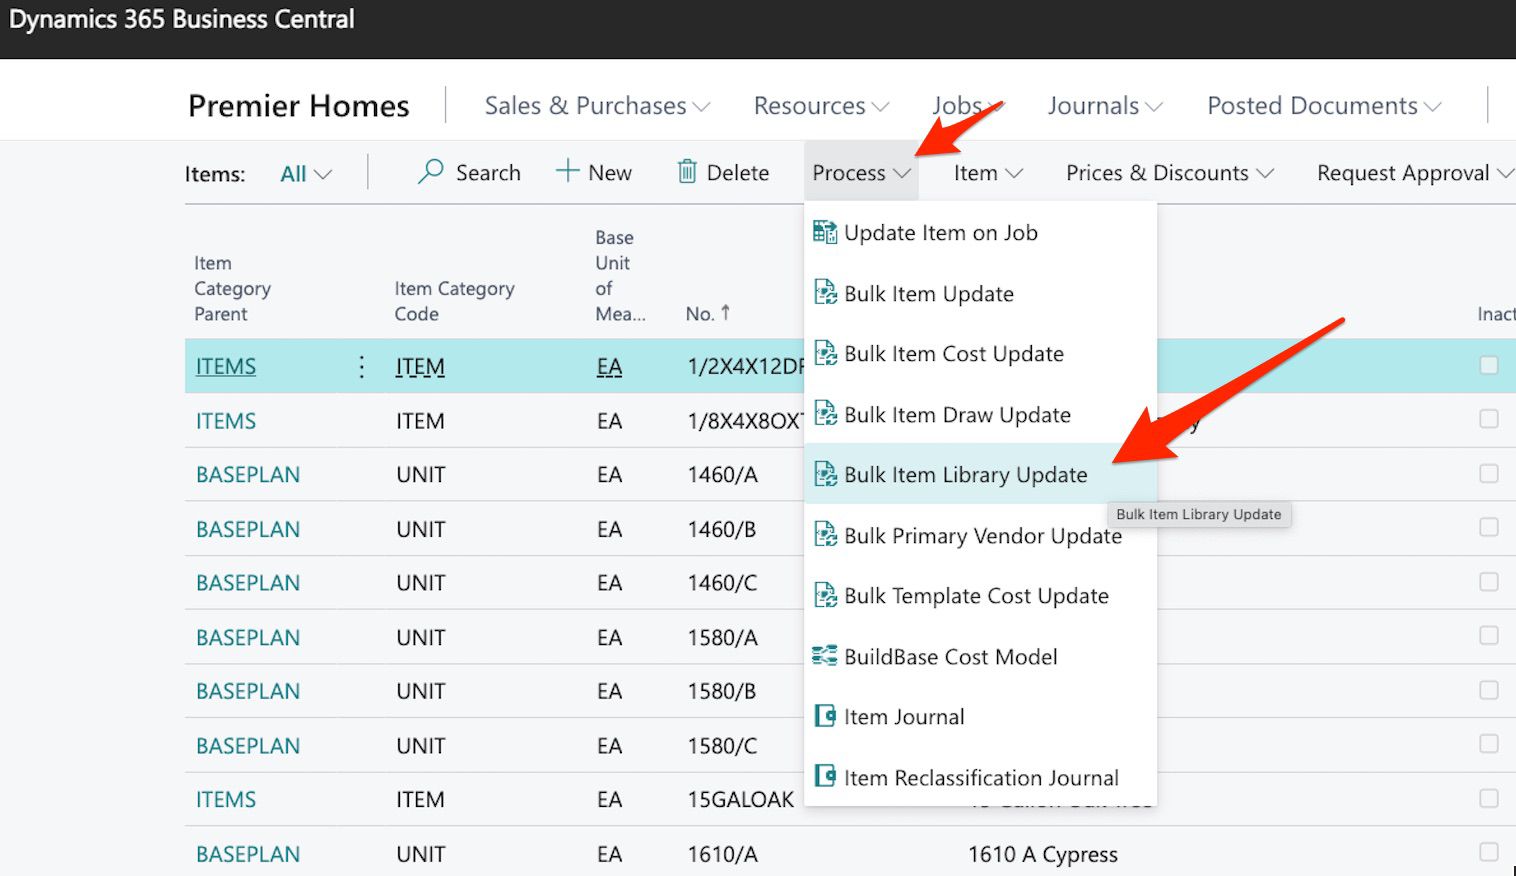
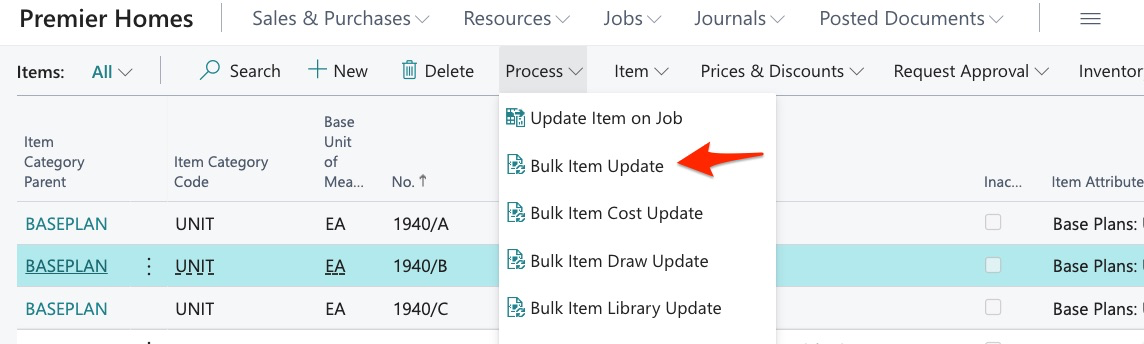
Let’s get started by creating some new items in bulk. We start by navigating to our item catalog and next select, Bulk Item Library Update from the “Process” menu:
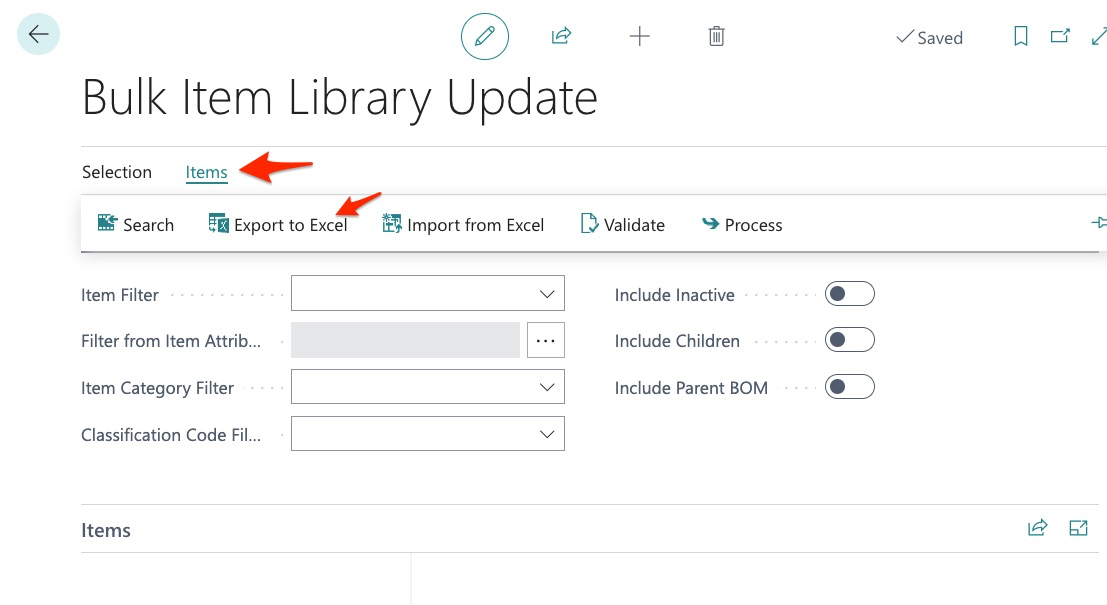
We import new items by selecting:
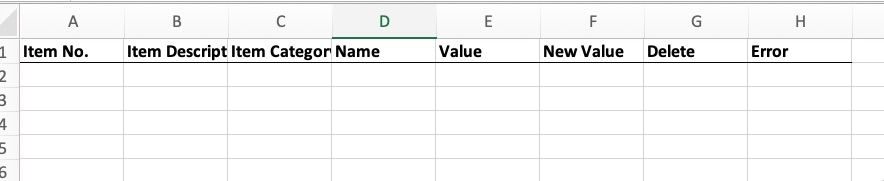
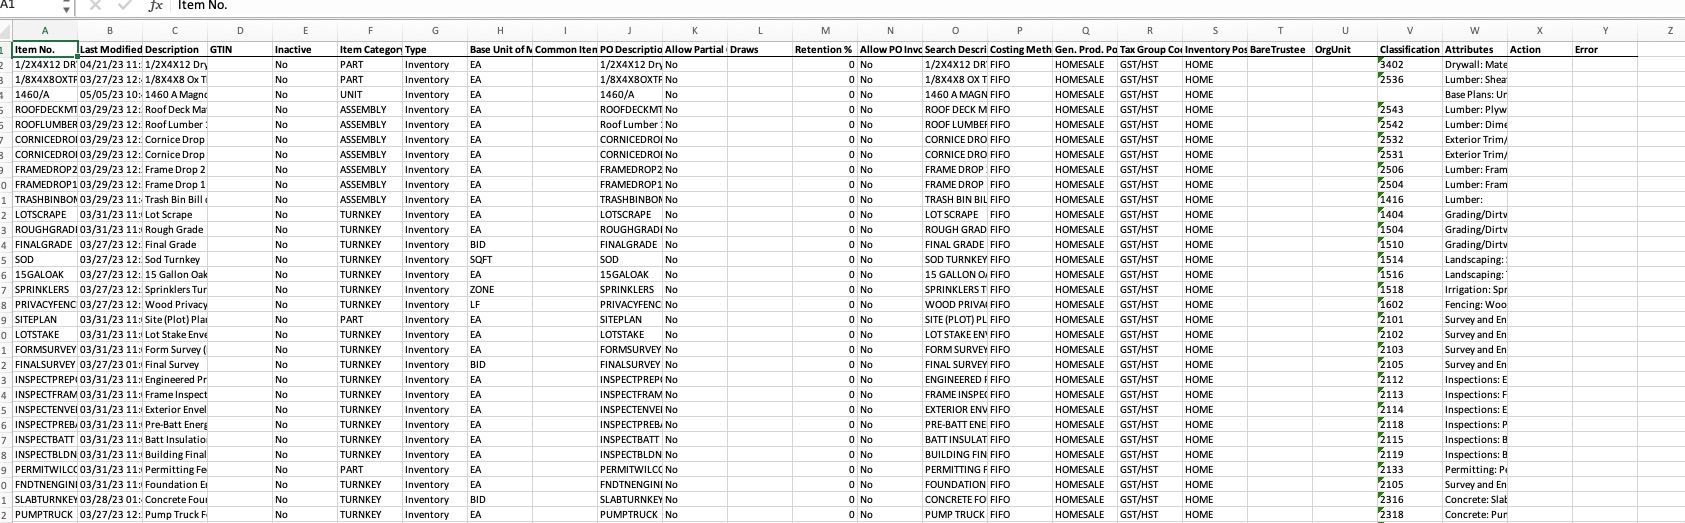
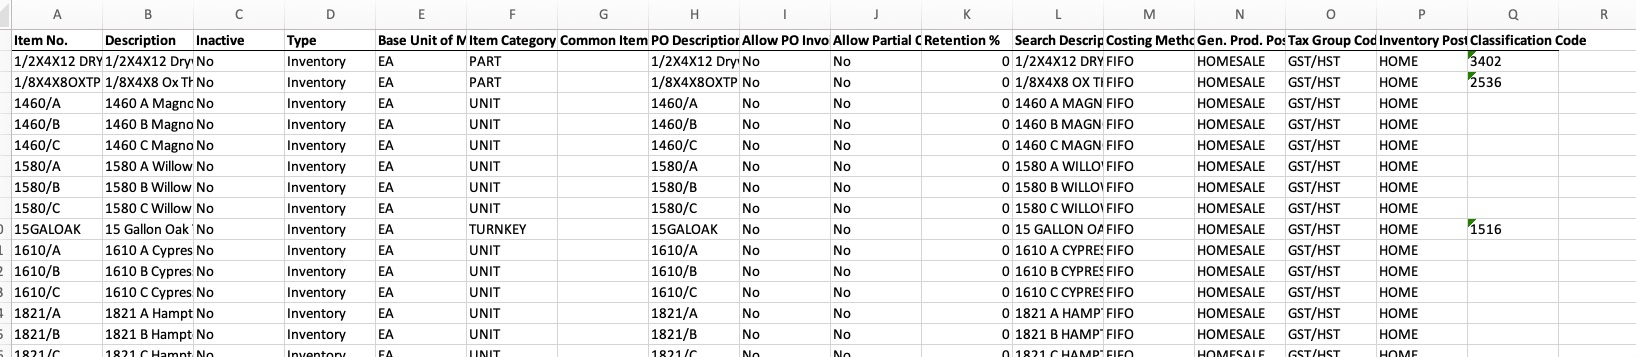
We then see this export sheet:
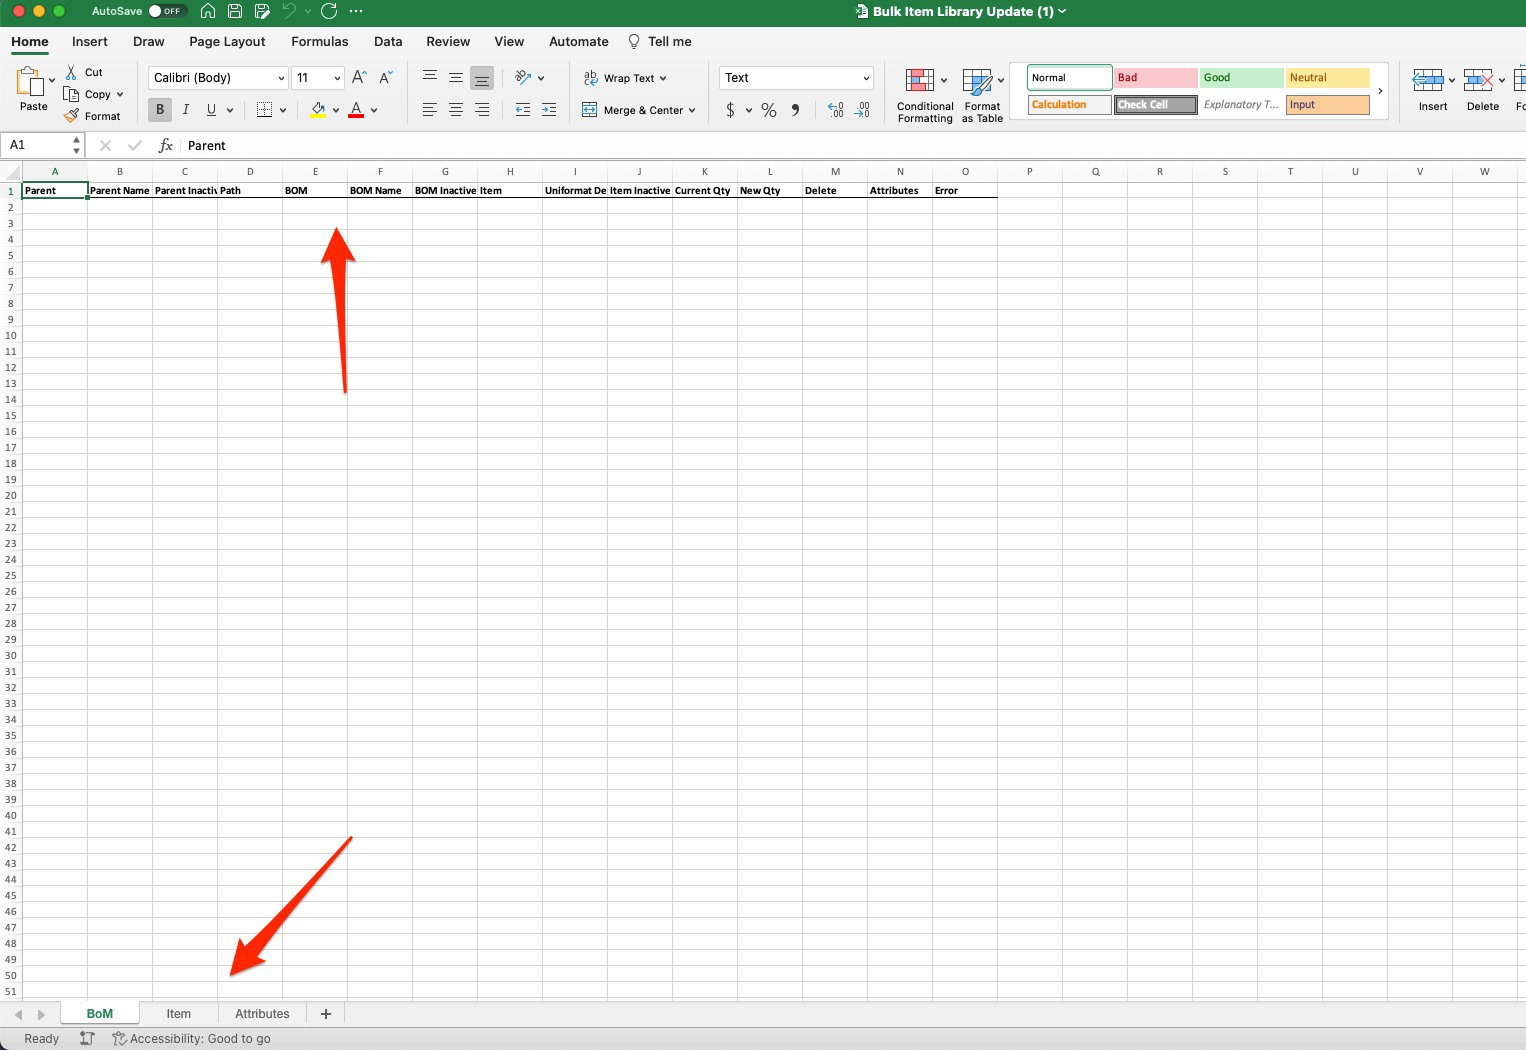
Obviously, as a new user it might be difficult to fully understand all the fields present on this export but, if you have been following the setup process, by now most of these fields should make sense.
The BuildBase team will help you setup your first few items which will help serve as an example for all new items created.
We then begin creating our new items and for this step, we can choose to skip the first tab for BOM:
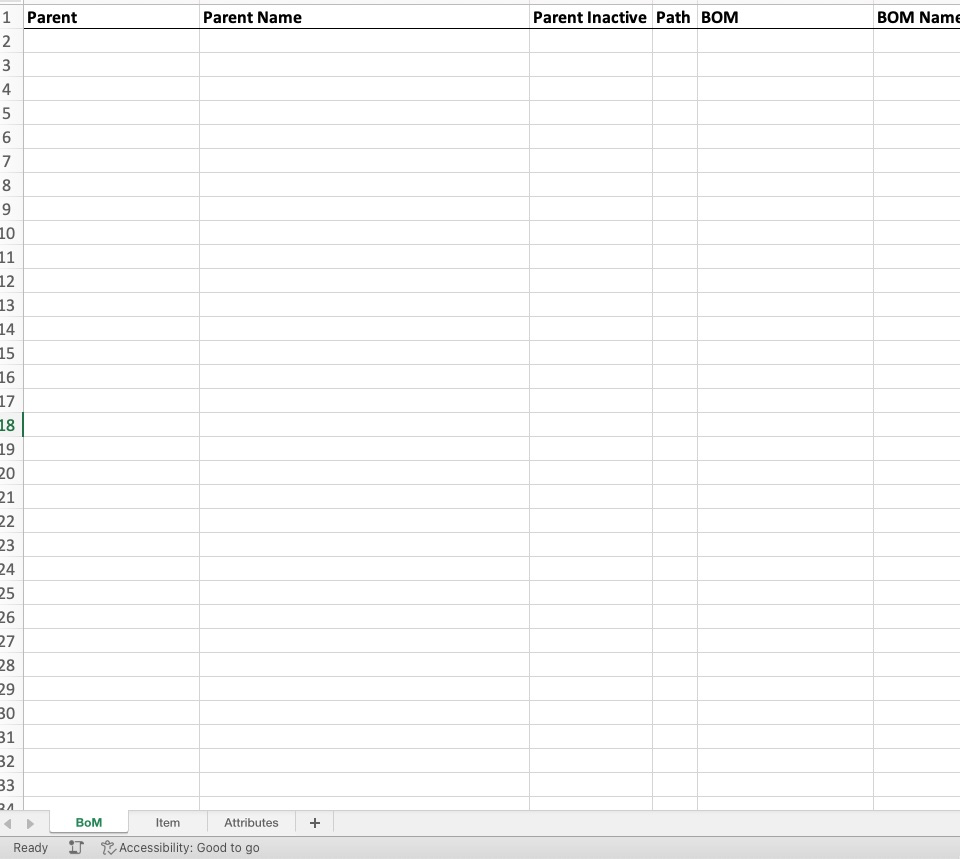
For new item creation, we will use the “Item” tab:
Here, we simply need to complete all the fields. But, keep in mind, prior to creating new items with this bulk tool, there are a lot of steps we need to take such as:
- Creation of classification codes
- Creation of attributes
- Creation of Unit of Measure
- Just to name a few
We highly recommend that you view the “Items guide” and video before you take this step.
In this example, I want to create 3 new items for laminate counter tops:

These fields seem self-explanatory but here are some details:
- Follow naming convention for code and description as this will help when searching
- It is ok if “description” and “PO Description” match – only needs to be different if it benefits the vendor
Our next set of fields:

Again, should be familiar if you have viewed the Items guide but we will point out:
- Search description can be the same as description, and PO description
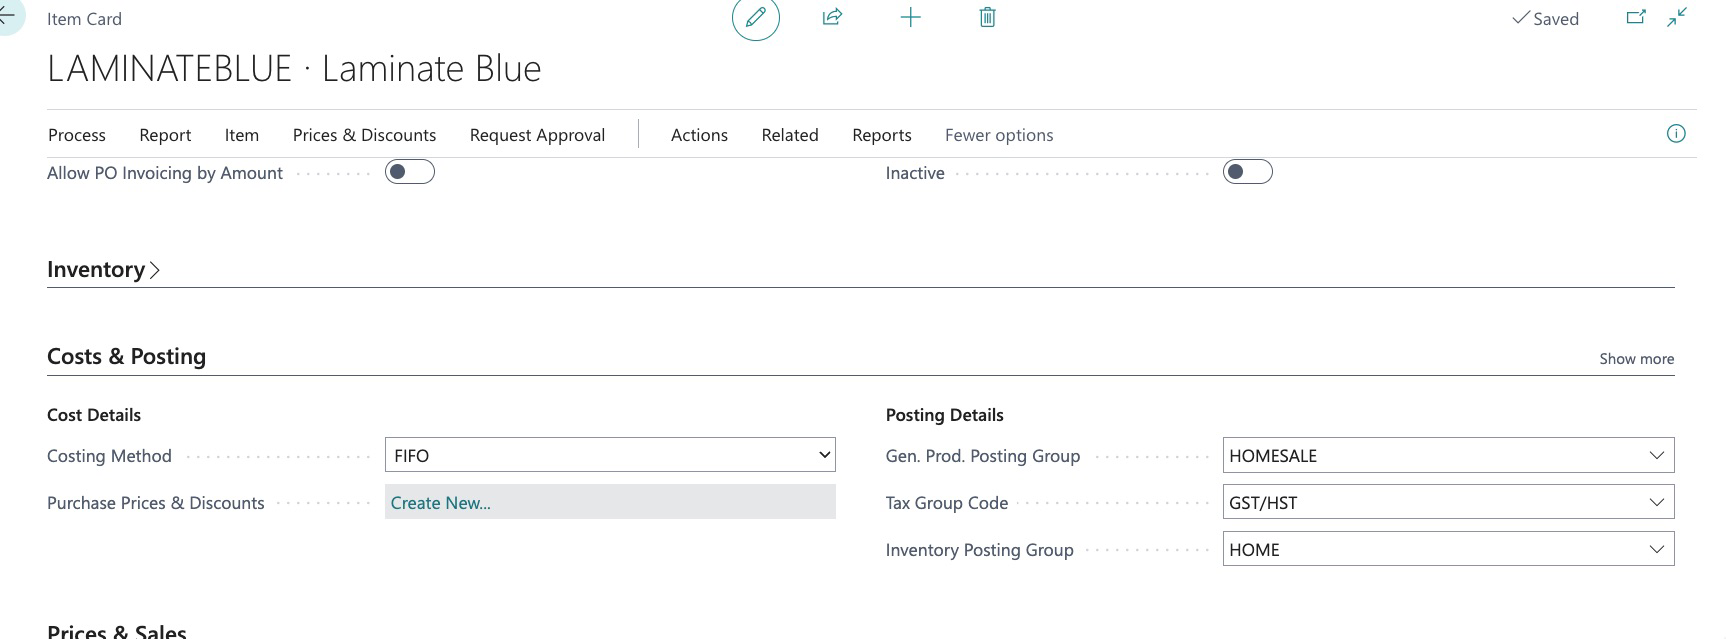
- Costing Method will ALWAYS be FIFO
- Gen Prod Posting and Inventory Posting will likely always be the same (depending on your organization)
And finally:
Here you will notice that the only field we chose to fill was that of classification (cost type). Even though we know the attributes for these items (Countertops: Laminate), adding them here will NOT import them into the system. Attributes only appear here for informational purposes. Later as we modify existing items using this tool, we may want to see the attributes of an item which is why they appear here.
Once this information is complete:

We can now move to the Attributes tab:
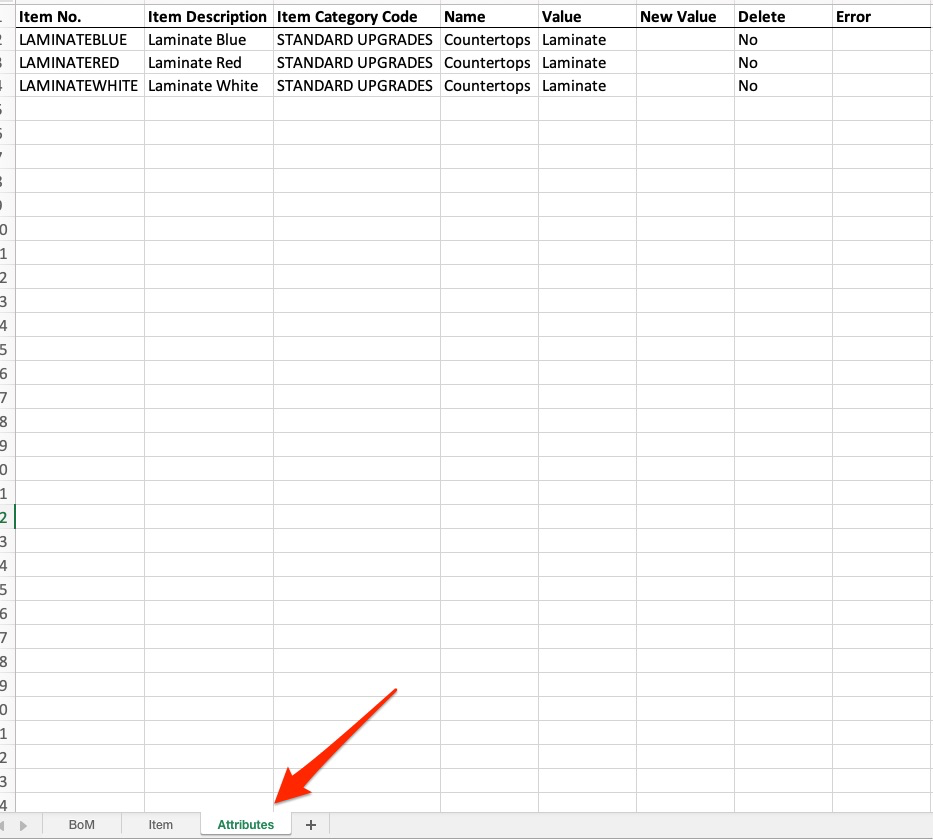
The Attributes tab is where we will enter attributes for our new items:
As you can see, our sheet is blank and we can now copy and paste our item information from the items tab:

Next, we must enter the Attribute Name, and the Value(s) we want to assign:

Here are some rules:
- Attribute name/value must match current attributes/values in the system (this does NOT create new)
- When adding attributes and values to items in which there is no current attribute/value, you must use the attribute Name field and the New Value fields. In our next example we will illustrate how to change attributes and values on existing items.
Quick recap – we have entered our 3 new items on the item tab and have also added attributes for these items. Next, we save our export and import it back into the system.
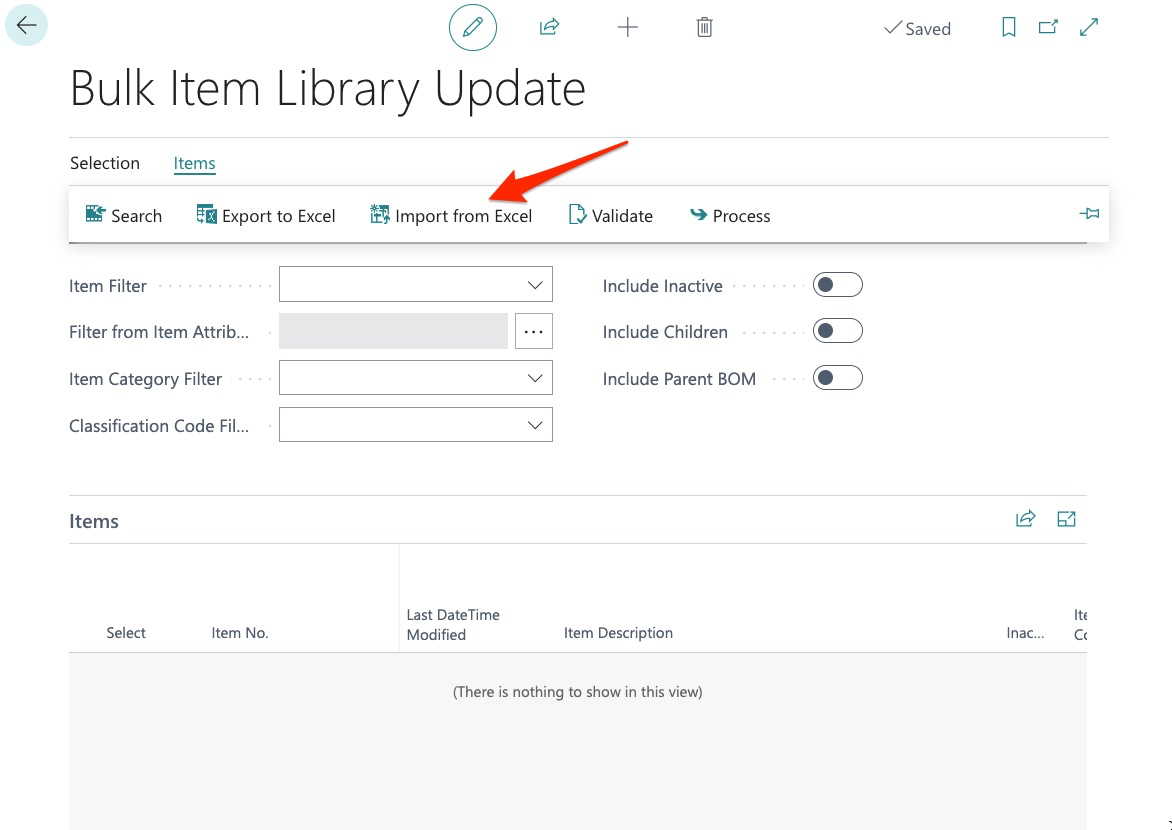
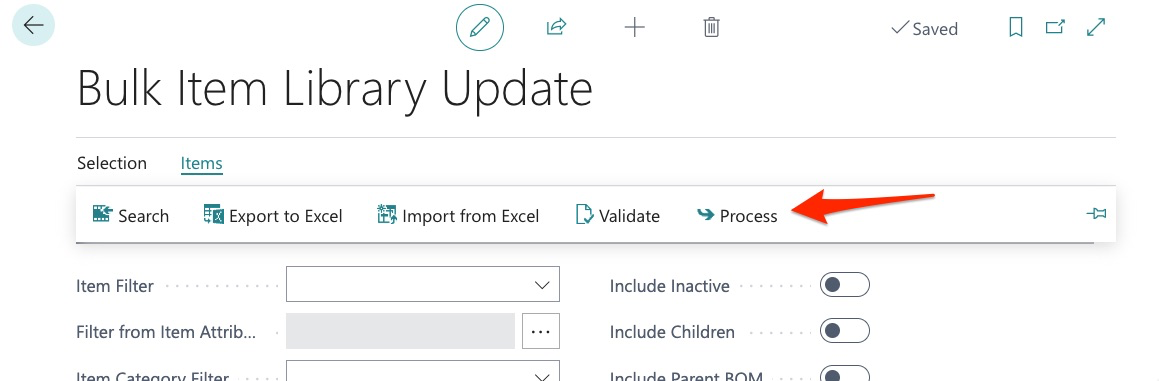
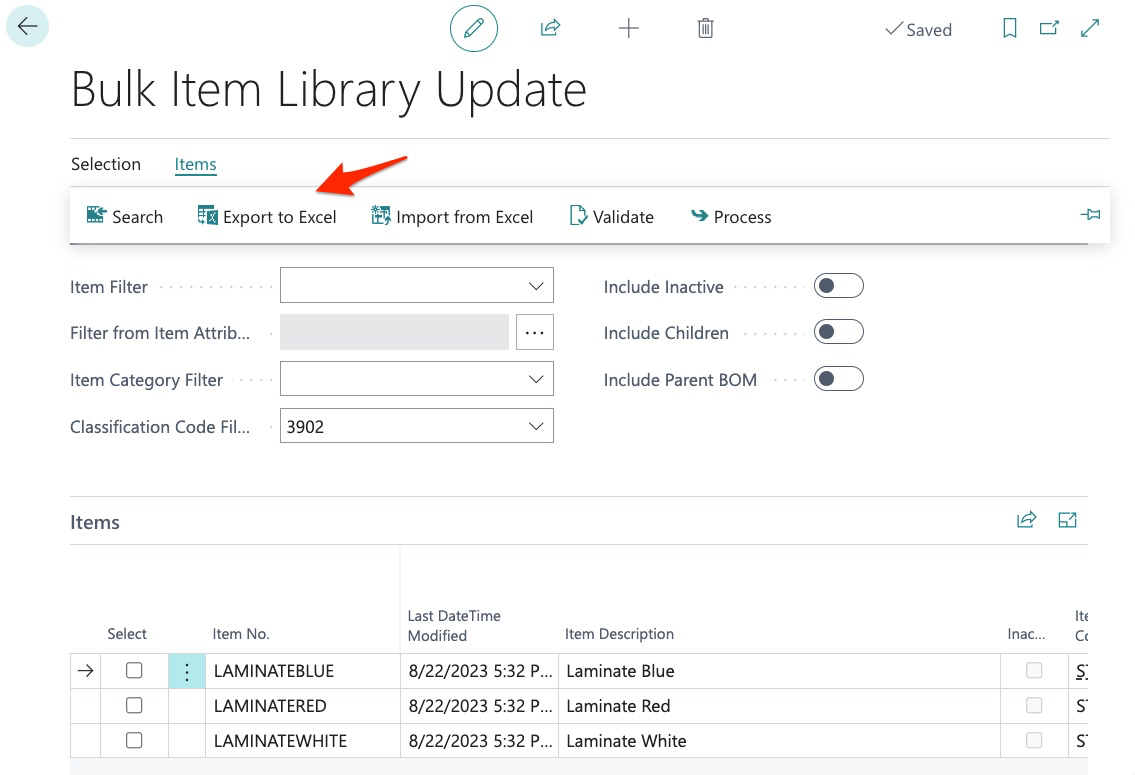
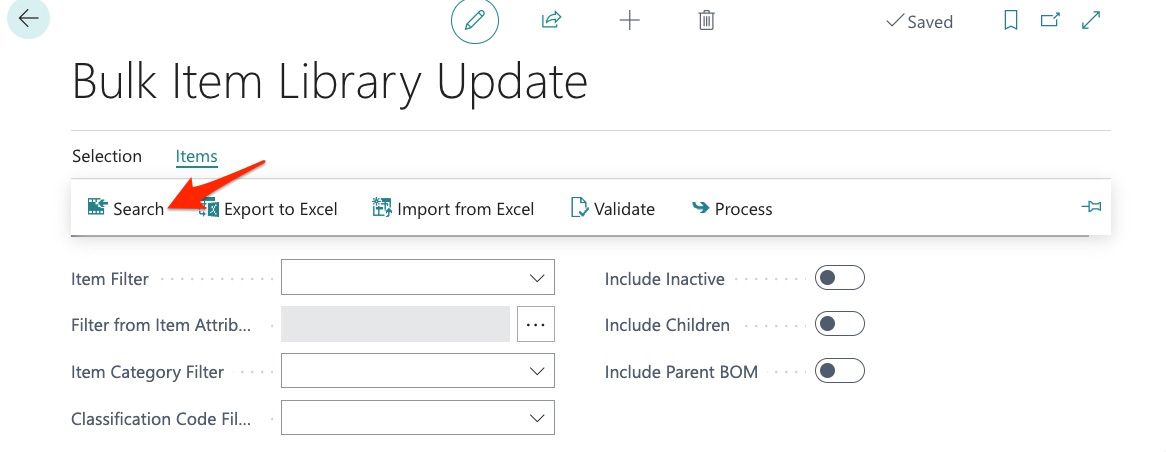
We return to Bulk Item Library Update as we are now ready to import our new items. To import our new items, we first select “Items”:
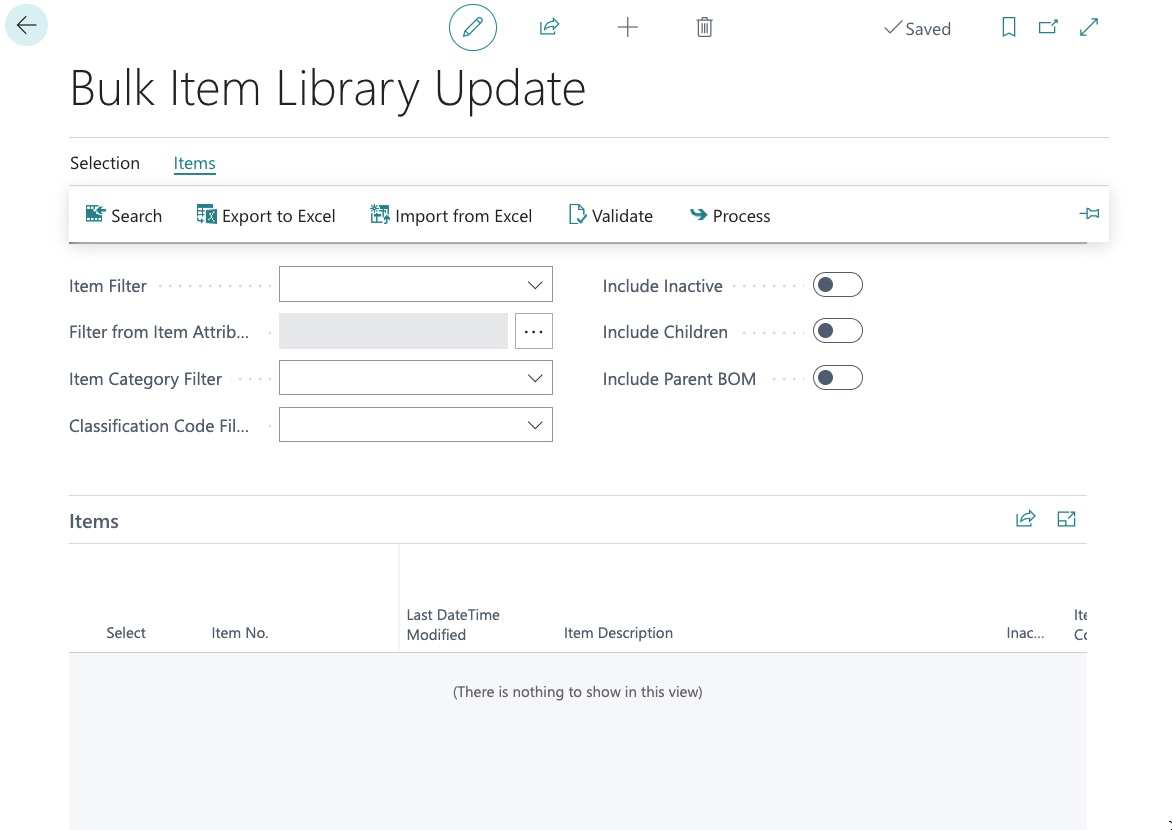
Here we see several options:
- Search – this is what we can use to search existing items once we have entered parameters below
- Export to Excel – this is what we used to get our data spreadsheet
- Import from Excel – this is what we will now use to import our new items
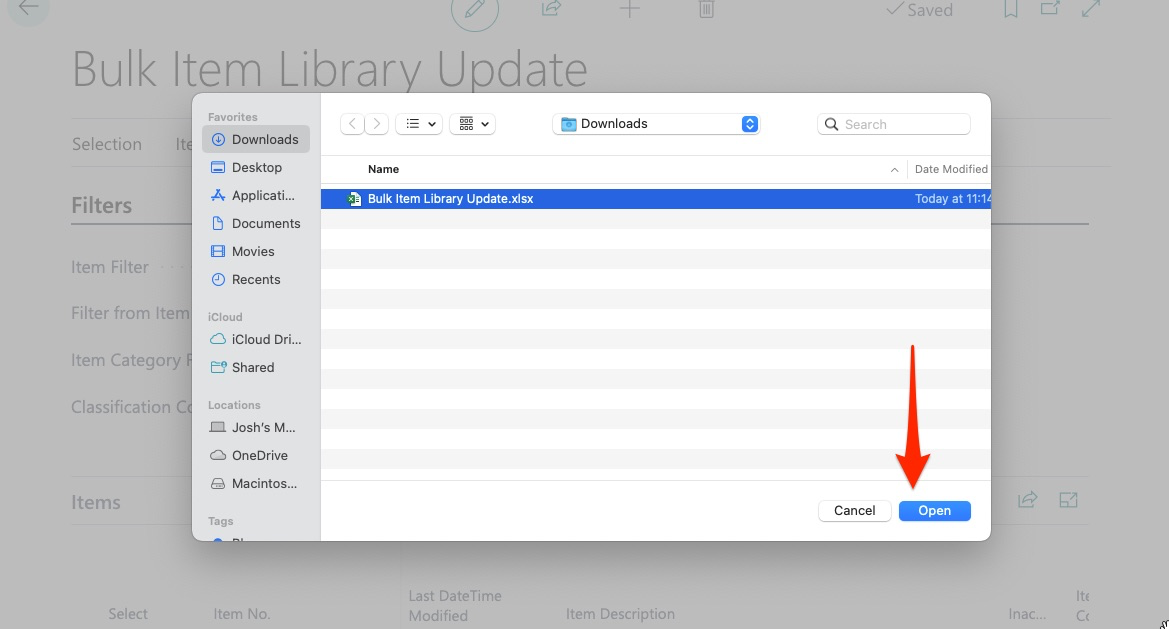
We now click import:
Then, find our sheet:
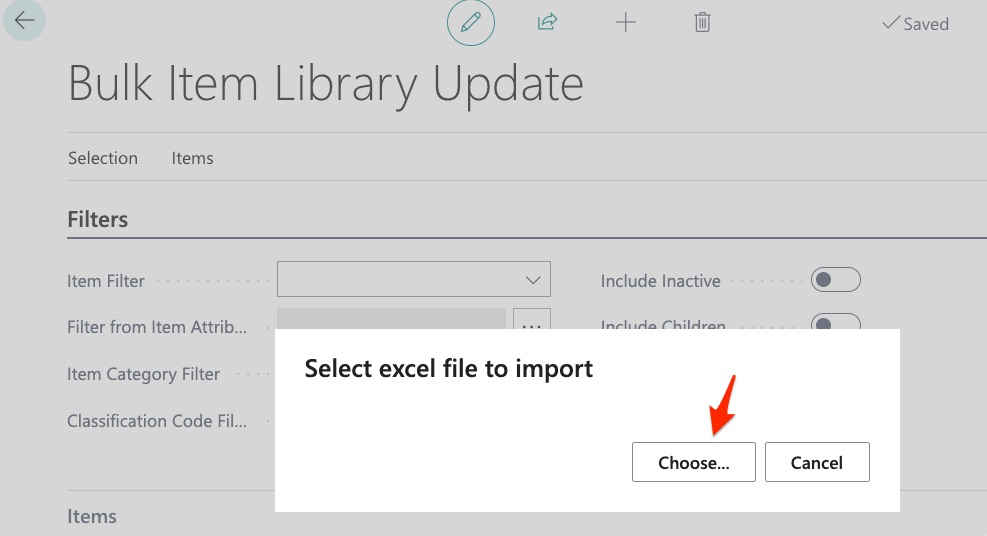
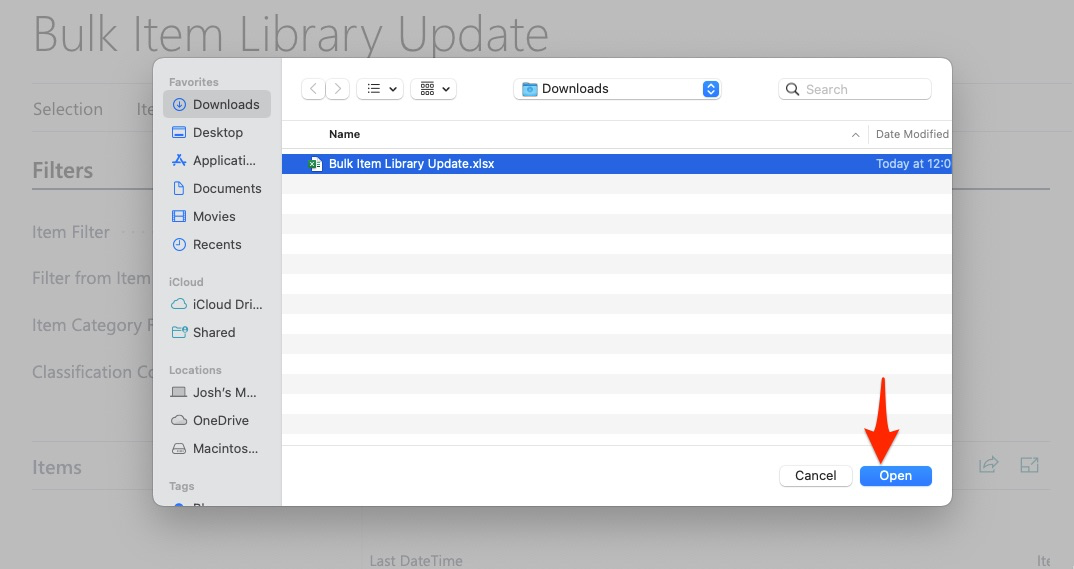
And click “Open”
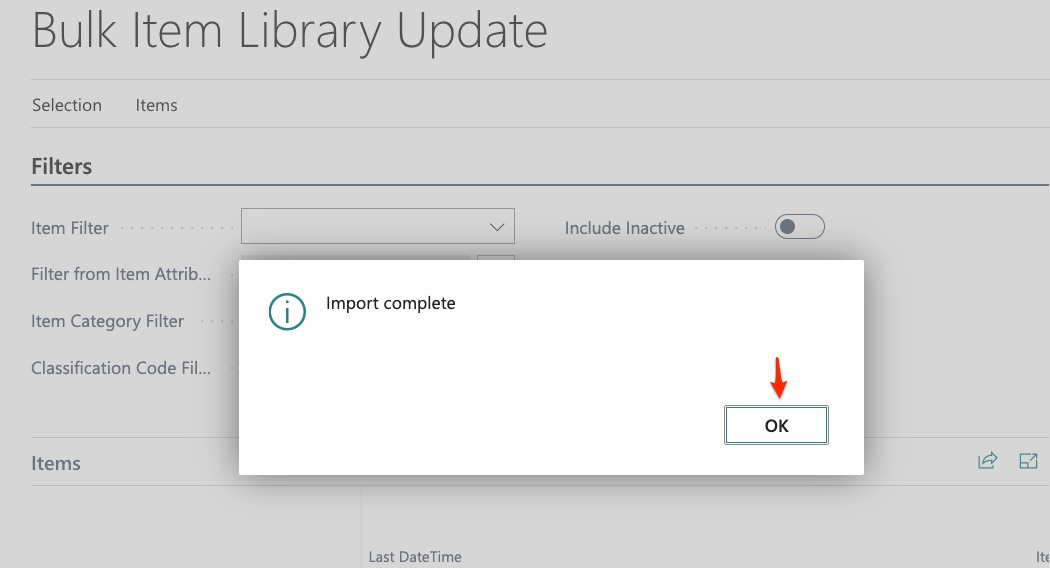
We can now see that our new items have been imported:
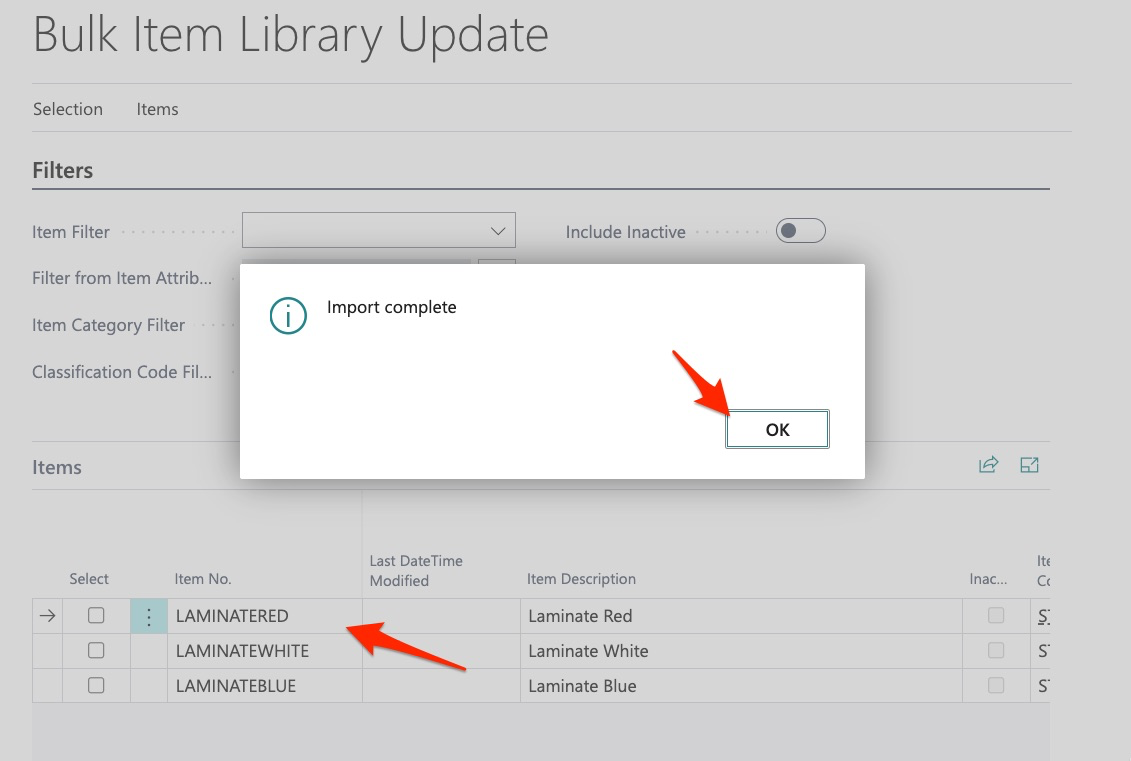
We click OK.
We can now view the items and verify this is what we wanted:
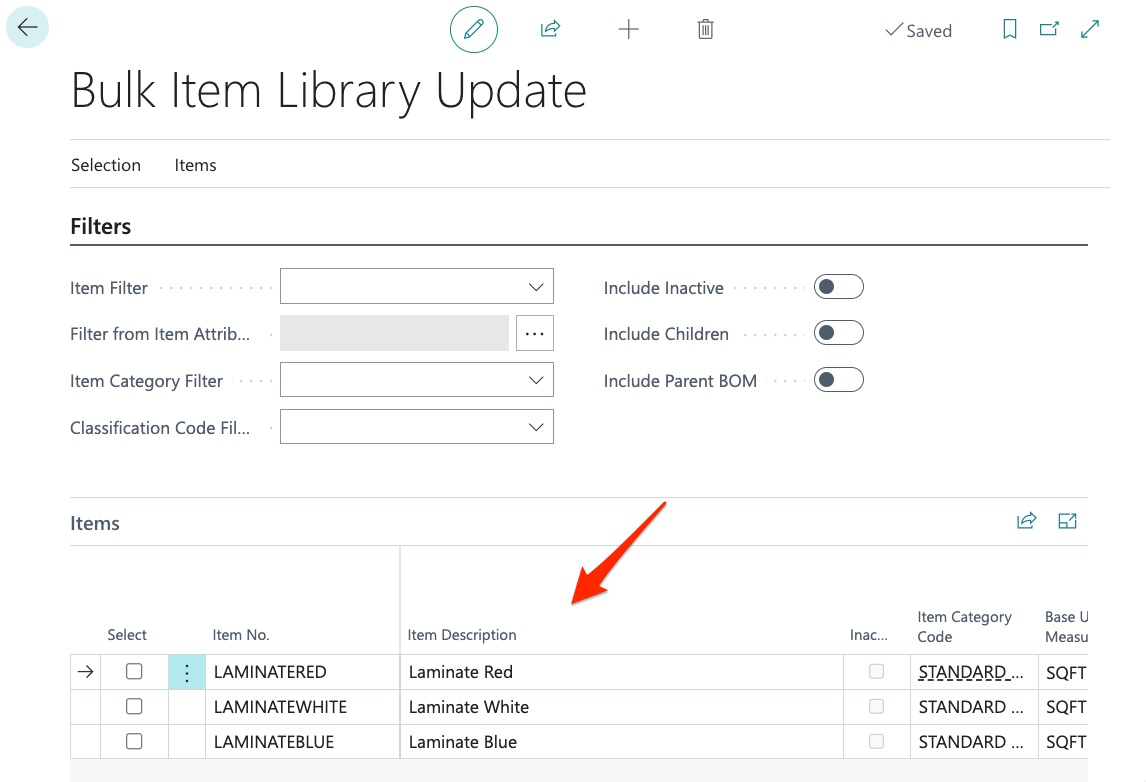
Keep in mind that when adding new items we can view the item details here in the item section:
We may also review the attributes in the “attributes” section, prior to upload:
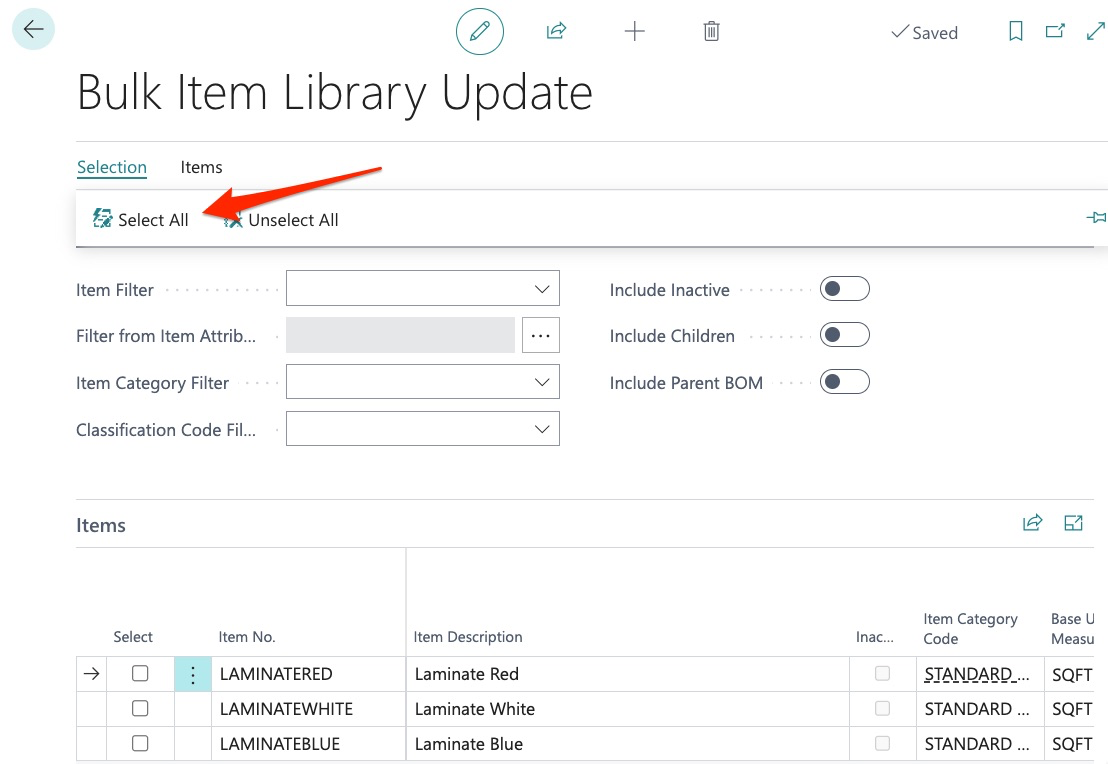
If we are satisfied, we can choose to complete the import process which is done by:
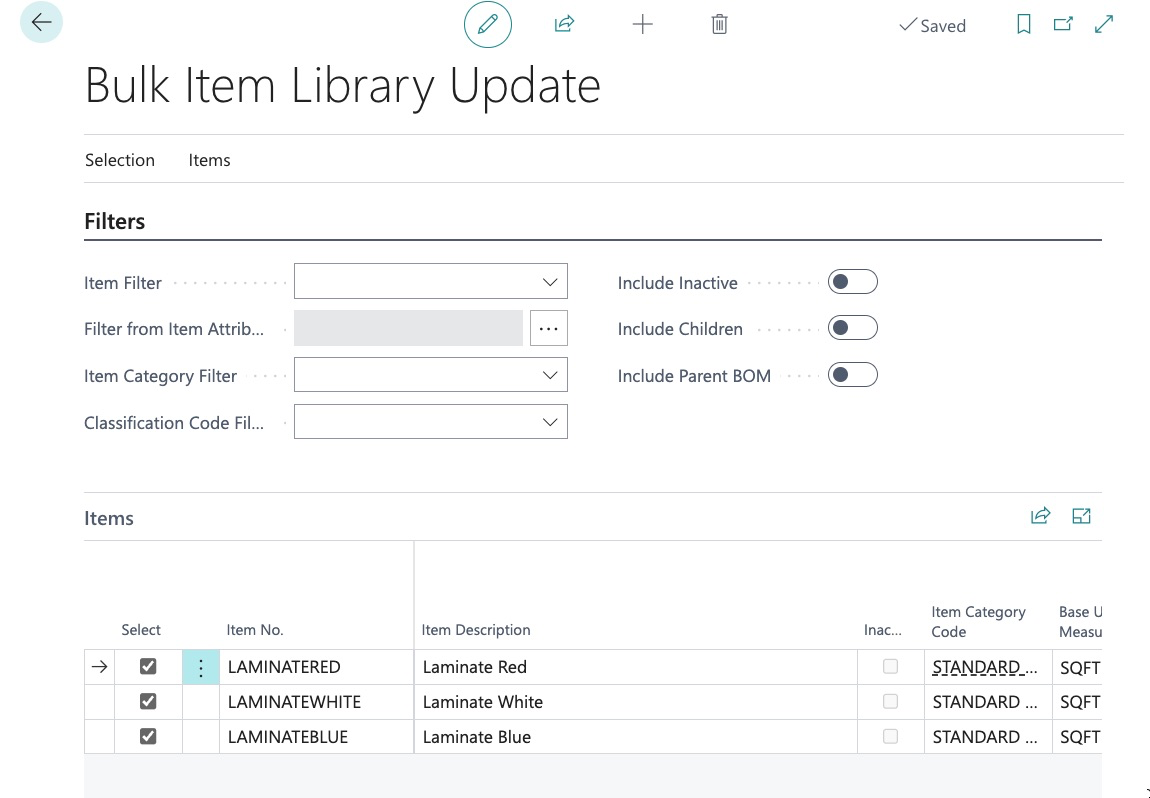
Selecting all (this will add a check to all items):
We can unselect as needed:
Next, we must validate the changes:
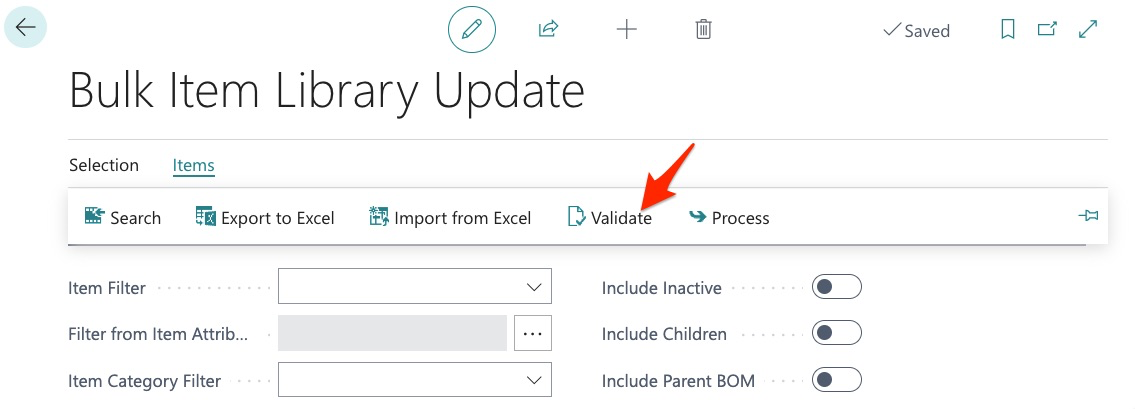

Any validation errors would appear here for us to resolve (missing unit of measure, item category, etc.).
And finally, we click process:
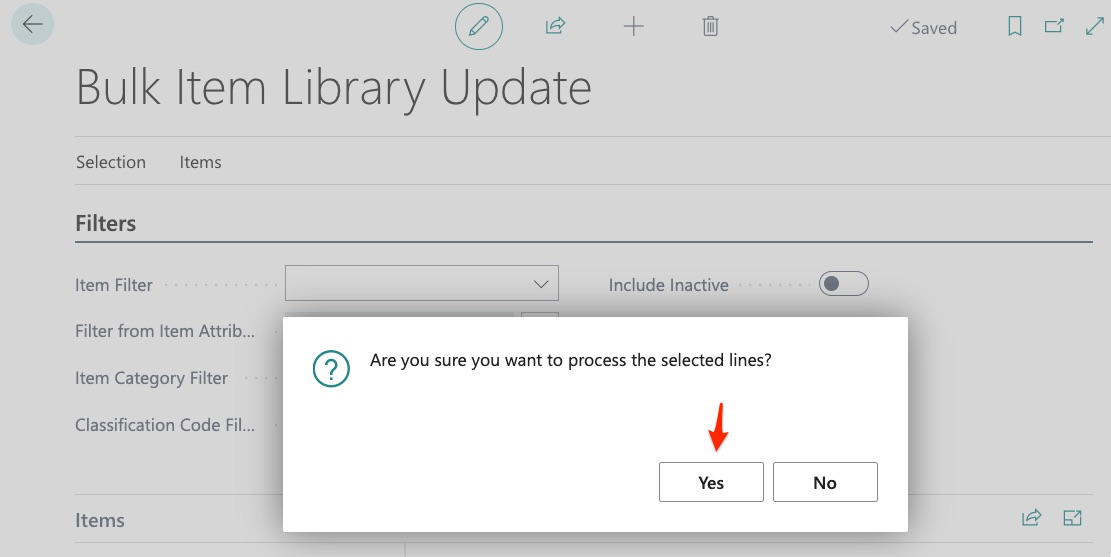
The process time is very fast, depending on how many items you are adding. Once complete, we can click the back arrow:
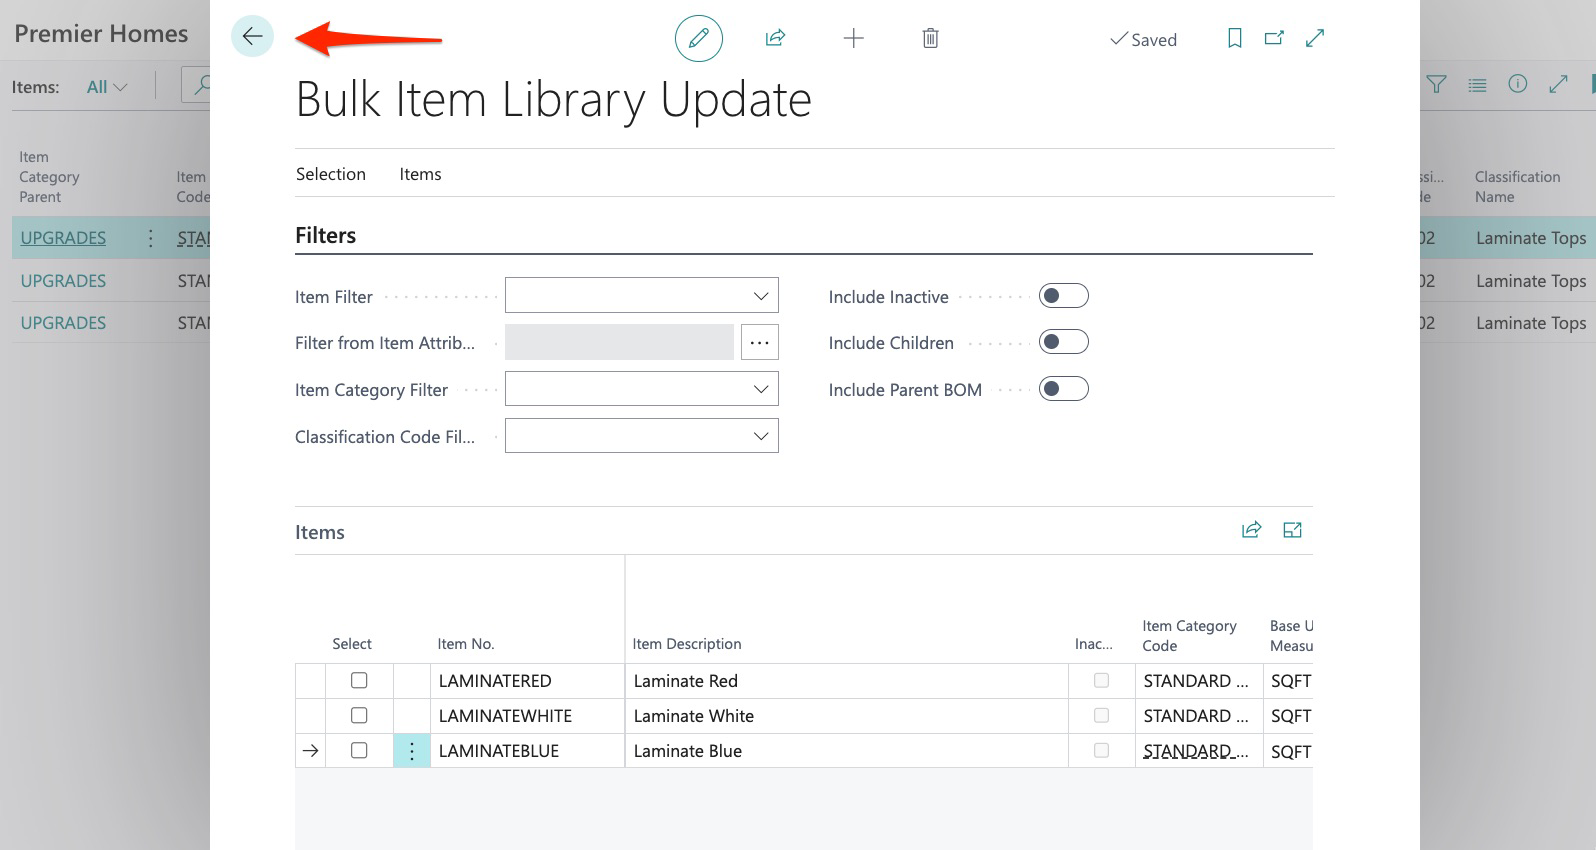
Using the quick search, we can now see our 3 new items:
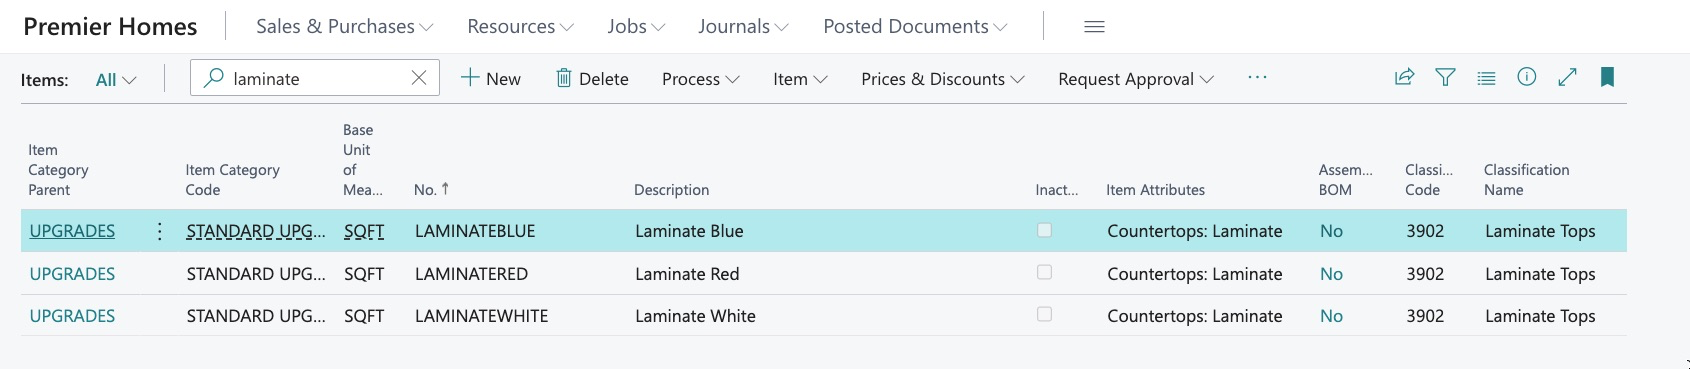
We can select an item to take a closer look:
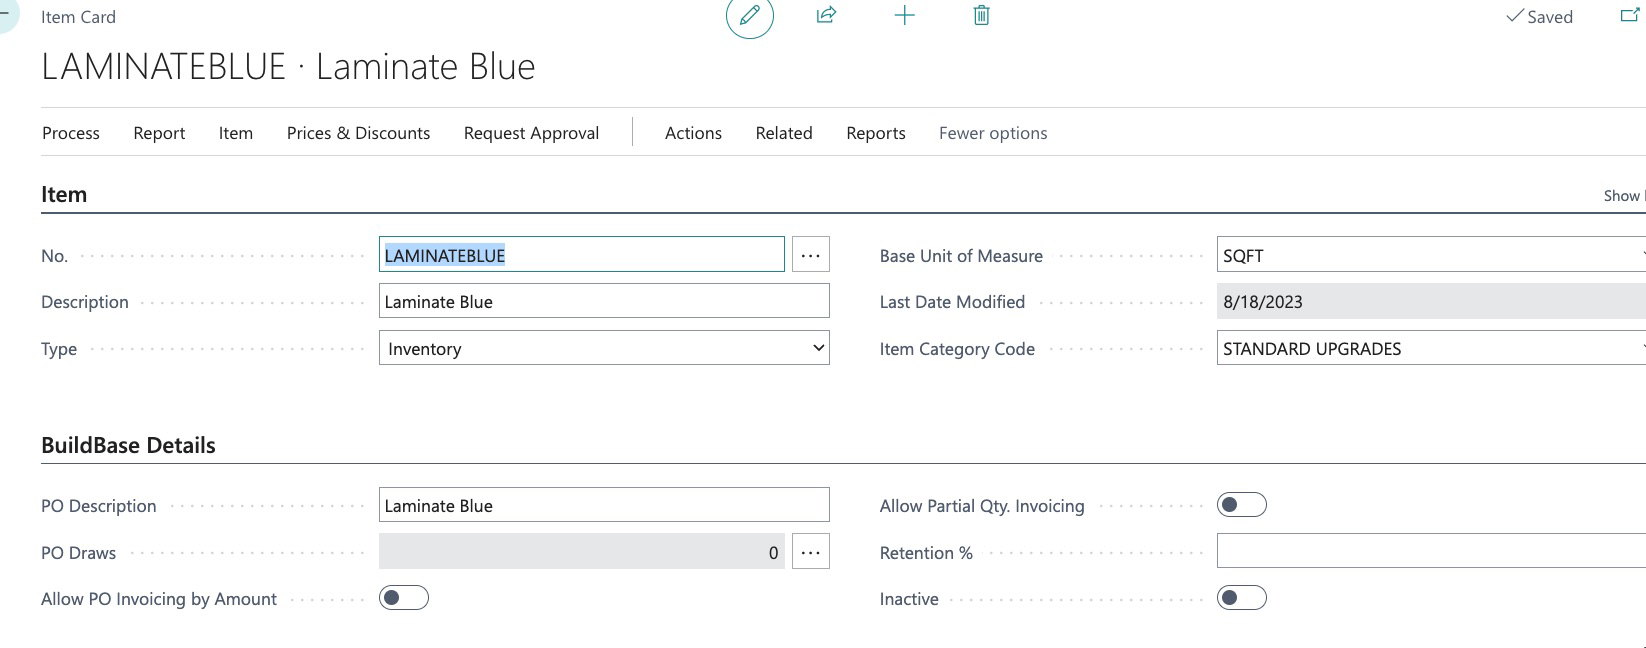
Here we can see all the information has been entered, just as if we had created each item singularly.
Now that we have used this tool to create 3 new items, let’s see what else this tool can do. Remember the rules of “Bulk Item Library Update”:
Bulk Item Library Update can:
- Create new Items in Bulk
- Create and manage Item Attributes in Bulk
- Create and Manage Assembly BOMs in Bulk
We will now use Bulk Item Library Update to modify the attributes of a few items.
Edit/modification of Item Attributes using Bulk Item Library Update
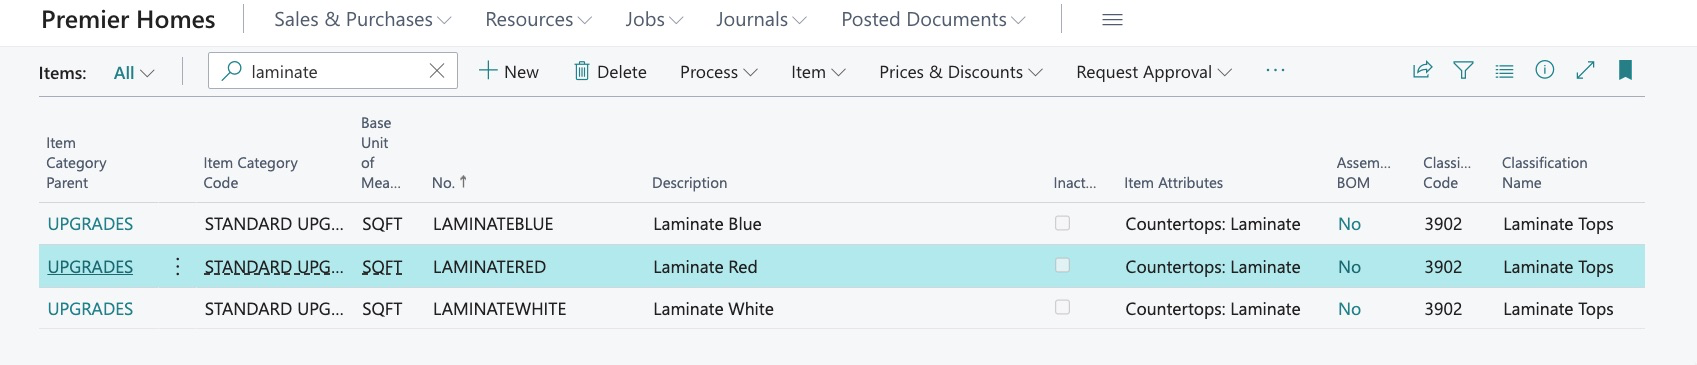
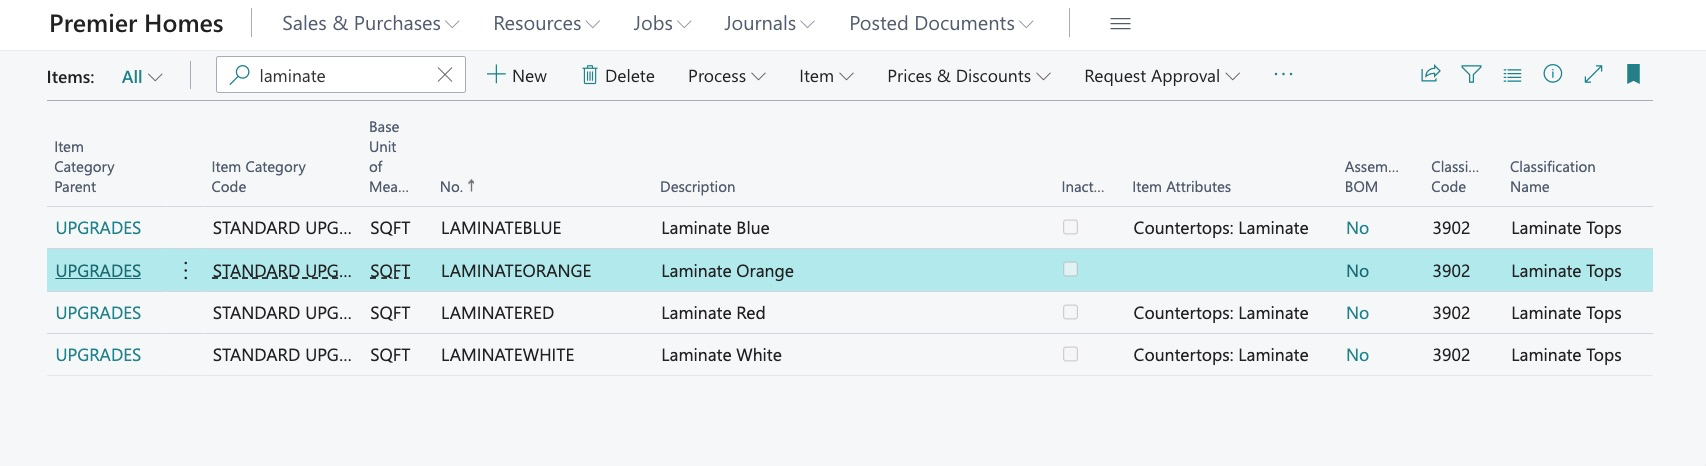
Here are 3 items that currently have attributes assigned:

If we want to change these attributes, we will navigate to our tool and first find the items using one of the search parameters:
Next, we export the items:
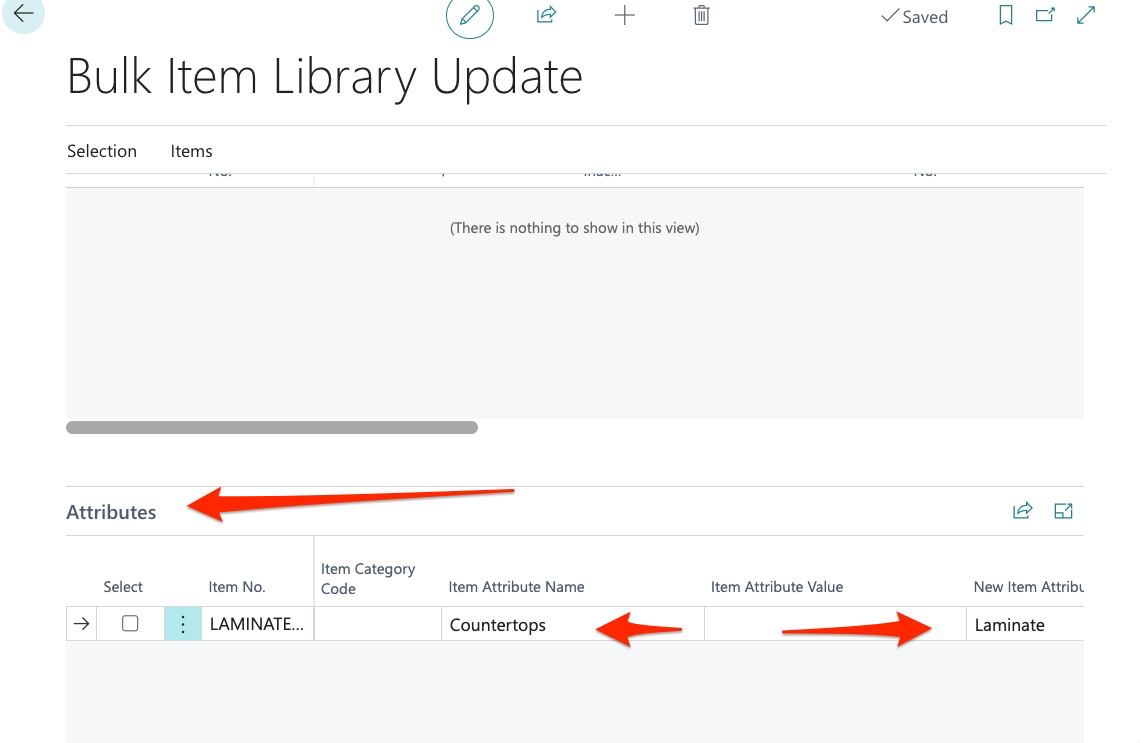
We now see our items in the export and click the attributes tab:
Here we can see the current attributes assigned to these items:

Currently the attribute is “Countertops”, and the value is “Laminate”.
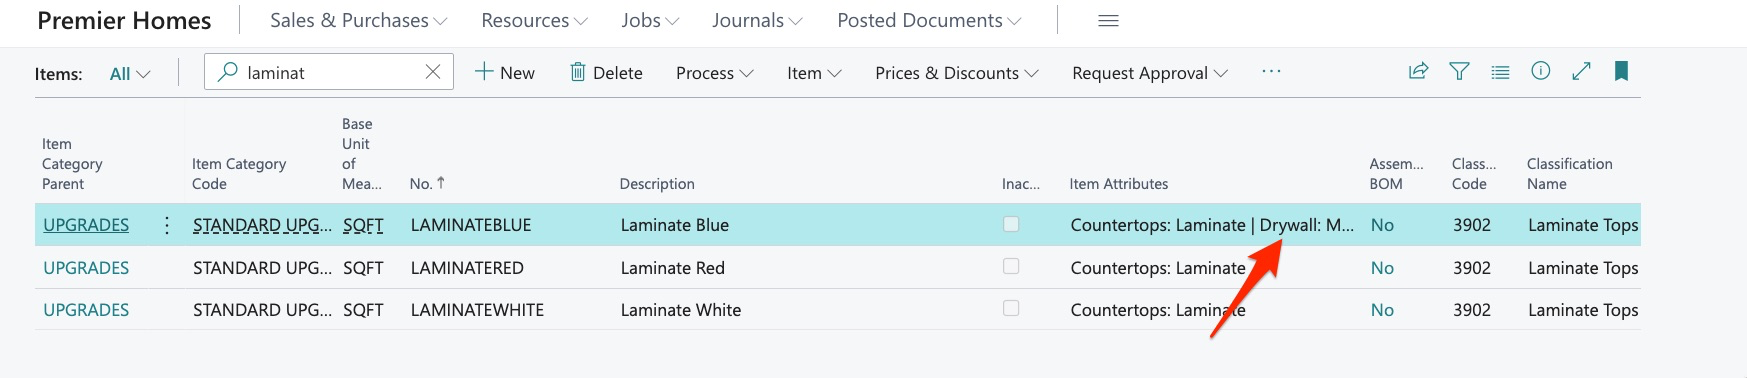
It is important to note that you cannot change the attribute but can add more attributes. For example, If I change the attribute from Countertops to Drywall and add a new value of Materials:

It will not change the existing attribute, but will add the additional attribute “Drywall: Materials”:
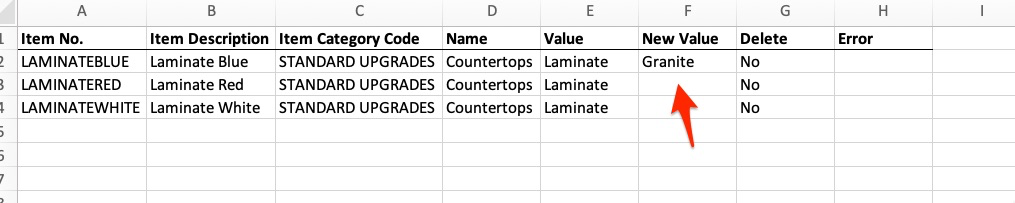
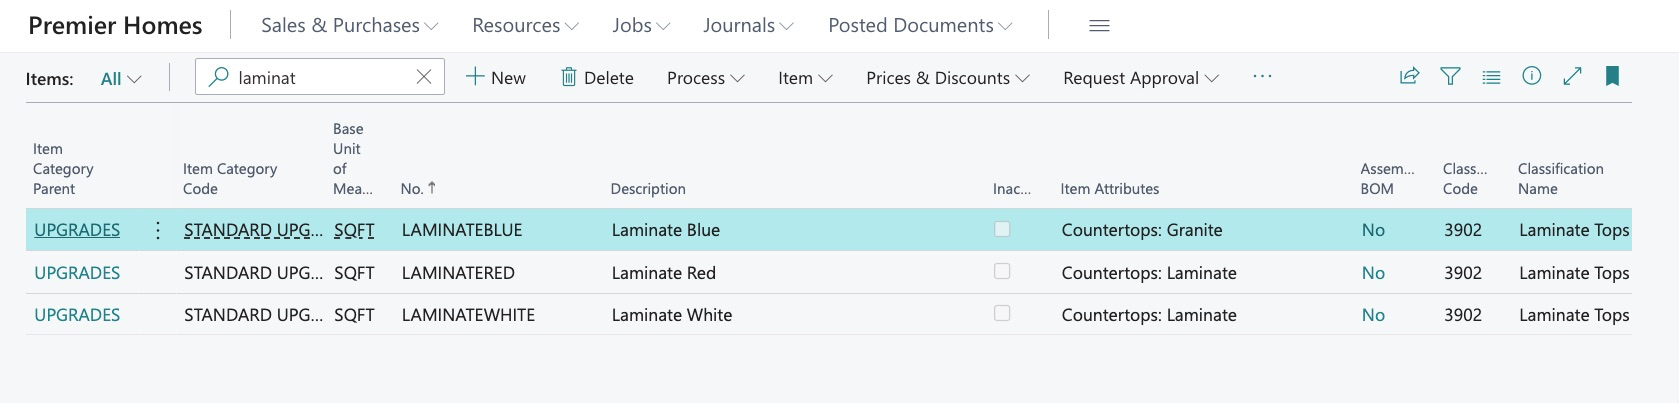
I can, however, change the existing value within the existing attribute:
Attributes and their Values may also be deleted by simply adding “Yes” in the delete cell:

The last feature we will cover in Bulk Item Library Update is the ability to manage BOMs or “Bill of Materials”.
Using Bulk Item Library Update to manage BOMs
Before we start this process, let’s first explain what this tool can do when it comes to bulk uploading of BOMs or “takeoffs”. In Dynamics, we can add items to assemblies to create our BOMs and this can be done item by item:
However, this can be a tedious process as you are entering takeoffs for entire plan sets.
This can be done in bulk through Bulk Item Library Update. There are a few ways this can be done. We can choose to export our entire item library here by first clicking “search”:
The system then returns a list of all items and note that we can choose to see active and inactive:
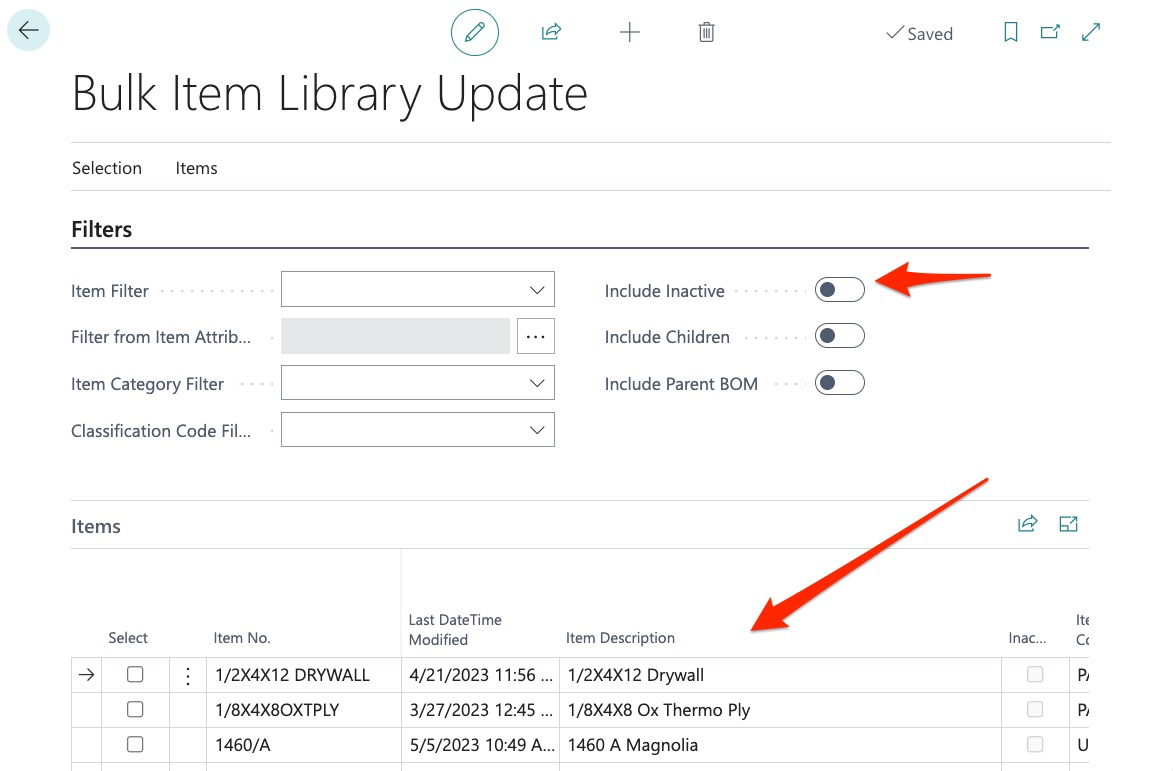
But as you will notice above, we can also limit the items as per our filter parameters by item, attributes, item category, or classification code.
In this example, I have chosen to export ALL items.
As you can see, the list is extensive since it includes all but don’t be intimidated by this as you can use all the items here to build BOMs as desired.
Now let’s shift to the BOM tab of the sheet:

Here we can see that the first item is an item for drywall that is located in the 1460A assembly. We recognize the 1460A as our baseplan 1460. We can add a filter to excel and see all the items for the 1460 together:
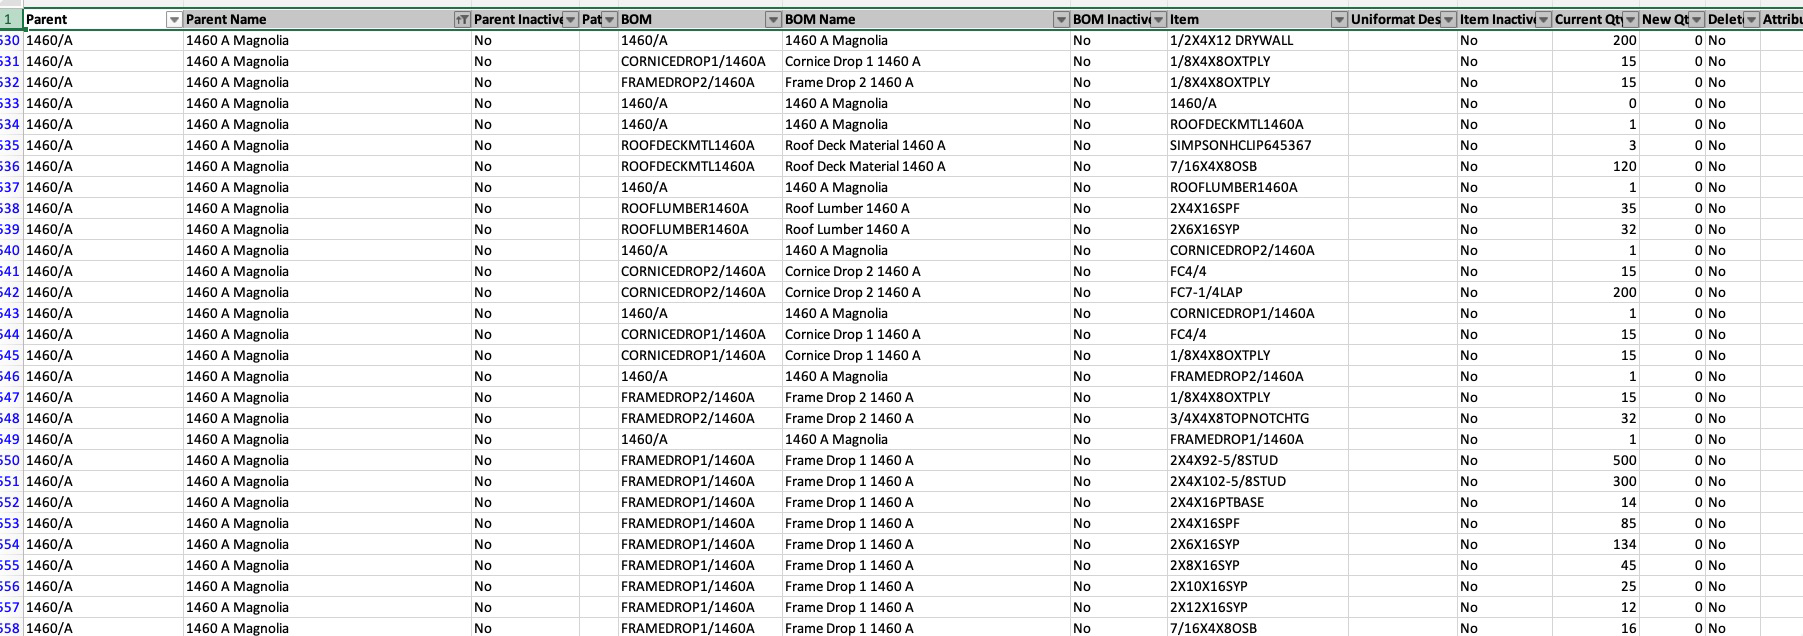
We can now see all the items that are currently in the BOM for this template or baseplan. Not only can we see the items within the 1460A assembly, we can also see the BOMs within the 1460A:

Here we can see a BOM “Roof Deck Material” and we can also see the quantity of these items in our BOM. This makes it extremely simple to export takeoffs, adjust quantities and import back into BuildBase.
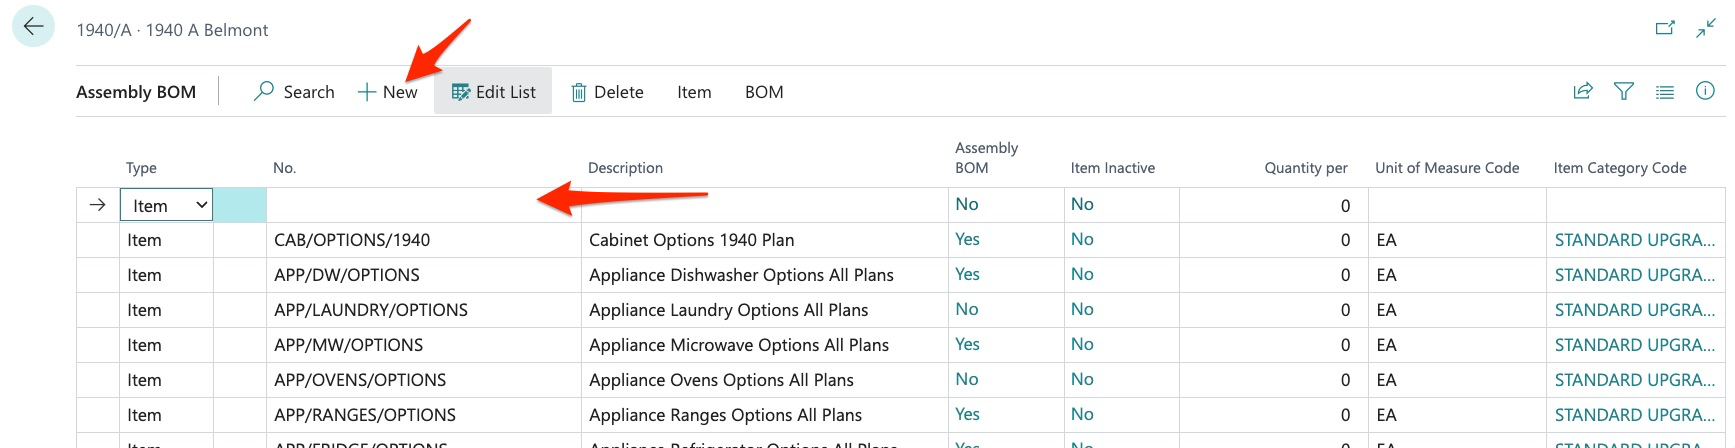
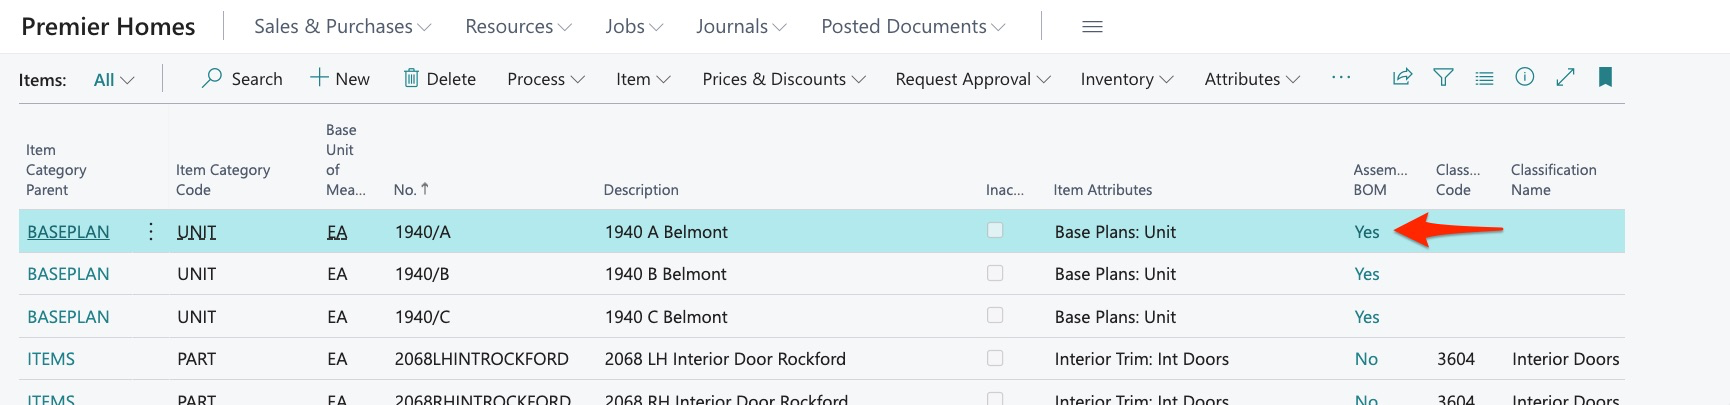
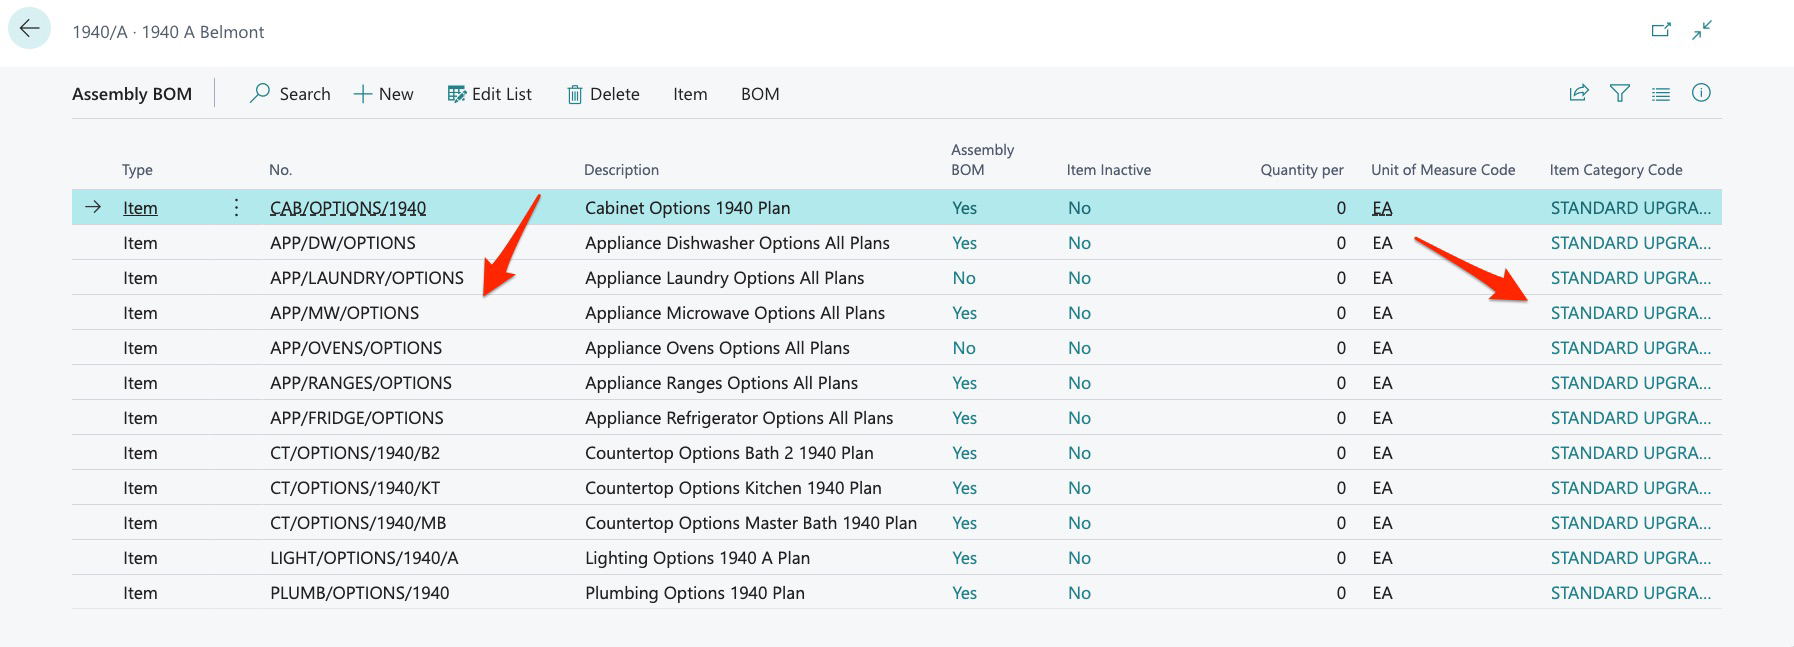
This also gives us the ability to add new items to BOMs. Let’s go through an example of how this works. Here we can see that currently the 1940 A plan only has options assigned:
We now want to add all our “base house” items and we can do that with Bulk Item Library Update. On our export we can simply copy and paste items to create our new BOM but here are some things to keep in mind.
It is ok to delete data from the export – items and BOMs may be deleted so that you can work with only the data you want, just be sure that you do not alter existing items as the system will view these as new items.
You can also simply filter to see only the desired data. Now in this example, I know the items I want to include in the BOM for the 1940 A so I simply enter them in the BOM tab and these are the only fields we must complete:
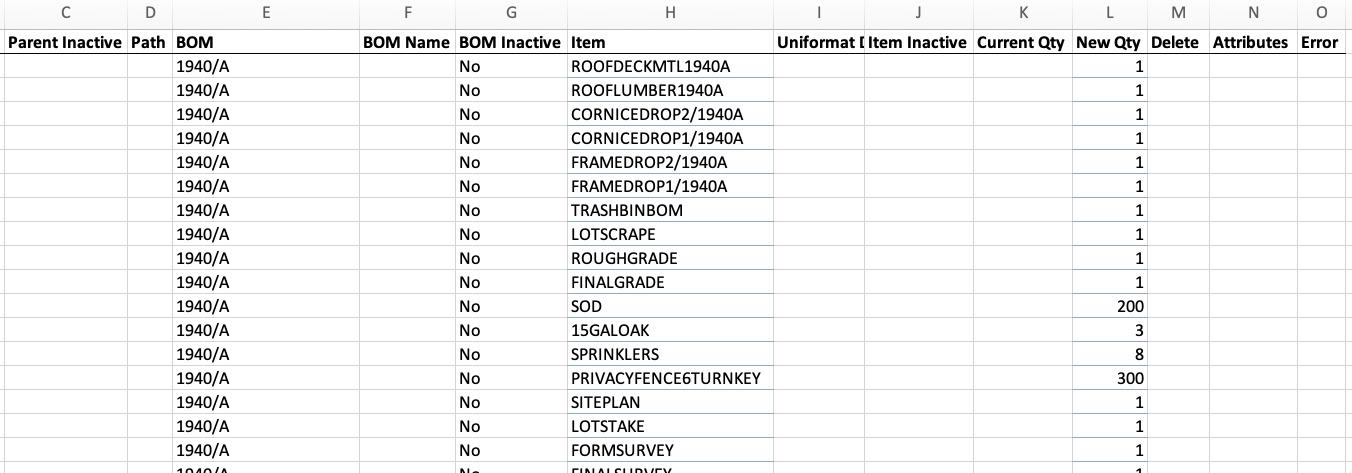
Here I have simply entered the BOM “1940/A” as this tells the system where I want the items placed – just be sure it is entered exactly as it exists in the system or a new BOM will be created.
Next, I enter No for inactive, the item, and the “New” quantity. Then save the sheet.
We then return to Bulk Item Library Update and import the file:
We are then told import is complete:
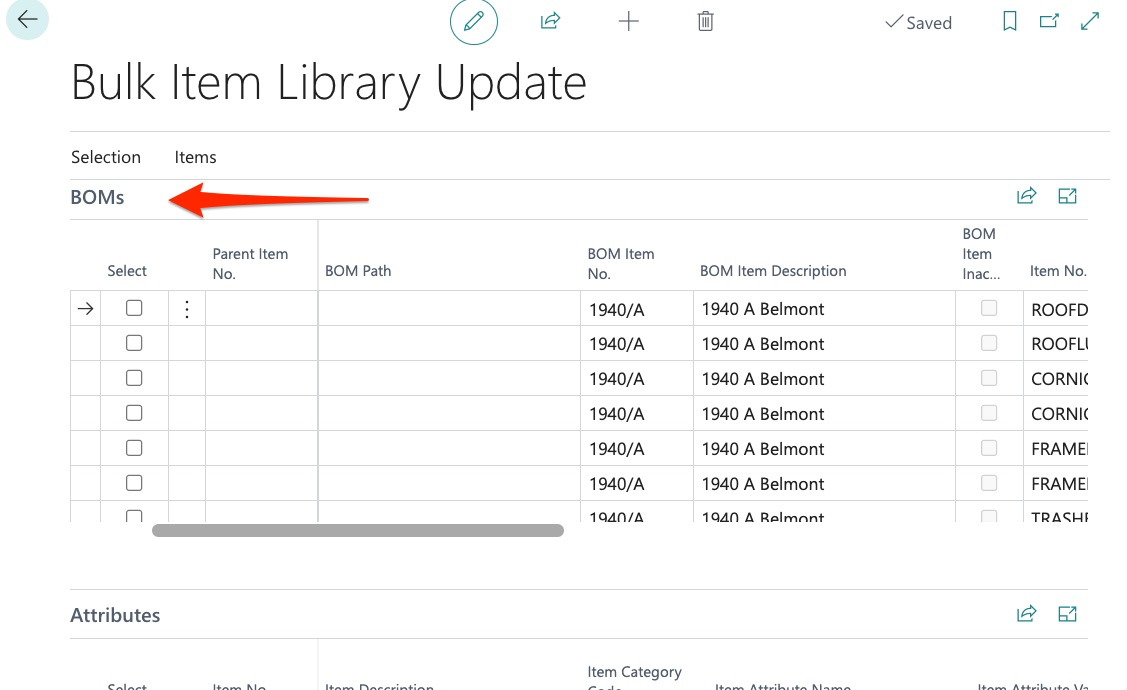
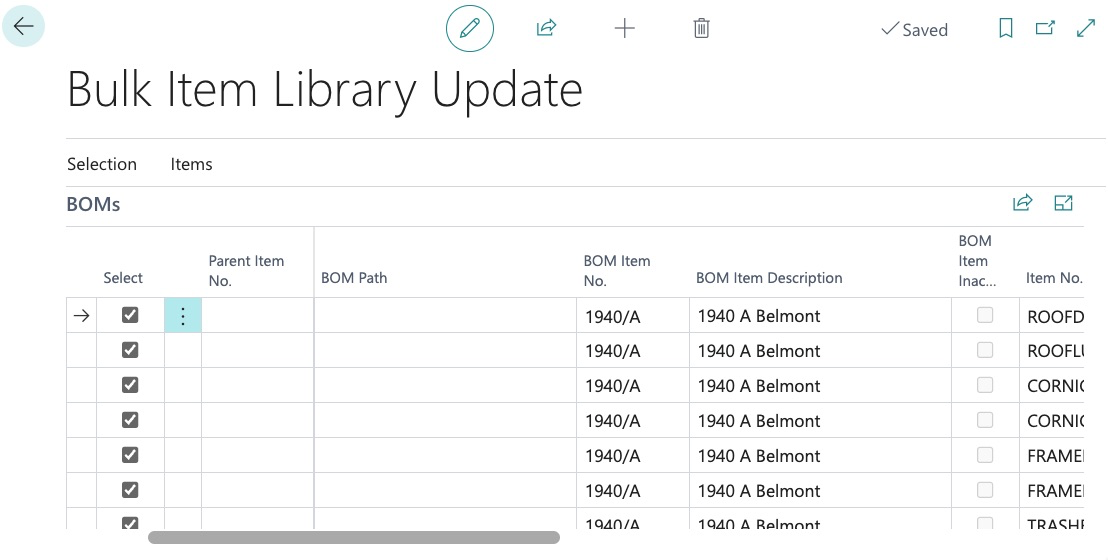
We can then review our items in the BOM section:
If we are satisfied, we then hit “select all” – THIS MUST BE DONE:
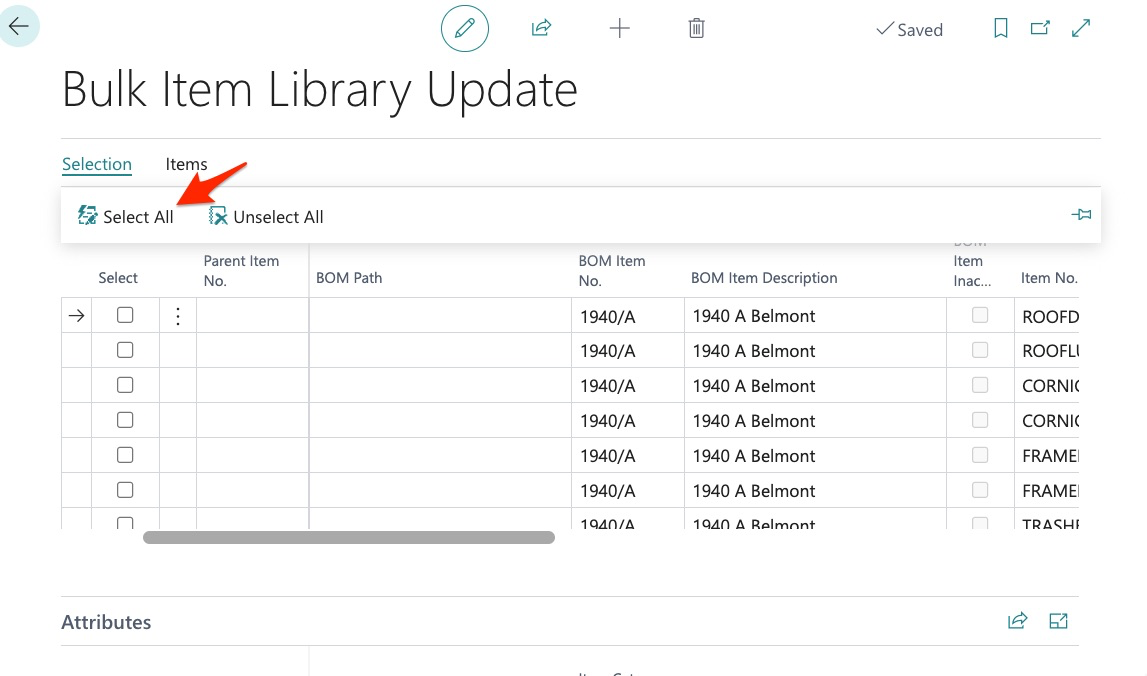
Then validate, and process:

We can now return to our template for the 1940 A and see that all items have been added:
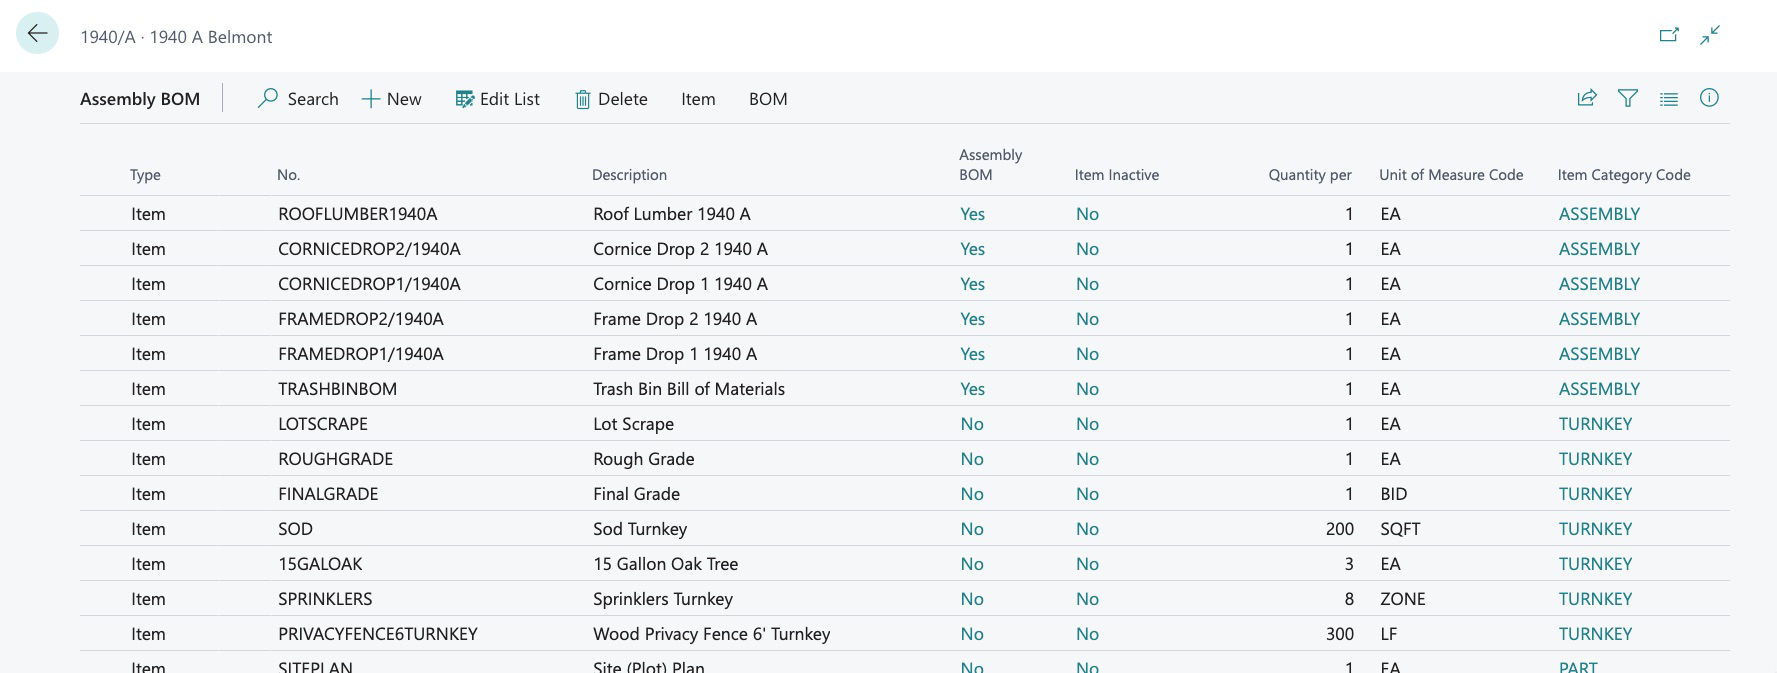
As well as all quantities.
This same process may be followed for multiple BOMS all at the same time. With Bulk Item Library Update, you can manage all your BOMs with ease in bulk.
Now that we have reviewed Bulk Item Library Update, let’s review our uses one last time.
Bulk Item Library Update can:
- Create new Items in Bulk
- Create and manage Item Attributes in Bulk
- Create and Manage Assembly BOMs in Bulk
Now let’s shift gears to our next bulk item tool – Bulk Item Update.
Bulk Item Update can:
- Modify existing Items
Bulk Item Update is NOT used for:
- Creation of new items
- Creation/modification of attribute assignment
- Creation/modification of assemblies
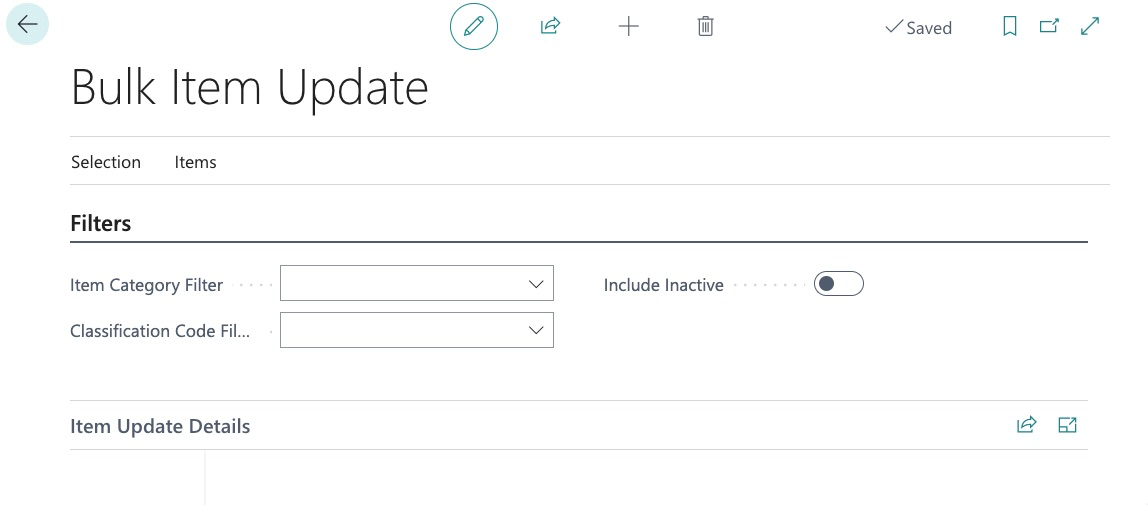
This application can be found here:
As you can see, the menu is very similar to what we saw previously in Bulk Item Library Update so we will not go into detail since you should be familiar with the interface. As stated previously, the only use for Bulk Item Update is for modification of existing items.
Let’s get started by exporting our item library.
Here we are given an excel sheet with only 1 tab and it contains all the fields we can now modify for these items.
Modifying Existing Item Descriptions
In this example, we want to modify descriptions perhaps to provide more clarity or maybe we made an error when first creating the items. Whatever the reason may be, this can be accomplished but there are a few things you MUST understand prior to modifying existing data.
First – Item Numbers cannot be modified in bulk.
Let’s say that for our red laminate, it should have been orange laminate:
We can make this change easily in Dynamics by drilling in, and making the change:
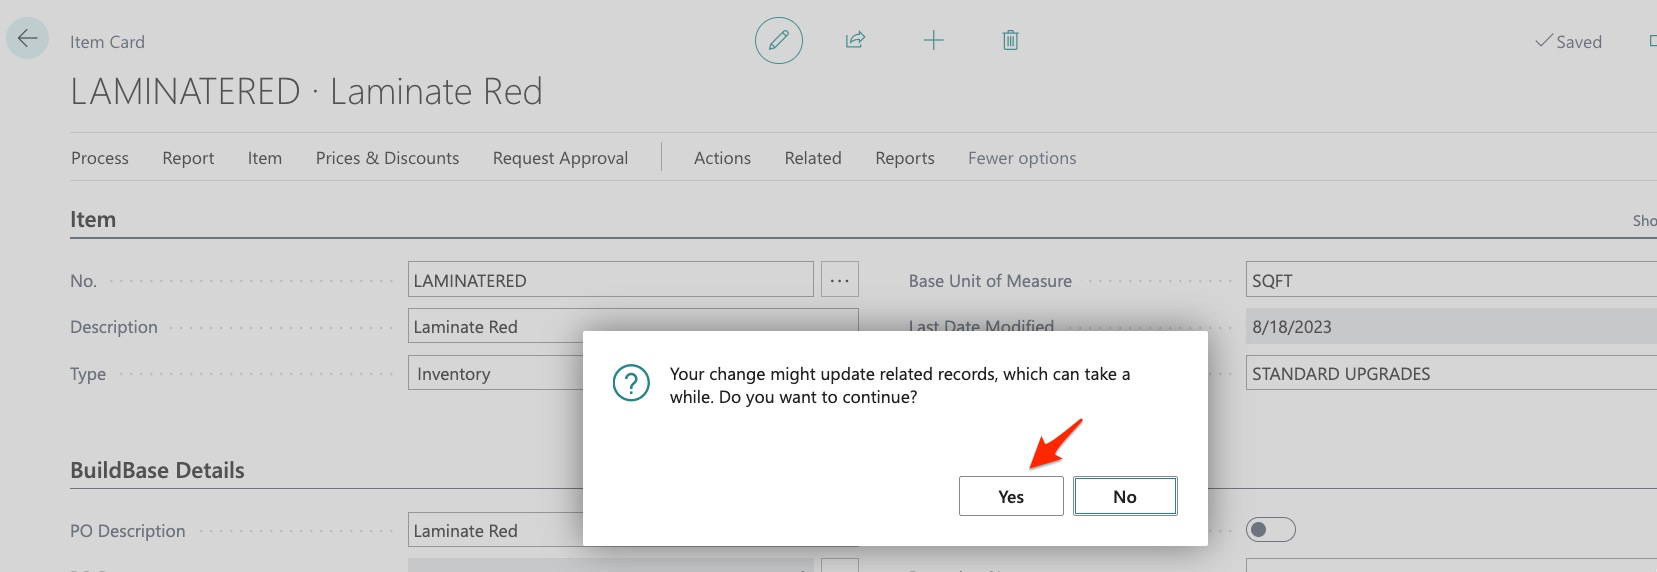
However, the system will warn us that this will affect ALL records in which this item is used. This means that anywhere it has been used, it will now change to orange. If we know this and are still ok, we can proceed.
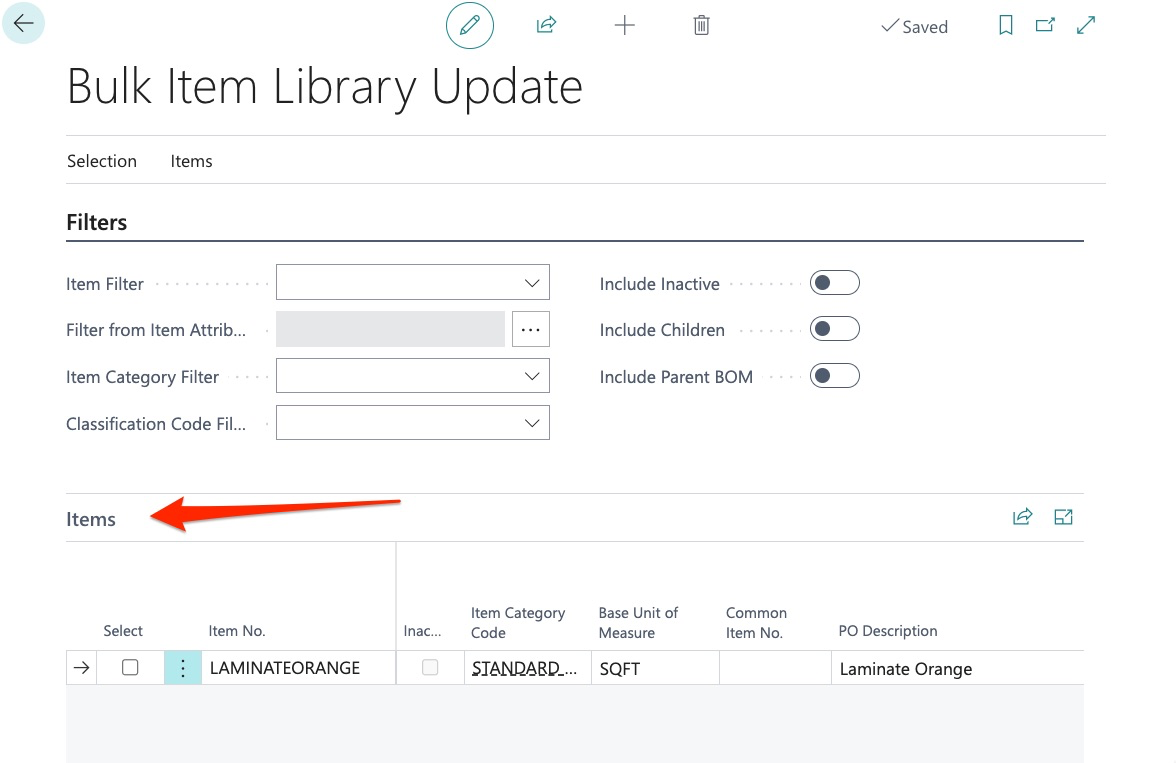
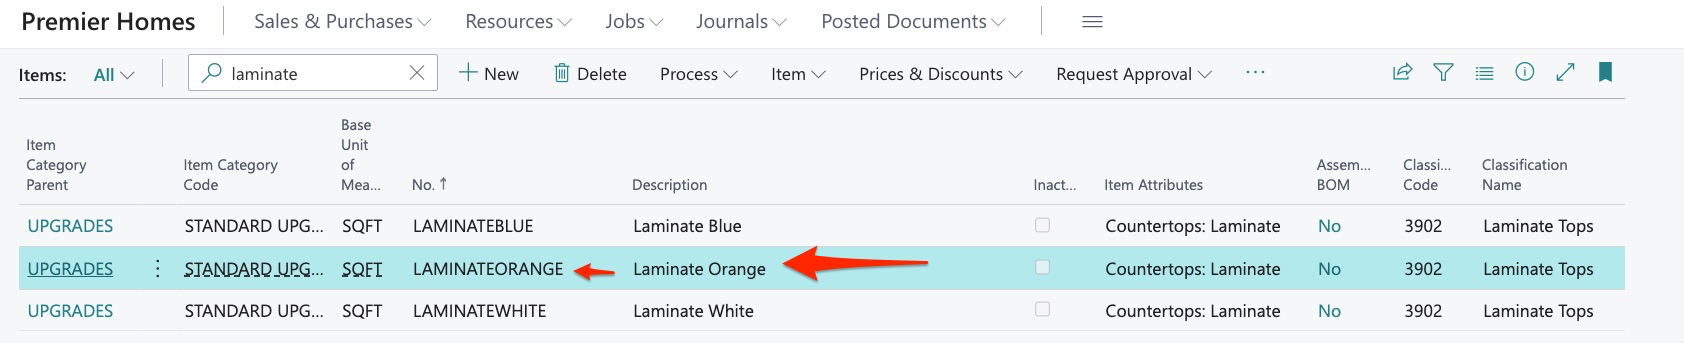
And we can now see that our item is orange:
Again, this is very easy but what if we need to make changes to a large number of items? Let’s give it a try.
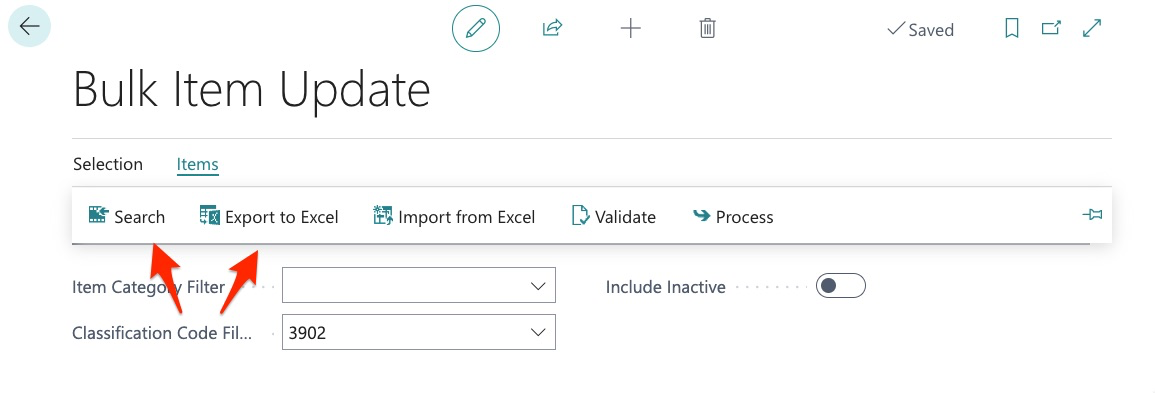
We go back into Bulk Item Update and first need to find the items:
We can do this by item category code or classification code.
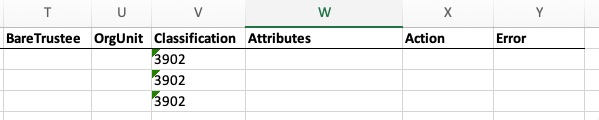
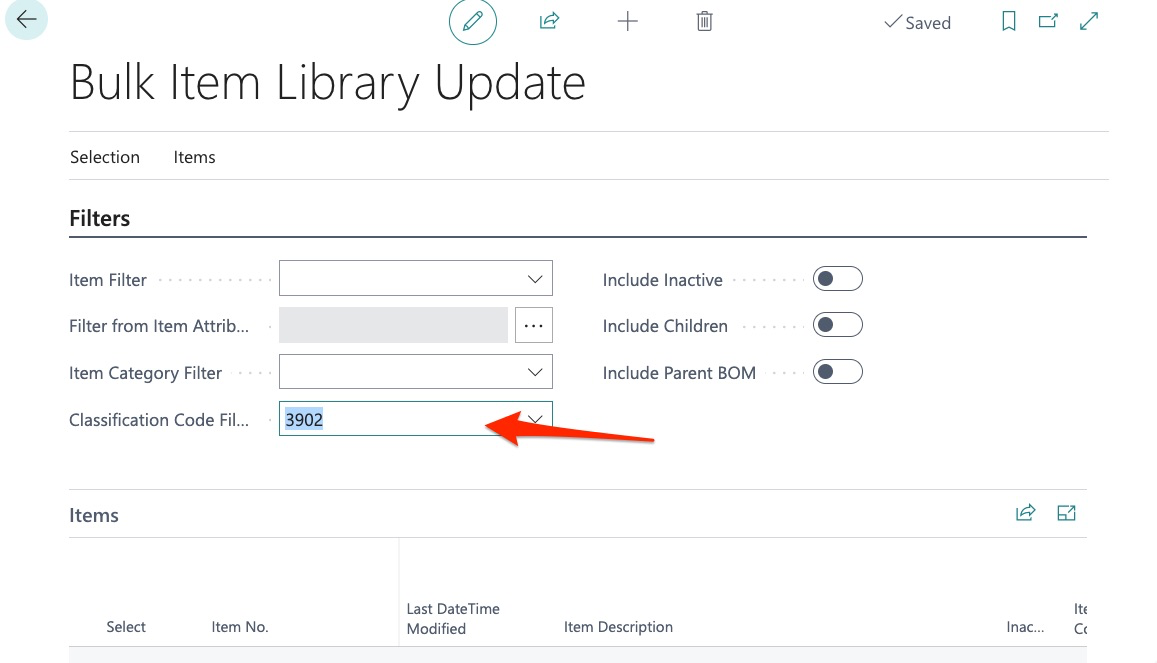
In this example, we will use classification to filter to the laminate items:
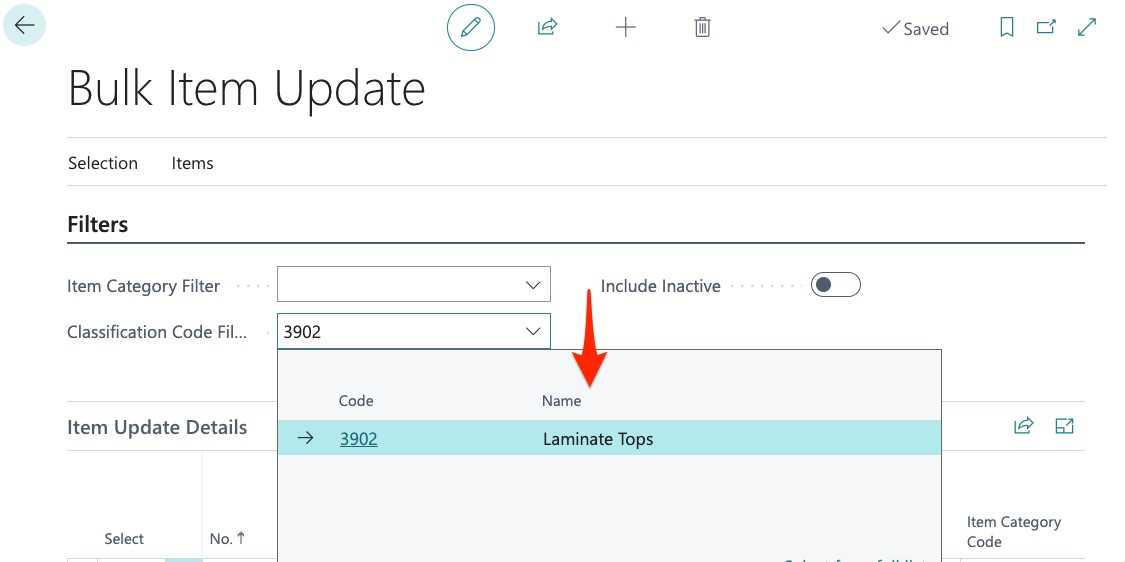
Now that we have selected our classification code, we follow the same steps as with our other tool which is search, then export to excel:
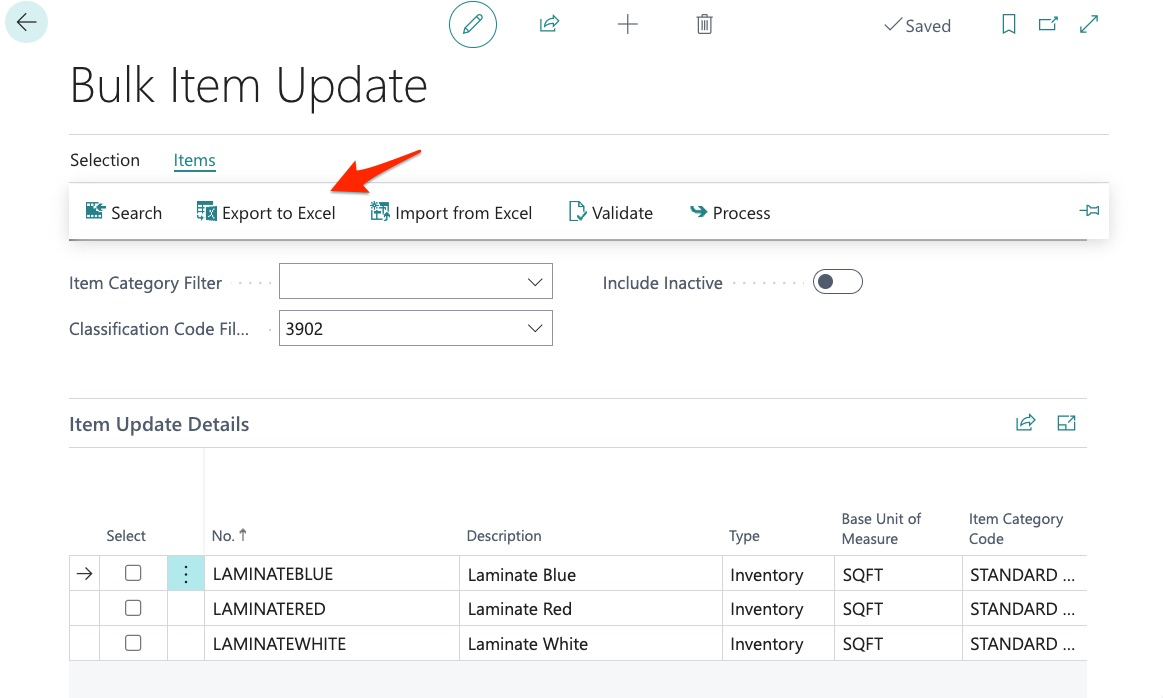
The system then finds all the items of classification code 3902 and shows them to us:
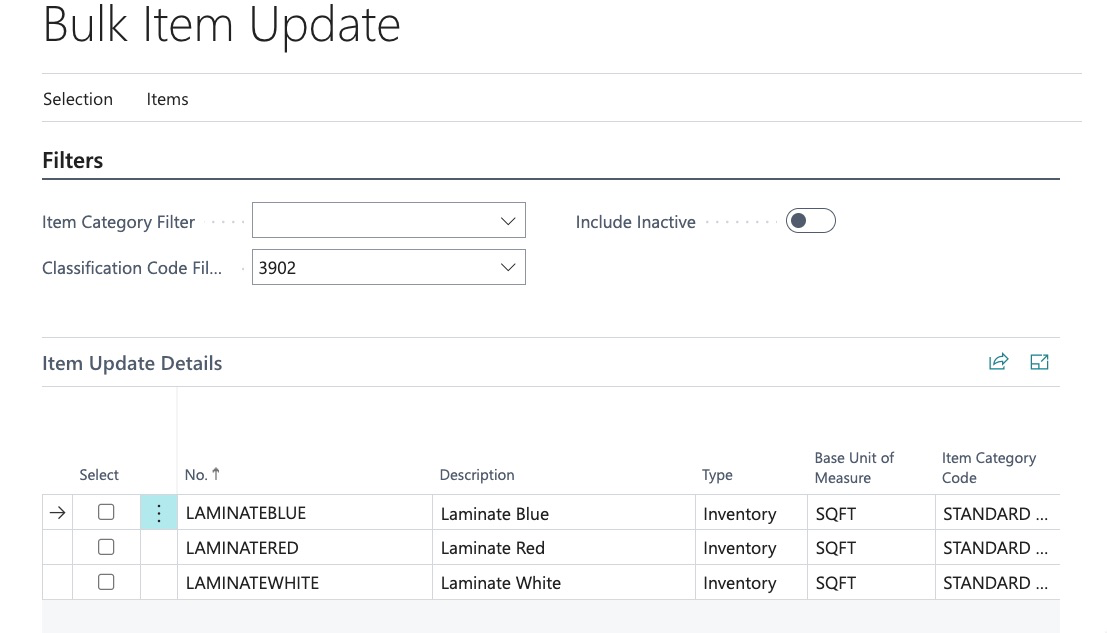
We only have 3 and, in this example, we just want to change the red laminate. So, we can now export our list:

And we now change the red laminate to orange in all appropriate fields:

I then save and follow the same import instructions as shown earlier and we return to our item catalog.
As you can see, the system did NOT see the import as a modification to an existing item instead, the import/system viewed the orange laminate as a NEW item. But why?
This is because the system identifies the item NUMBER as the item first, once we modified the item number, the system sees the item as new and NOT existing. If you wish to modify existing item in bulk, you can do so as long as the item number does NOT change. To modify item numbers, this must be done in the item card.
As long as the item number is NOT altered, any fields on the item export may be changed in bulk. This is a great tool to use when items need alteration to correct errors, provide more clarification, change descriptions, and more.
Searching and filtering by using a vertical line or “Pipe” key
Multiple parameters may be used when filtering through use of the vertical line key. For example, here in “Bulk Item Library Update”:
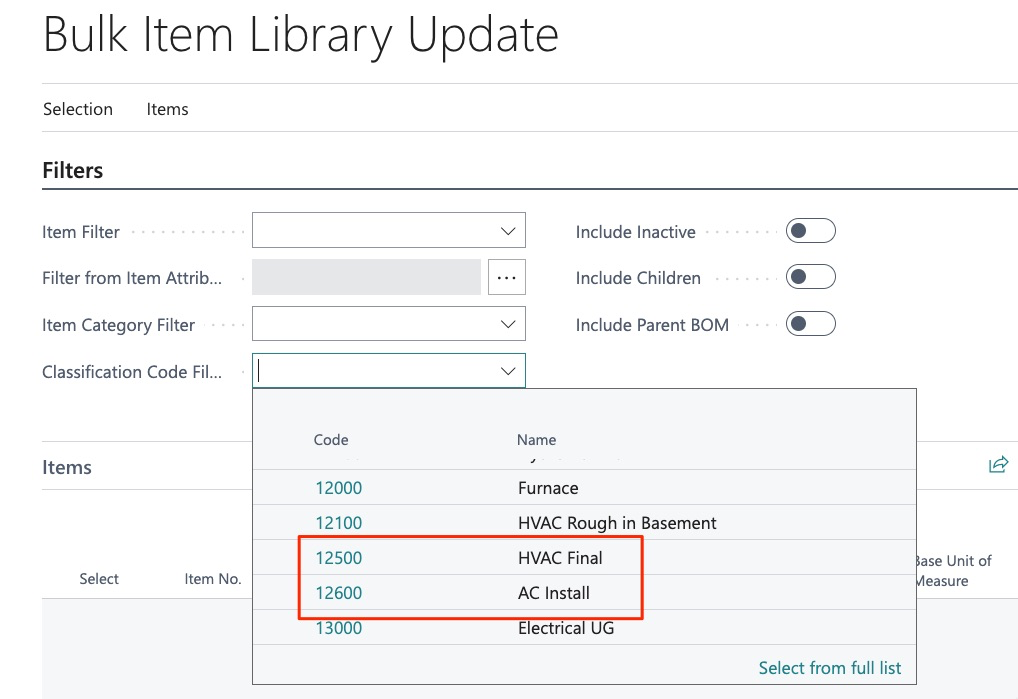
We may want to filter to multiple classification codes, we can do this by separating each parameter with a vertical line:
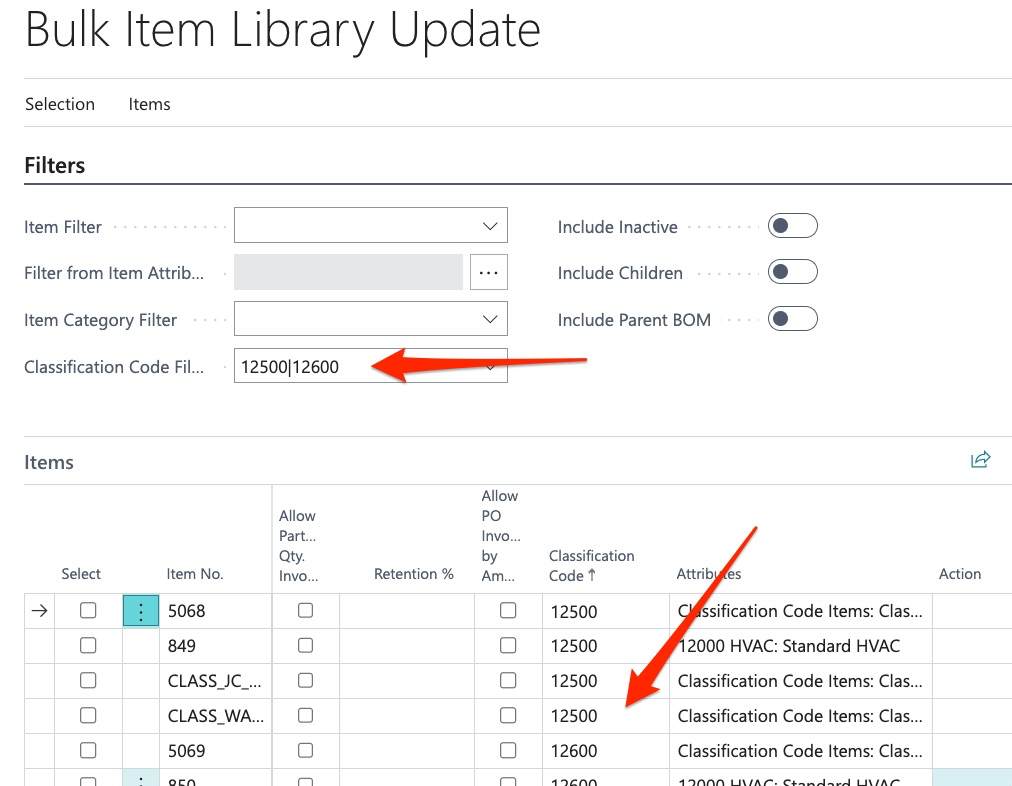
We can now see all classification codes that were searched. This method may be applied to ALL fields within the BuildBase Bulk Tools: